ファームウェアのアップデート
このセクションでは、ファームウェアのアップデート方法について説明します。Bluetooth、SWD、OpenOCD、UWB など、様々な方法をサポートしています。
より詳細な情報については、以下からご希望の方法を選択してください:
Bluetooth インターフェース経由
ネットワークが稼働している状態でネットワーク全体を新しいファームウェアイメージにアップデートしたい場合は、イニシエーターを Bluetooth 経由でアップデートするだけで十分です。イニシエーターは、UWB 無線リンクを介して他のすべてのデバイスに新しいファームウェアを自動的に伝播します。イニシエーターが最初にアップデートされると、ネットワークが再起動され、各デバイスがネットワークに再接続すると、そのファームウェアが更新されることに注意してください。そのため、FW アップデート中は、アップデートを実行しているノードは “オフライン” になります。
開始するには、PANS PRO Manager アプリケーションをダウンロードしてください(Google Play で入手可能)。

デフォルトのログインアカウントは、ユーザー名が admin、パスワードが admin です(設定でユーザー管理が有効になっている場合)。
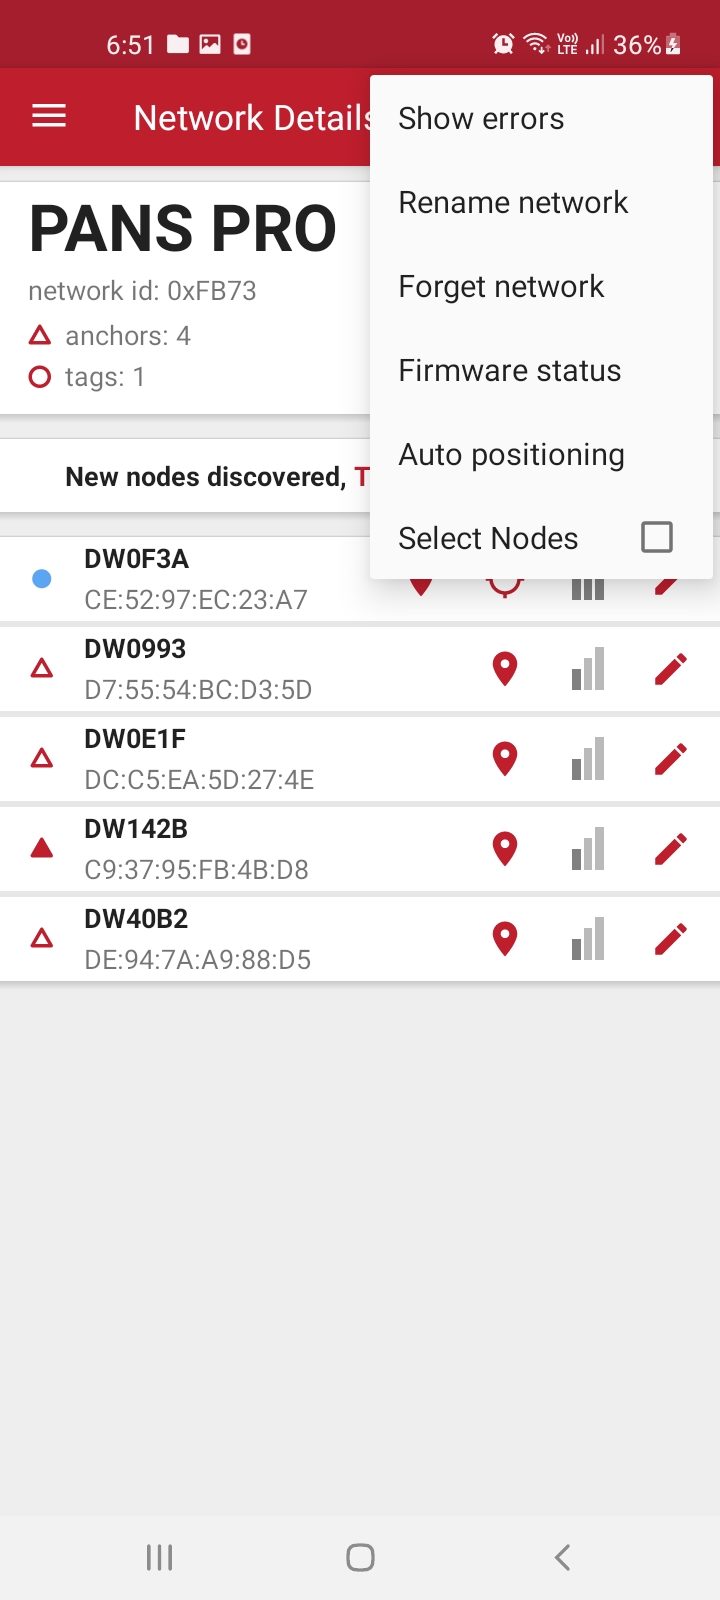
ファームウェアステータスにアクセスします。 アプリケーション内の オプションメニュー をタップします。 (縦に3つの点で表示) をタップします。 Firmware status オプションを探し、選択します。
ファームウェアステータス オプションを探して選択します。
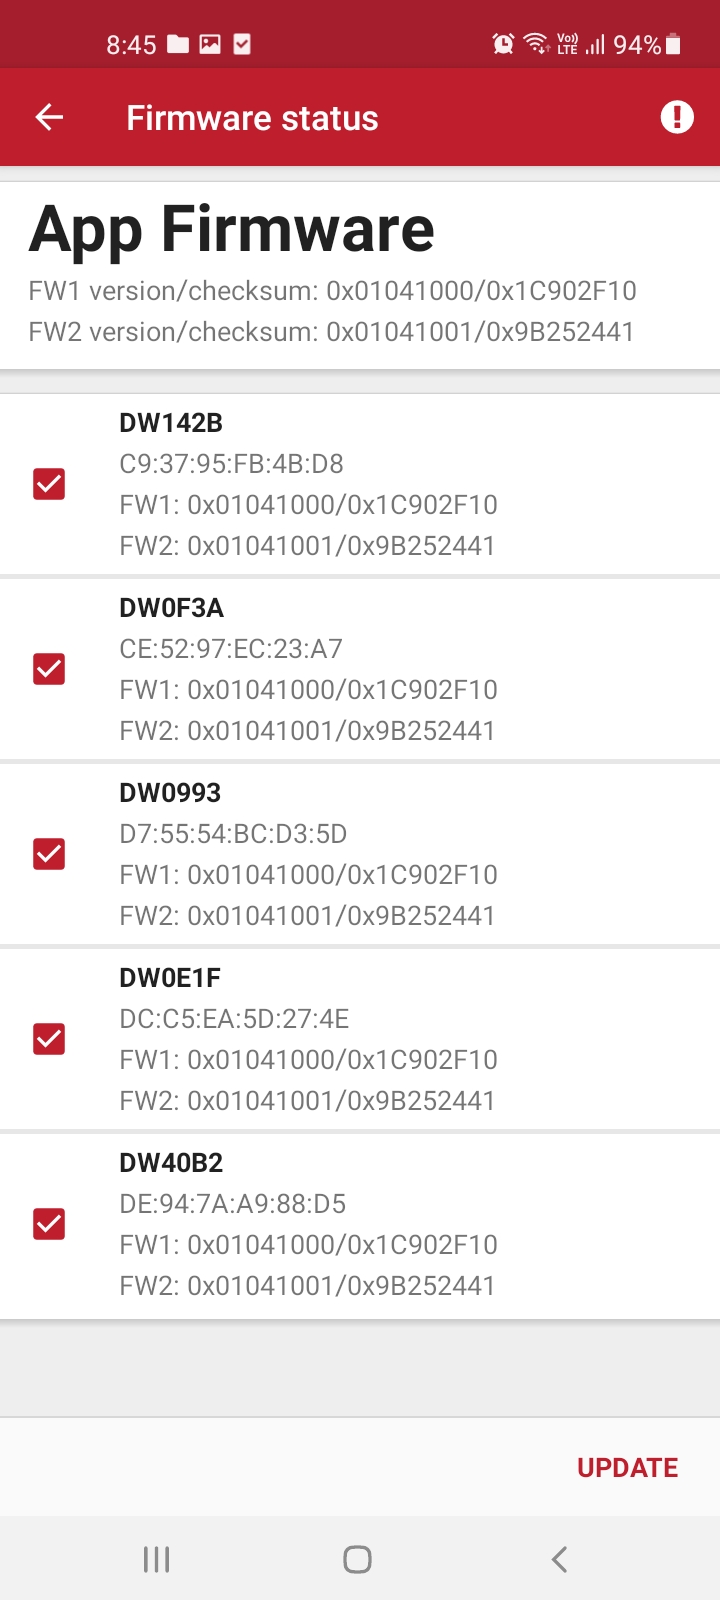
更新するデバイスを選択します。
SWD プログラマを使用したファームウェアのアップデート
LC4/LC5 上の DWM1001C
名前のないボード
バイナリのプログラミング
ボードにファクトリーイメージを書き込むために必要な手順を以下に示します。再フラッシュするには、J-Link または CMSIS-DAP プログラマを使用する必要があります。プログラマコネクタからは電源が供給されないため、再フラッシュ中はボードに USB またはバッテリーから電源を供給する必要があります。
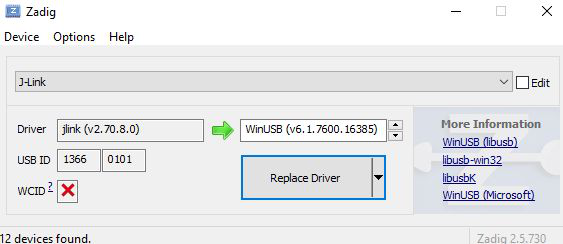
J-Flash Light ソフトウェアツールを使用してイメージをフラッシュできます。この方法については後述します。別の方法として、様々なプラットフォームで利用可能なオープンソースツール OpenOCD を使用することもできます。PANS PRO ソフトウェアパッケージには、OpenOCD で使用する再フラッシュスクリプトが含まれています。
Segger J-Flash Lite (J-Link ソフトウェアスイート) をダウンロードしてインストールします: https://www.segger.com/downloads/jlink/#J-LinkSoftwareAndDocumentationPack
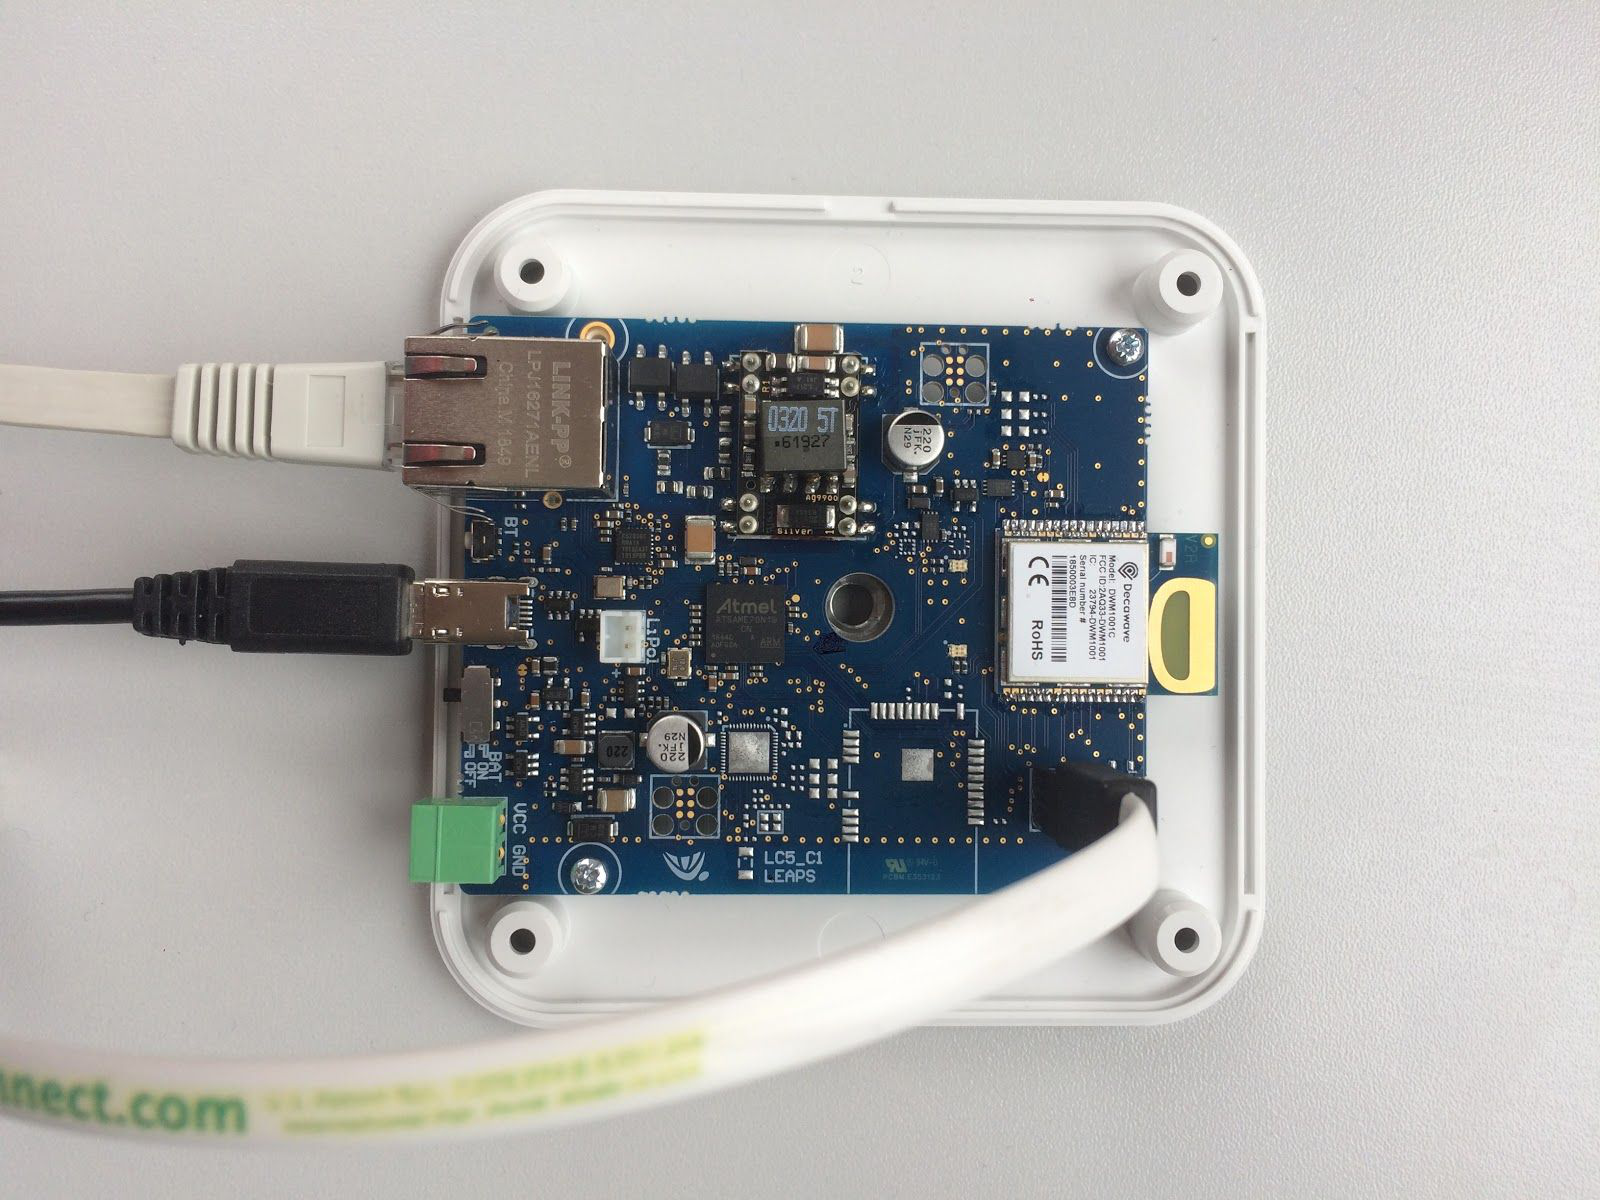
以下に示すように、モジュールを Micro USB データケーブルで接続します。
LC5 Gateway 上の DWM1001C モジュールのファームウェア再フラッシュ用接続
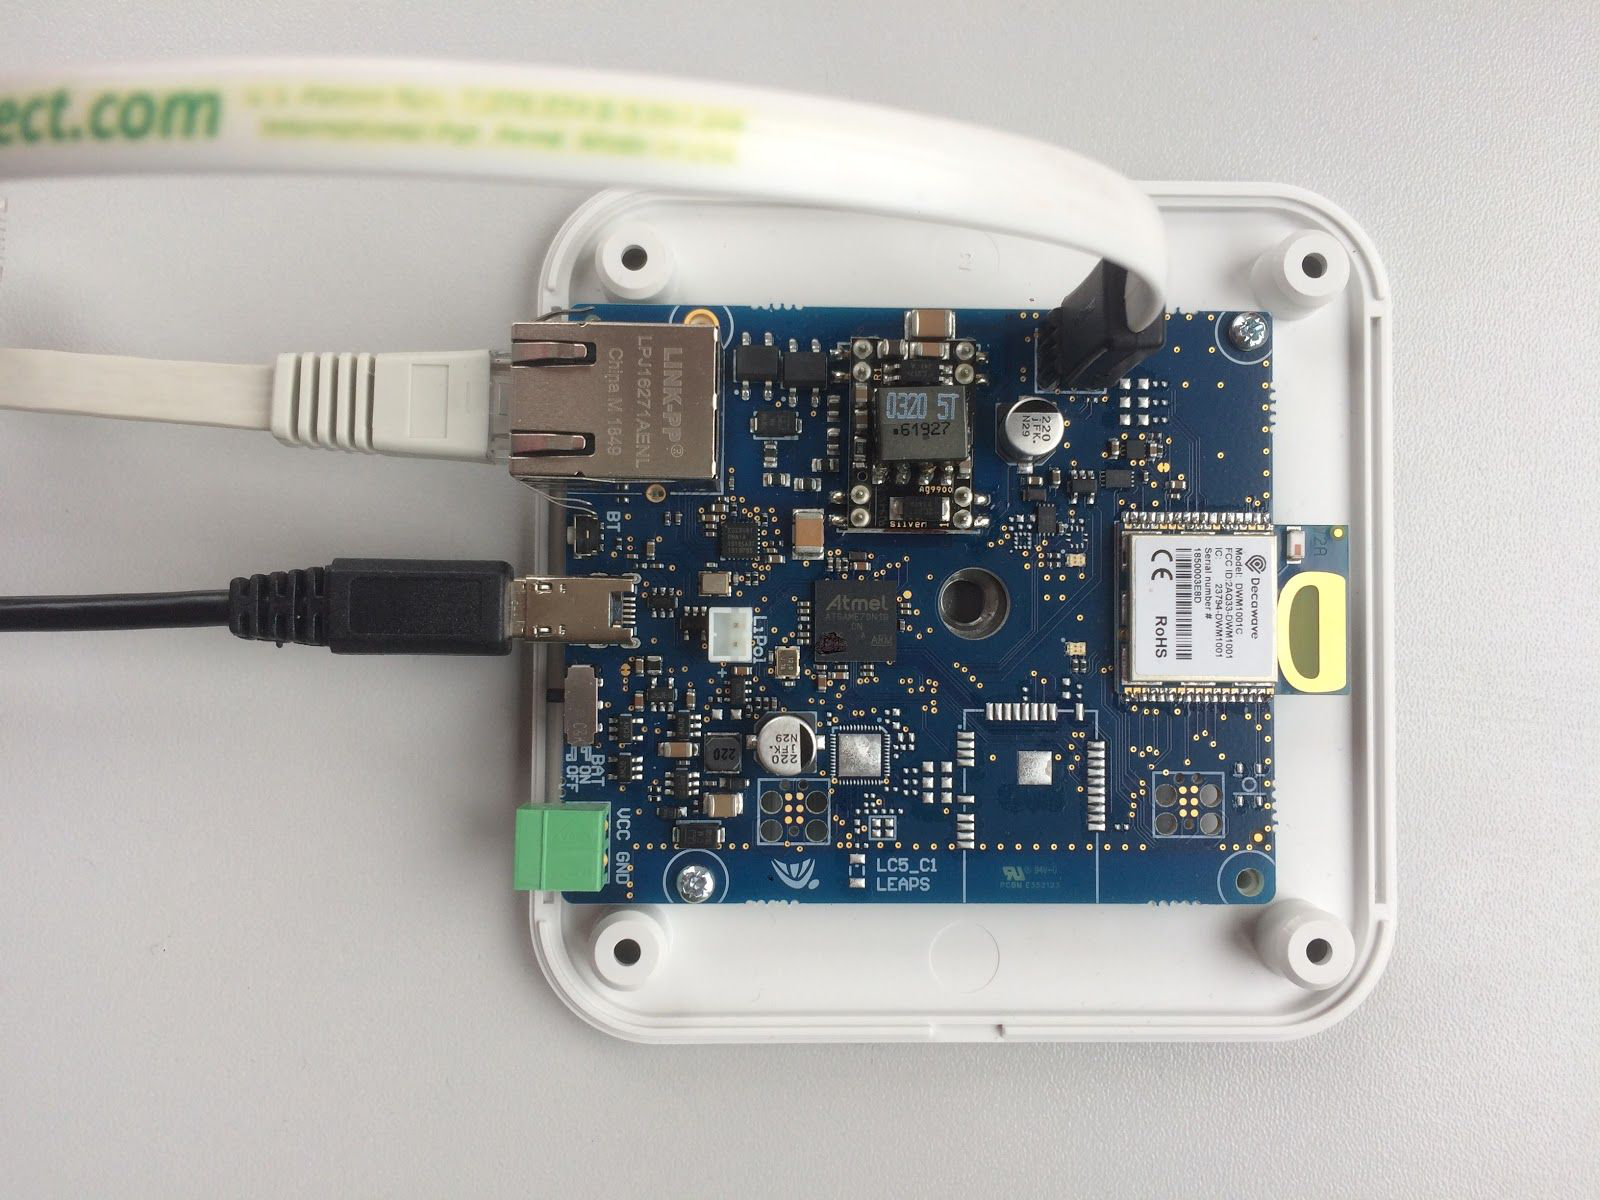
LC5 Gateway 上のホスト MCU SAME70 のファームウェア再フラッシュ用接続
J-Flash Lite を開きます。
DWM1001Cのデバイスとしてnrf52832_XXAA、インターフェースとしてSWDを選択します。ホストMCUはATSAME70N19を使用します。デフォルトの速度1000を使用し、OK をクリックします。
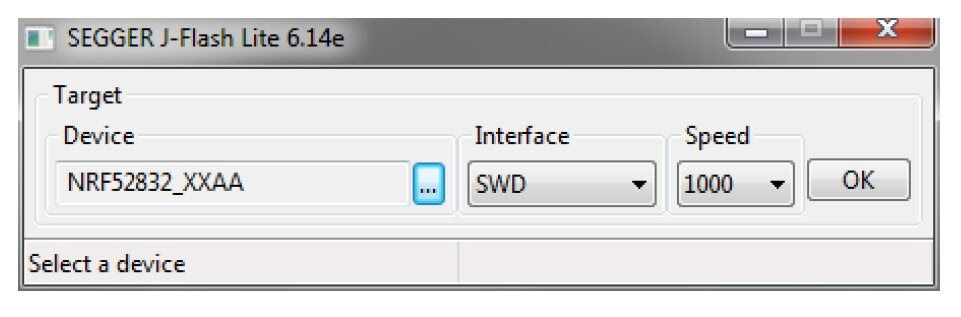
“チップ消去” をクリックして、チップ全体を消去します。
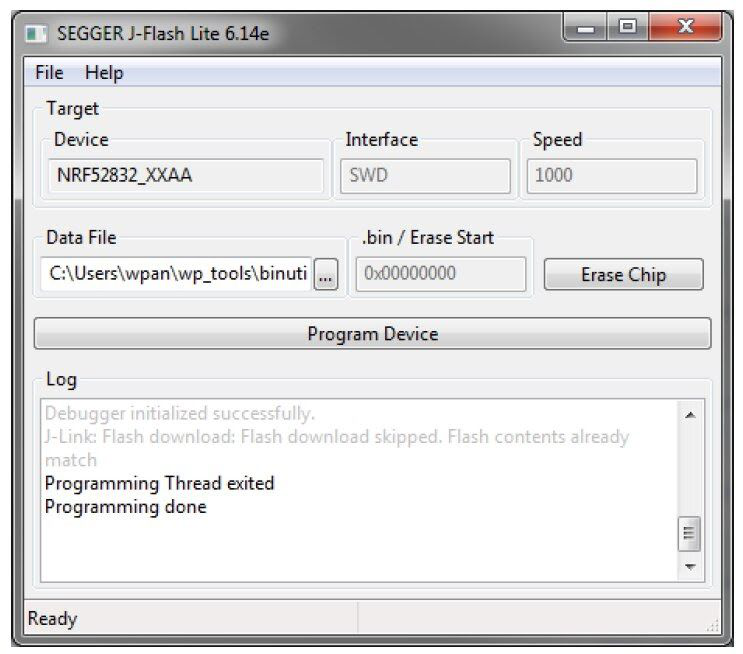
データファイルで “...” をクリックし、フラッシュするPANS PROソフトウェアパッケージに含まれる16進ファイルを参照します。その後、 “Program Device” をクリックします。ファームウェアバイナリの互換性
ダウンロード パッケージについては、apps-support@leapslabs.com までお問い合わせください。
ファームウェアファイル |
ターゲット |
リフラッシュアドレス |
|---|---|---|
pan-pro-all-dwm1001c-vY.XX.hex |
LC4タグおよびLC5ゲートウェイ上のDWM1001Cモジュール |
0x00000000 |
pans-pro-all-lc5s-vY.XX.hex |
LC5ゲートウェイ上のホストMCU SAME70 |
0x00400000 |
セットアップの準備
少なくとも 1 つのデバイス。
パッケージには、アップデート用のスクリプトとバイナリが含まれています。
OpenOCD がインストールされました。
OpenOCD (Open On-Chip Debugger) 経由で更新する方法に関するステップバイステップの手順:
OpenOCD デバッガーをインストールしています。
Windows に OpenOCD をインストールしています。
Windows 用のバイナリ zip ファイルをダウンロードします。
C:\xpack-openocd-0.11.0-1フォルダーに解凍します。パスを追加します: Windows ユーザーパス環境変数に
C:\xpack-openocd-0.11.0-1\binというパスを追加してください。
Linux または macOS に OpenOCD をインストールします。
Linux 用バイナリ tarball をダウンロードします。
tarball を解凍してローカルにインストールします。
mkdir -p ~/.local/xPacks/openocd
cd ~/.local/xPacks/openocd
tar -zxvf ~/Downloads/xpack-openocd-0.11.0-1-linux-arm.tar.gz (with PC’s AMD core, using … linux-x64.tar.gz with PC’s Intel core)
....
sudo chmod -R -w xpack-openocd-0.11.0-1/
~/.local/xPacks/openocd/xpack-openocd-0.11.0-1/bin/openocd --version
export PATH="~/.local/xPacks/openocd/xpack-openocd-0.11.0-1/bin/:$PATH"
cd ~
source .bashrc
OpenOCD のバージョンを確認します。
openocd --version
xPack OpenOCD, x86_64 Open On-Chip Debugger 0.11.0-00155-ge392e485e (2021-03-15-16:43)
Licensed under GNU GPL v2
For bug reports, read
  http://openocd.org/doc/doxygen/bugs.html
パッケージをダウンロードしてPCに解凍します。WinZipや7-Zipのようなプログラムを使ってダウンロードしたファイルを解凍します。
ダウンロード パッケージについては、apps-support@leapslabs.com までお問い合わせください。
お気に入りのターミナル アプリケーションを開きます。
Linux または macOS では、ターミナル アプリケーションのように。
Windows では、Powershell のように。
抽出されたパッケージが含まれるフォルダーに移動します。
cd to /path/to/PANSPRO-Firmware-OpenOCD
Micro USBデータケーブルを使用して、デバイスの``Micro USBデータポート``とPCを接続する。
スクリプトを実行して、ファームウェアを自動的に更新します。
linuxまたはmacOSでは、reflash-panspro-rtls-2ab.sh コマンドを使用します。
Windows では、 reflash-panspro-rtls-2ab.bat コマンドを使用します。
更新が完了すると、デバイスは更新の成功を示すビープ音を鳴らします。ボードはプロセスの一部として自動的にリセットされます。
デバイスはファームウェアを正常に更新しました。最新の機能と改良点をお楽しみください。
RTLS ネットワークを形成する際、イニシエータアンカーはネットワークに必要なファームウェアバージョンを指定します。自動ファームウェアアップデートが有効になっている場合、ネットワークに参加したいデバイスは同じファームウェア(バージョン番号とチェックサム)を持っていなければなりません。新しいデバイスが正しいファームウェアを持っていない場合、以下のサブセクションに従って更新されます。
UWBインターフェース経由
DWM1001 システム概要 [4]で紹介されているように、ノードは自分のファームウェア・ バージョンを参加したいネットワークと比較します。ファームウェアのバージョンが異なる場合、ノードは参加する前にファームウェアのアップデートを試みます。このファームウェア・アップデート機能は、コンフィギュレーションで有効/無効を設定できます。ここでは、ノードが従う機能のルールを示します。
タグ:
有効にすると、タグは常にファームウェアバージョンを確認し、測距を開始する前にネットワーク内の近くのアンカーノードに更新要求を送信することで、ファームウェアバージョンをネットワークと同期しようとします。
無効にすると、タグはファームウェアバージョンを確認せずに測距を開始します。これはバージョン互換性の問題を引き起こす可能性があるため、慎重に扱う必要があります。
アンカー:
有効にすると、アンカーはネットワークに参加する前にファームウェアバージョンを確認し、近くのアンカーノードに更新要求を送信してネットワークとファームウェアバージョンの同期を試みます。ネットワークに参加した後、アンカーは近くのノードからのファームウェア更新要求に応答します。
無効にすると、アンカーはネットワークに参加する前にファームウェアバージョンを確認せずに直接参加要求を送信します。これはバージョン互換性の問題を引き起こす可能性があるため、慎重に扱う必要があります。ネットワークに参加した後、アンカーは近くのノードからのファームウェア更新要求を無視します。