LEAPS Manager
LEAPS Manager は、UDK (All-in-One Ultra-Wideband Development Kit) および LEAPS RTLS (高度な Ultra-Wideband Real-Time Location System) にデバイス検出、デバイス構成、ネットワーク構成、ネットワーク管理、および位置情報の可視化を提供する必須ツールです。
主な機能
デモウィザードにより、キットの事前定義されたデモセットアップを簡単かつ高速に設定できます。
2Dと3Dのグリッドはリアルタイムで位置を更新し、ネットワーク内のデバイスを視覚化します。
デバイスとの通信はBLE経由で行われ、最大6つの同時接続をサポートすることで接続の信頼性を維持します。
データ集中化を使用する場合、MQTT経由で LEAPS Server と通信できるため、ネットワーク全体のデバイスの管理と可視化が可能になります。
その他の便利な機能には、ユーザー管理、BLE経由でのファームウェア更新、アンカー自動位置決め、位置ロギング、デバッグコンソールがあります。
システム環境
LEAPS Manager は、Android APIレベル24以降に基づいて開発されています。詳細は apilevels を参照してください。
最小Androidバージョン:Android 7(API 24)
最小メモリ:100MB(ディスク空き容量)
Bluetooth の最小バージョン: 4.2 (推奨: 5.0 以上)
Android デバイスの推奨: Google Pixel 7 (同等のデバイス)
非推奨デバイス: Samsung Galaxy Tab A8 については、既知の問題リストをご覧ください:
手順
開始するには、LEAPS Manager アプリケーションをダウンロードしてください(Google Play から入手可能)

開始するには、LEAPS Manager アプリケーションをダウンロードしてください(App Store から入手可能)

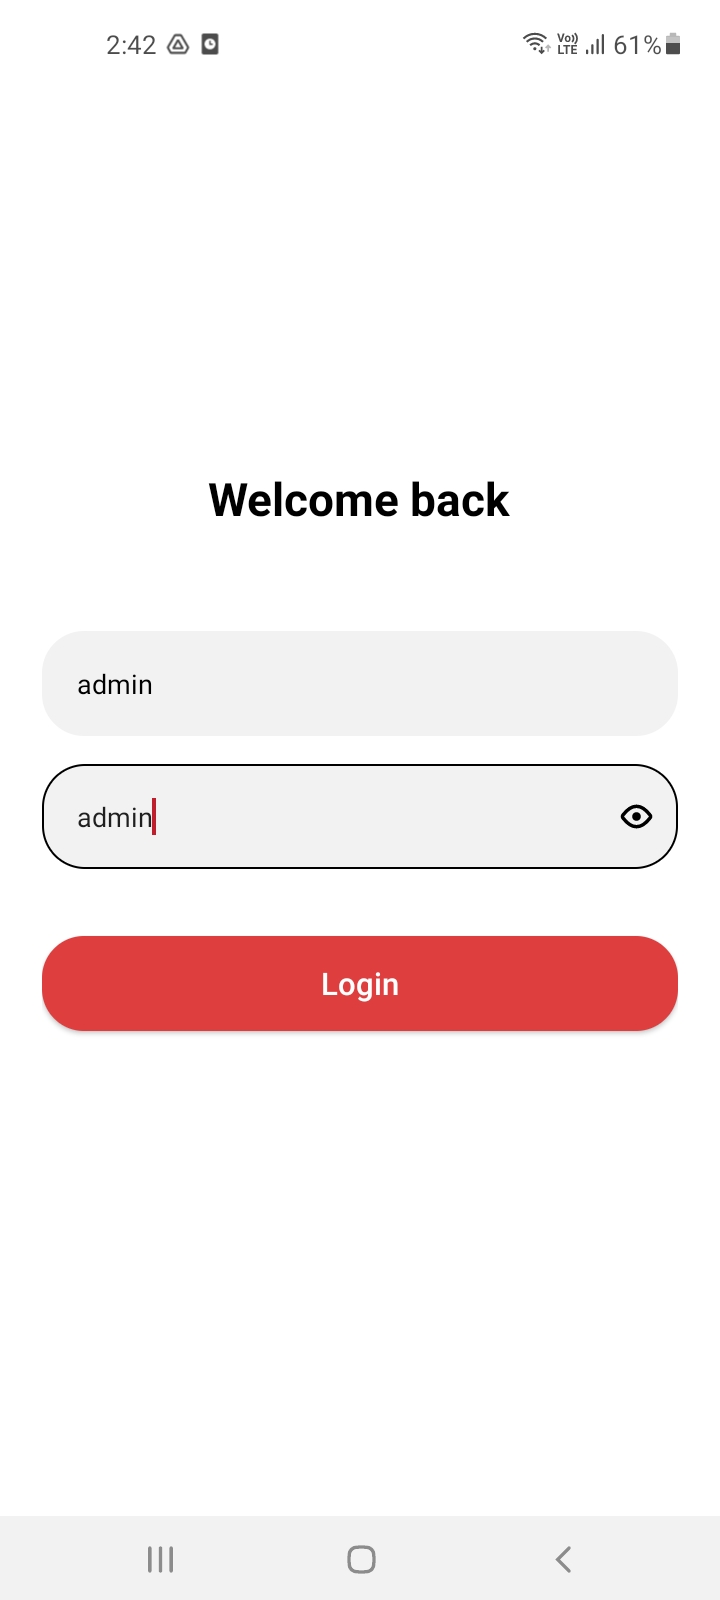
開始方法
デフォルトでは、ユーザー管理が有効になっている場合、ユーザー名は admin、パスワードは admin です。
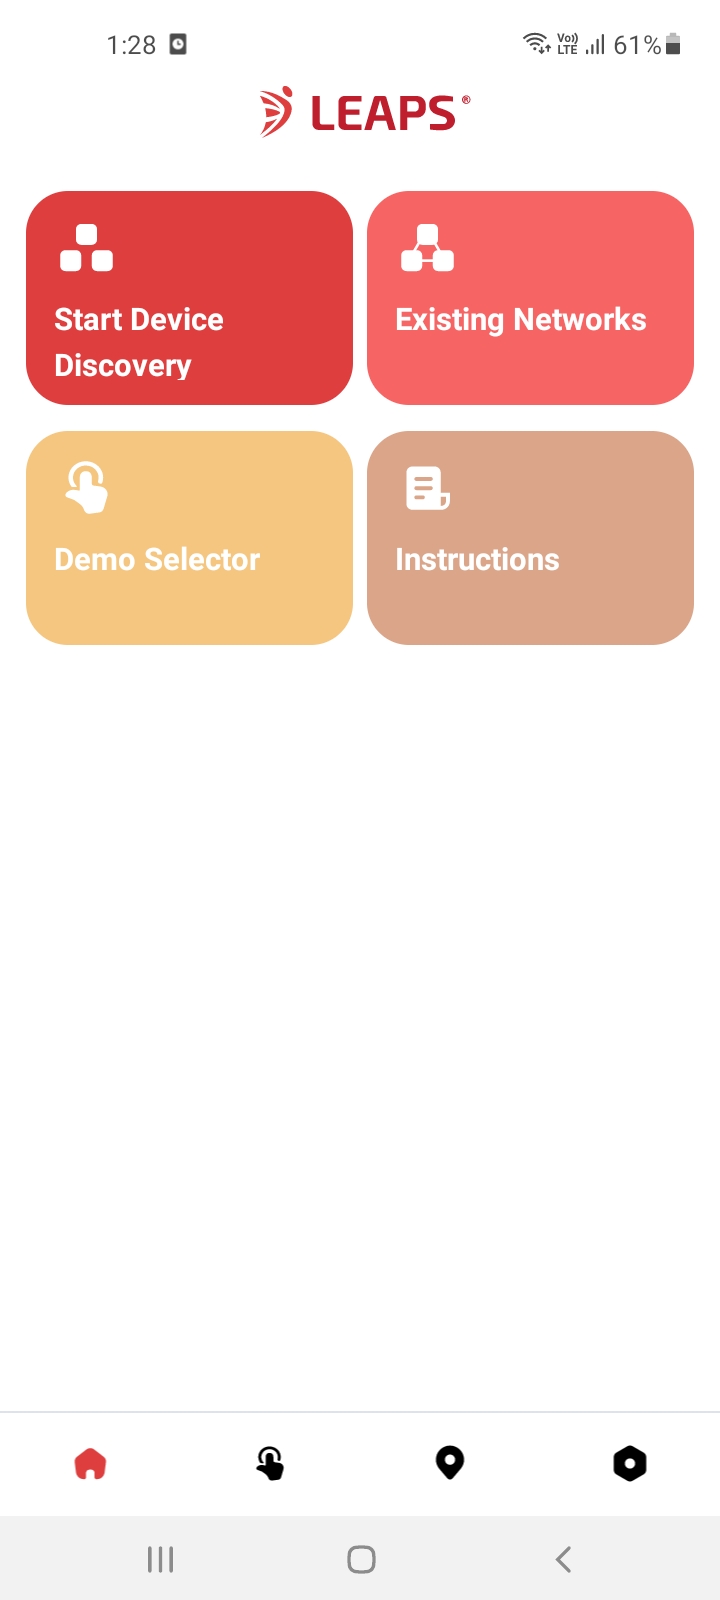
ネットワーク設定
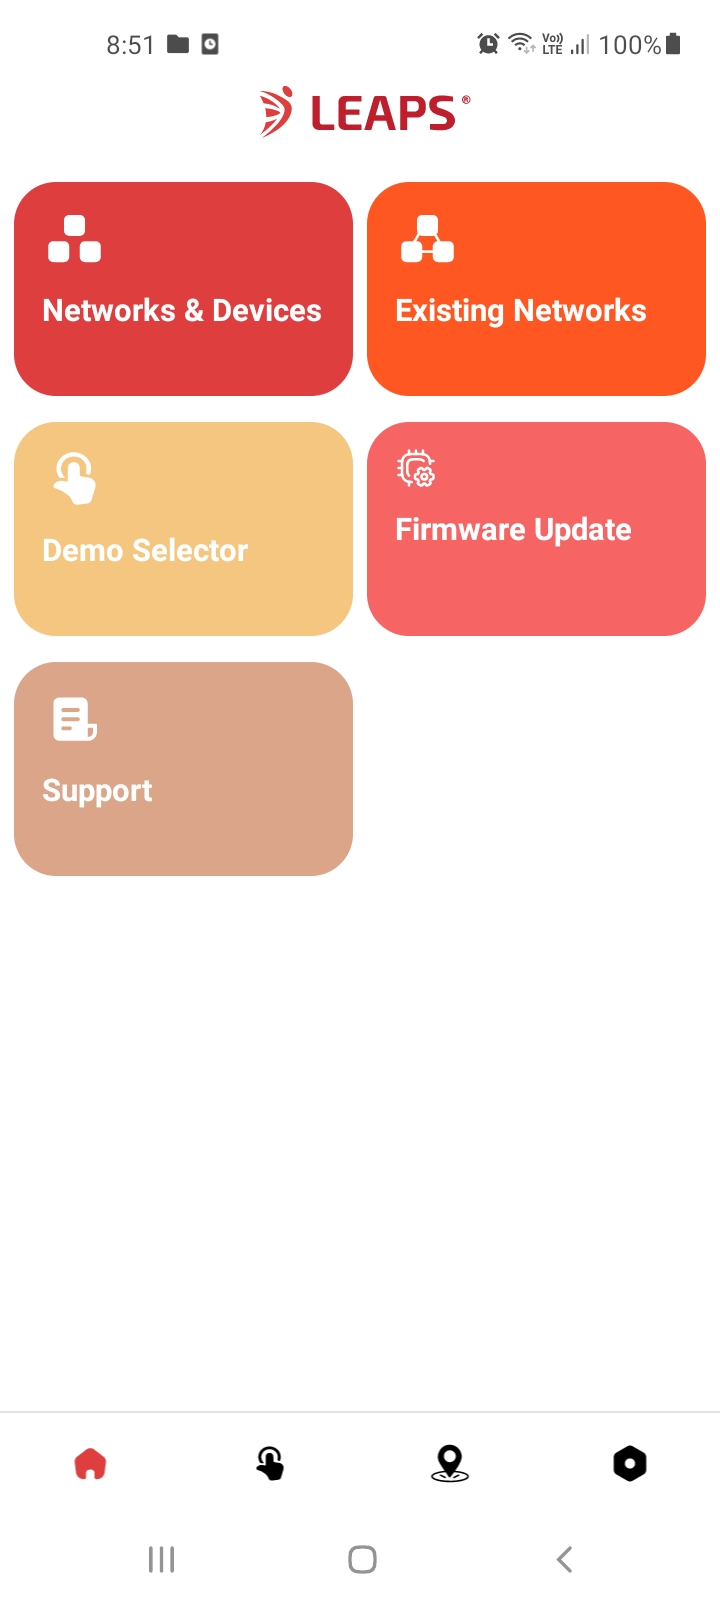
アプリを開き、割り当てられているネットワークがない場合は デバイス検出を開始 を選択します。既にネットワークが存在する場合は、既存のネットワーク に移動します。
ここで、アプリケーションは利用可能なすべてのネットワークとデバイスの検出とスキャンを開始します。
|
|
|
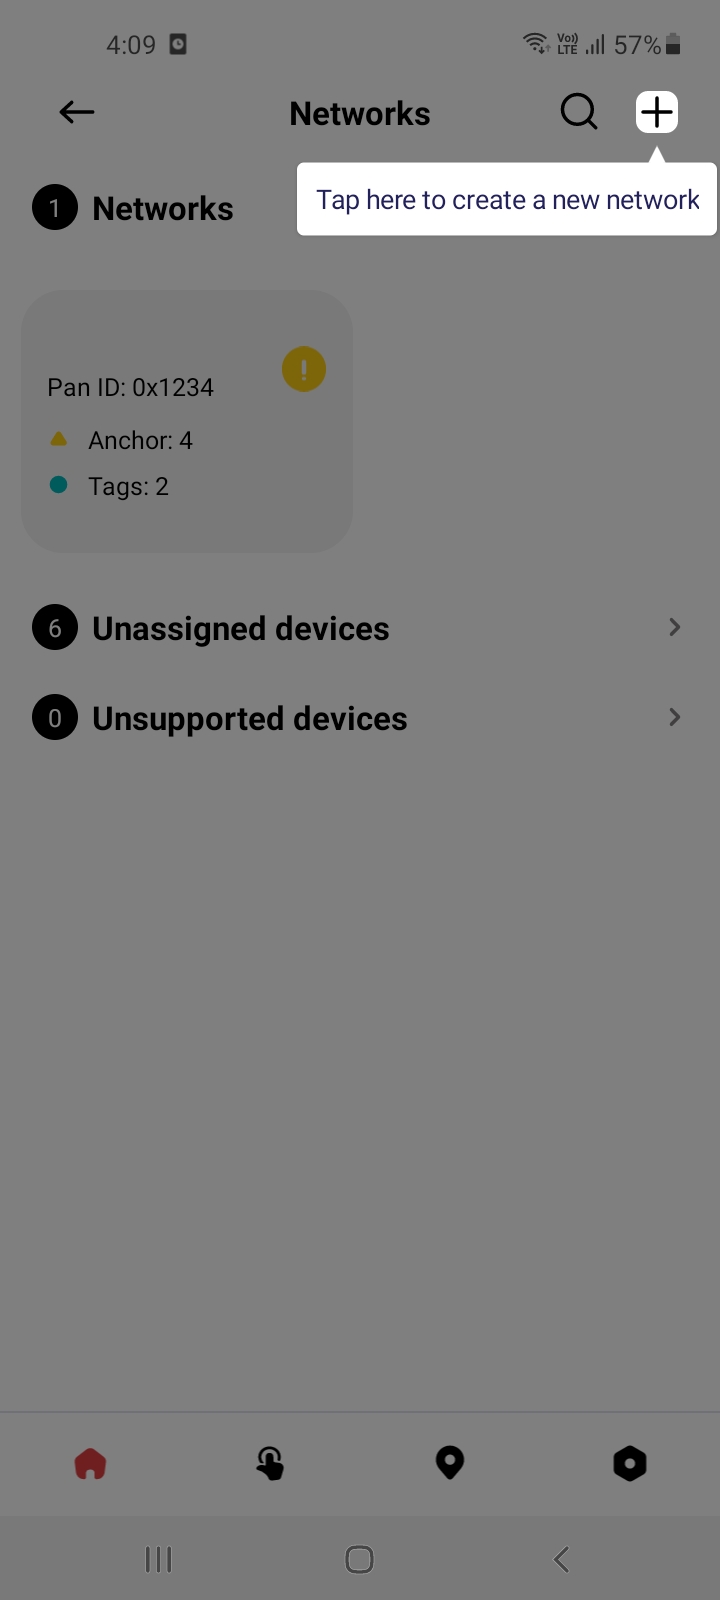
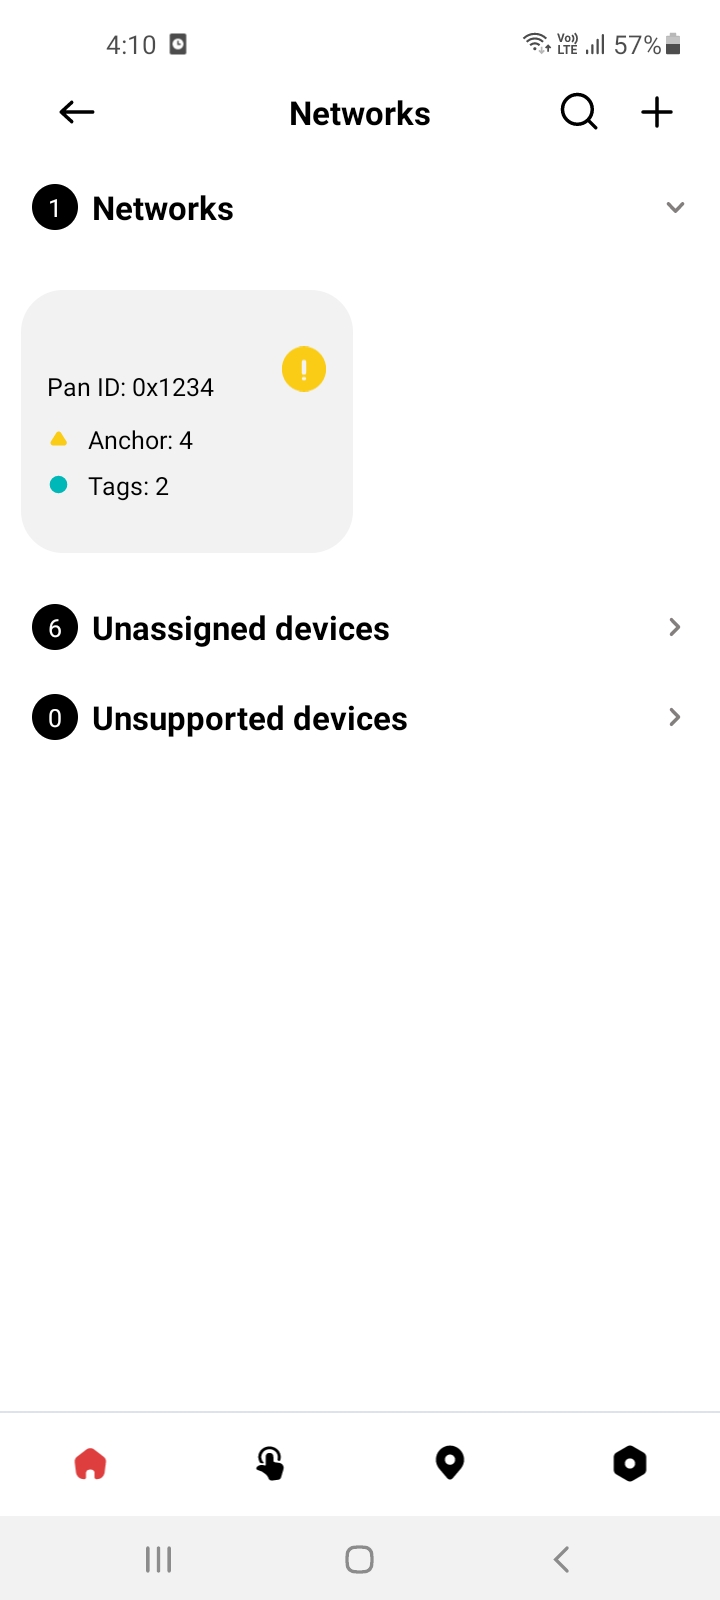
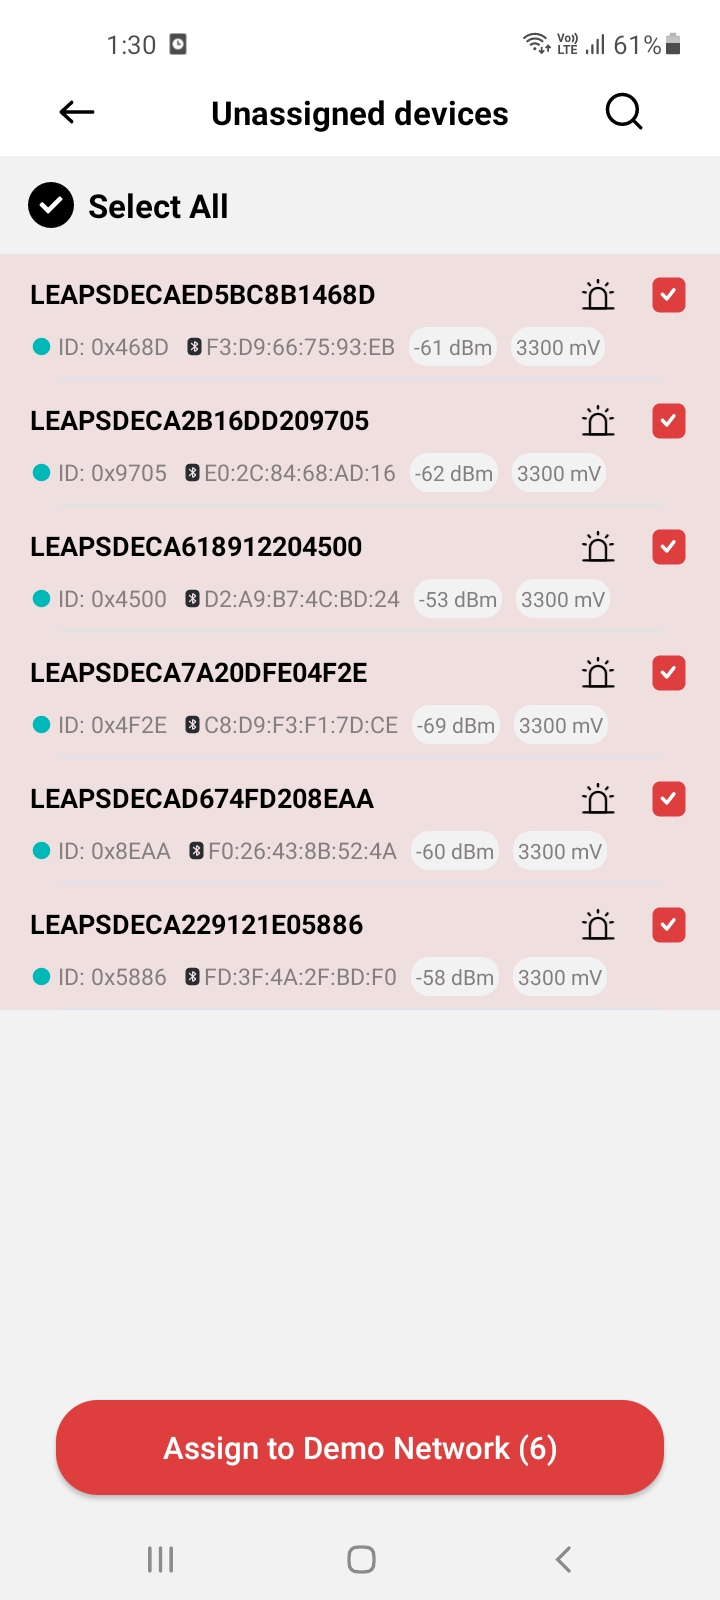
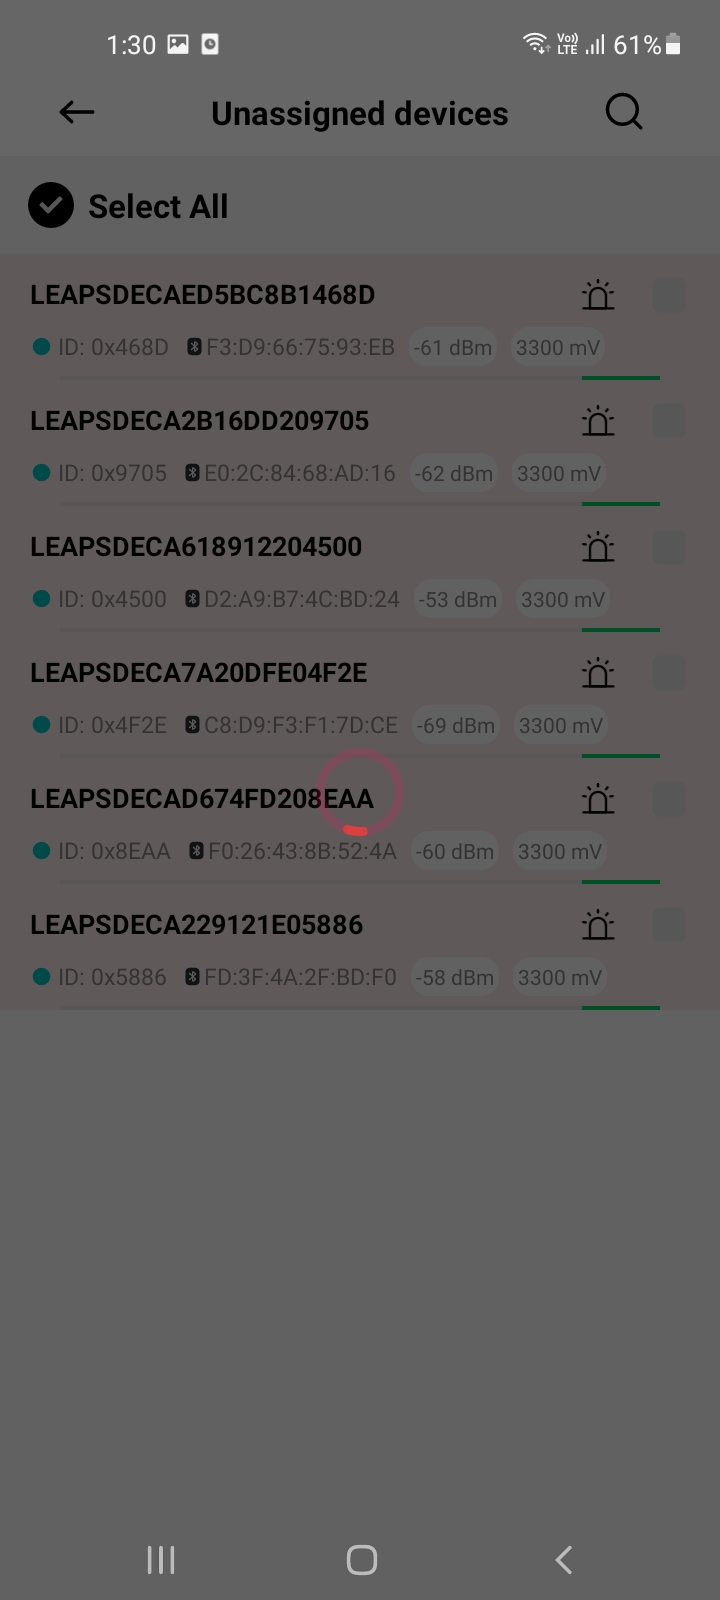
検出とスキャンのプロセスが完了するまでお待ちください。利用可能なネットワークが割り当てられていない場合は、ネットワークを指定できます。デバイスを選択して作成し、指定したネットワークに割り当てることができます。
|
|
|
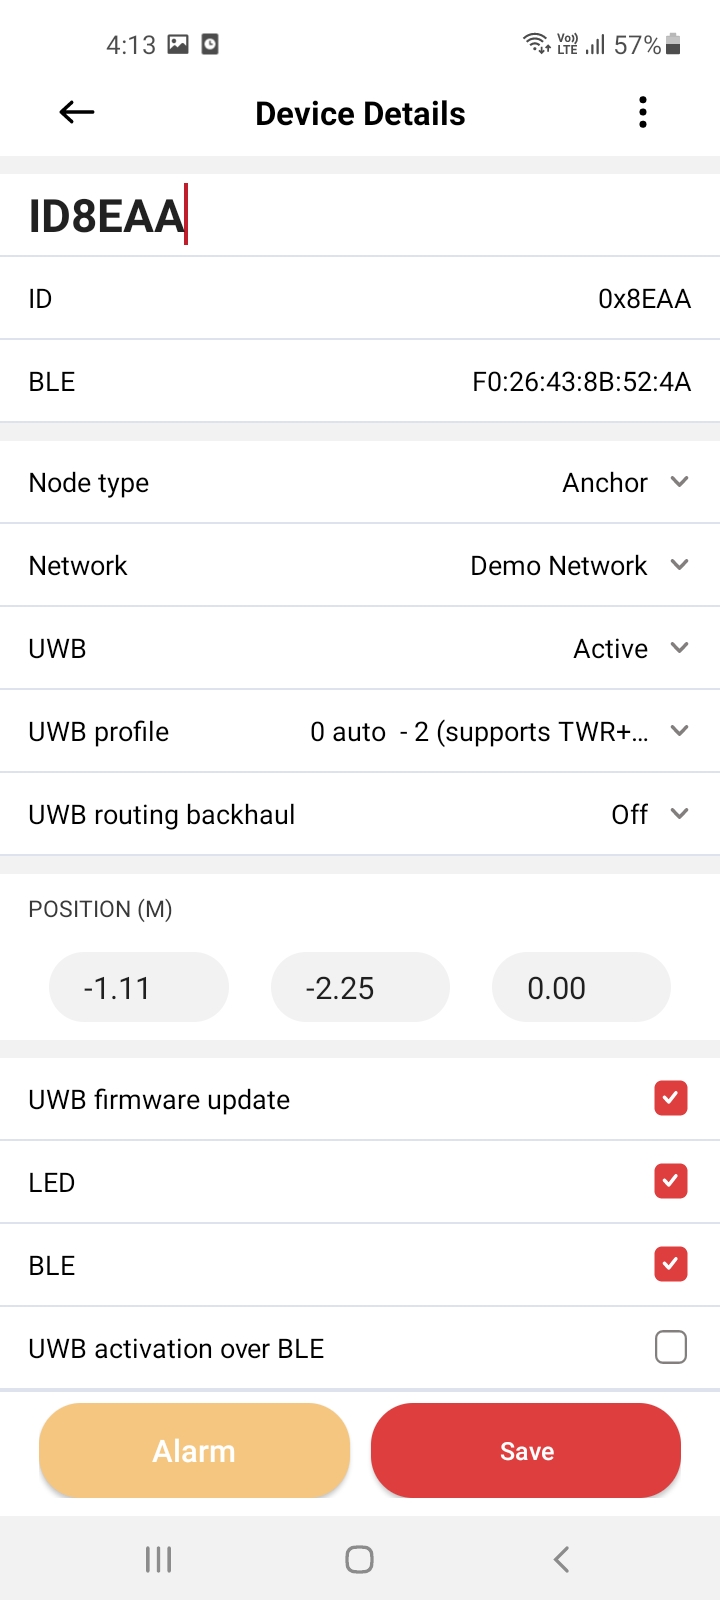
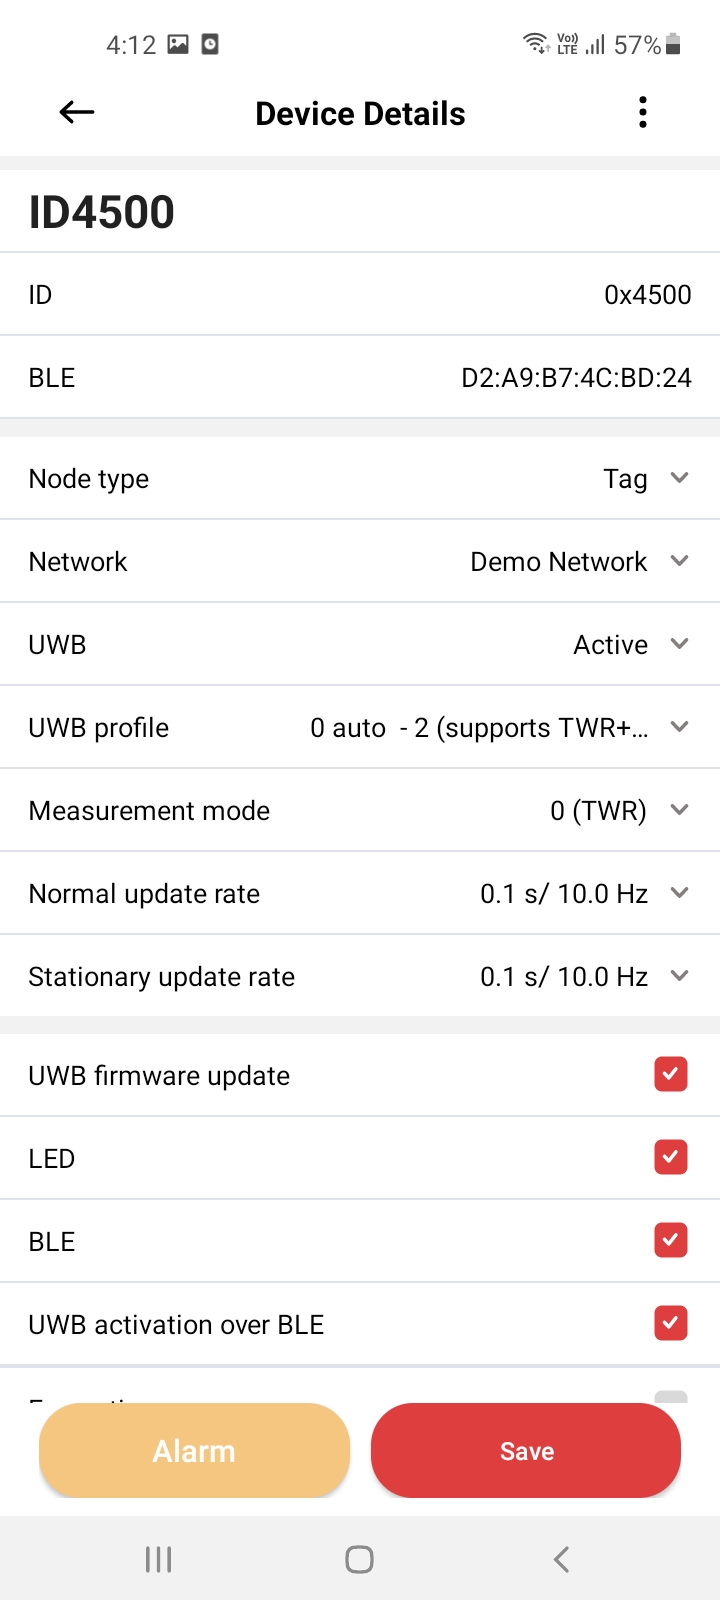
ノード設定
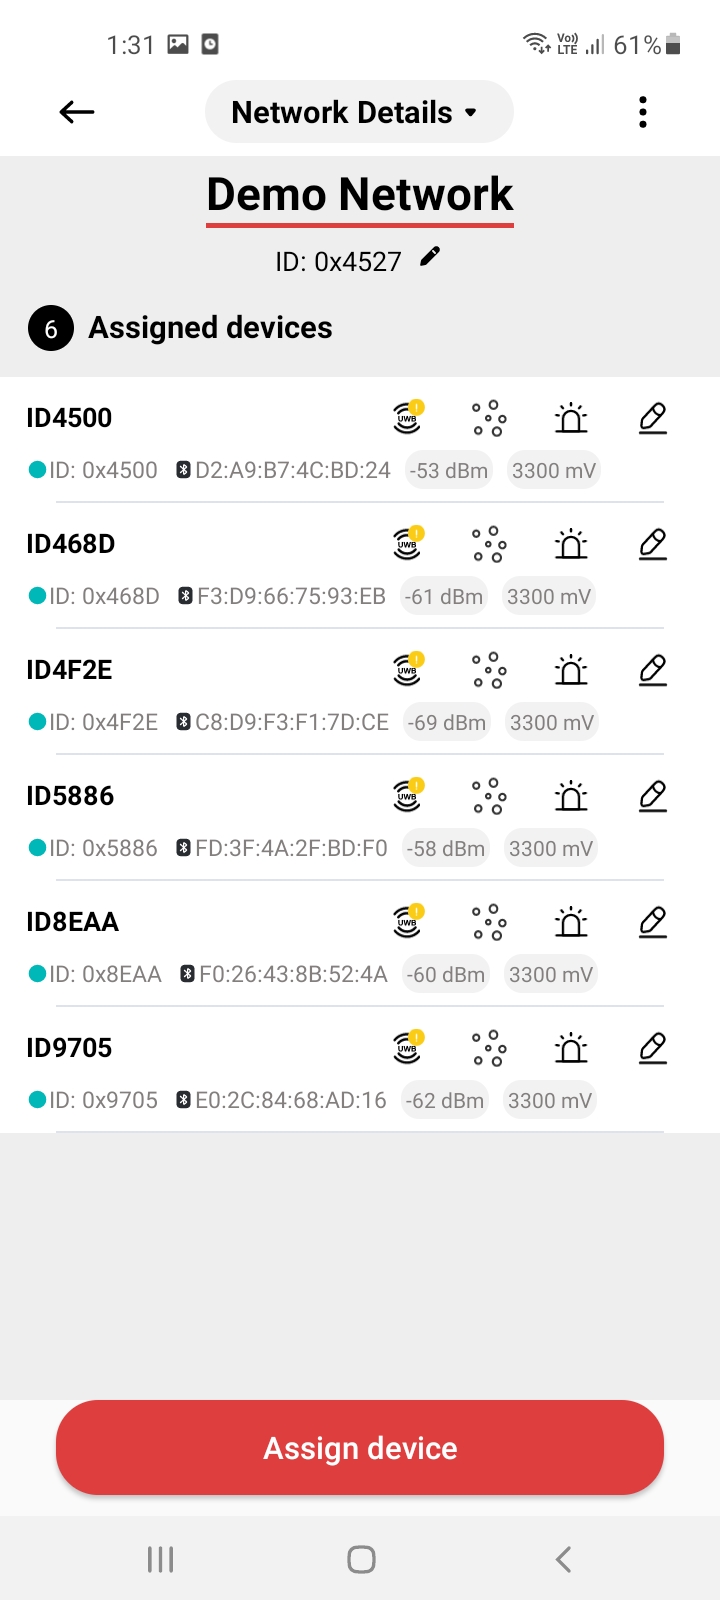
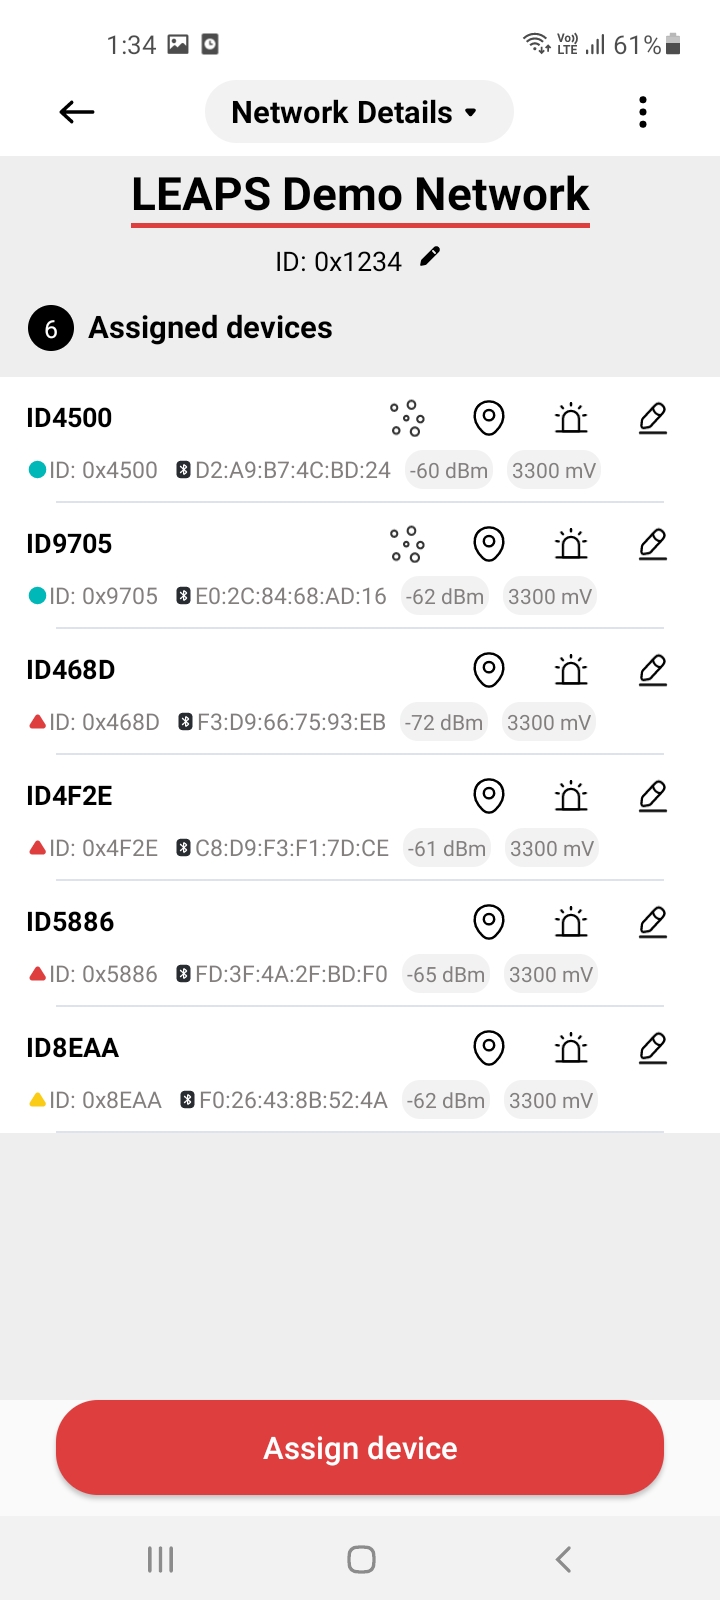
ノードを設定するには、事前にノードを特定のネットワークに割り当てる必要があります。指定したノードを含むネットワークを選択すると、ネットワークの詳細が表示されます。
画面をスワイプしてスキャンし、アプリケーションからデバイスへの接続信号があることを確認してください。
鉛筆アイコンが表示されている場合は、それを選択してノードを設定できます。
|
|
|
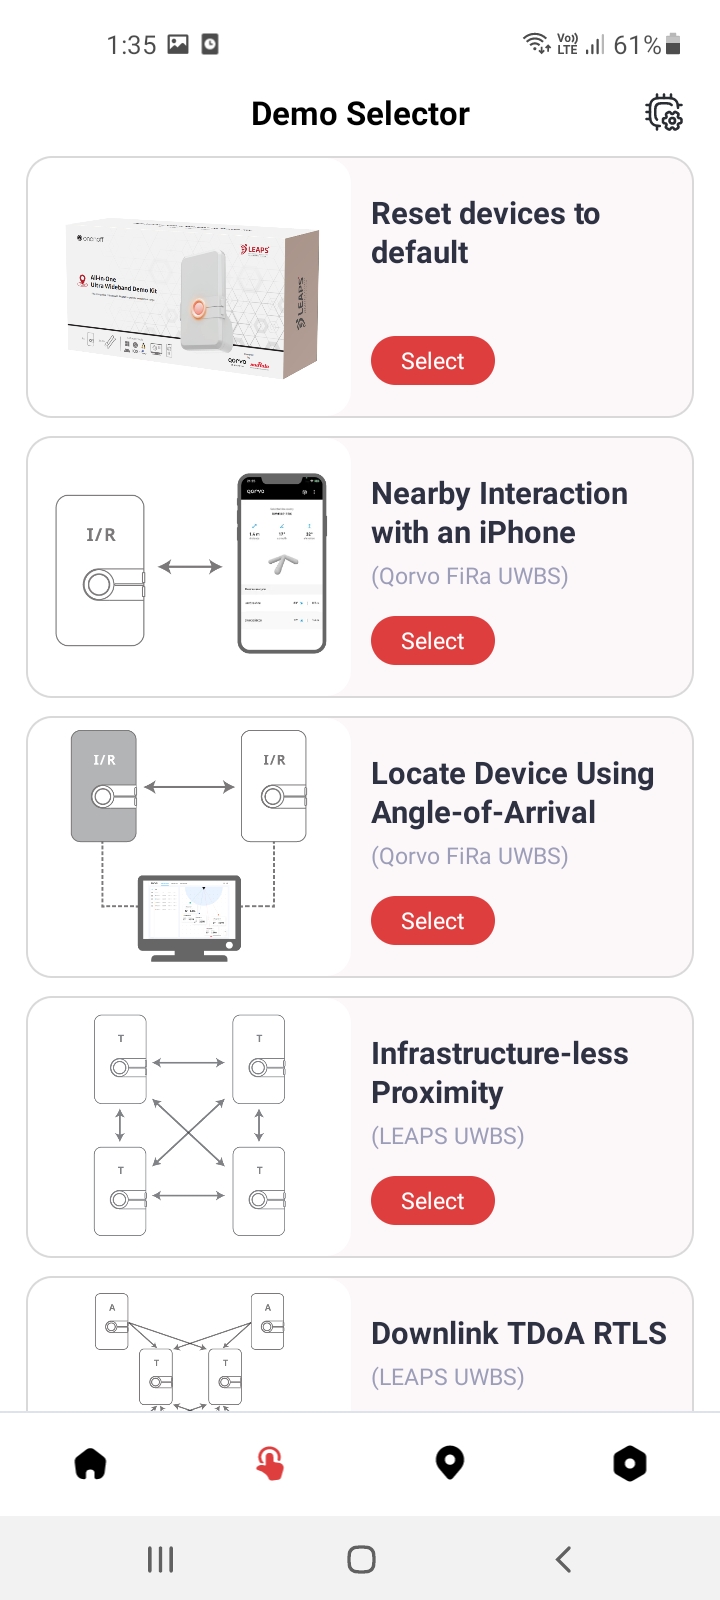
デモセレクター
デモセレクターに移動し、設定するデモを選択します:
と iPhone の周辺での対話デモ
到着角度(AoA)を使ったデバイスの位置特定デモ
インフラレス近接デモ
ダウンリンク TDoA RTLS デモ
高速ダウンリンク TDoA RTLS デモ
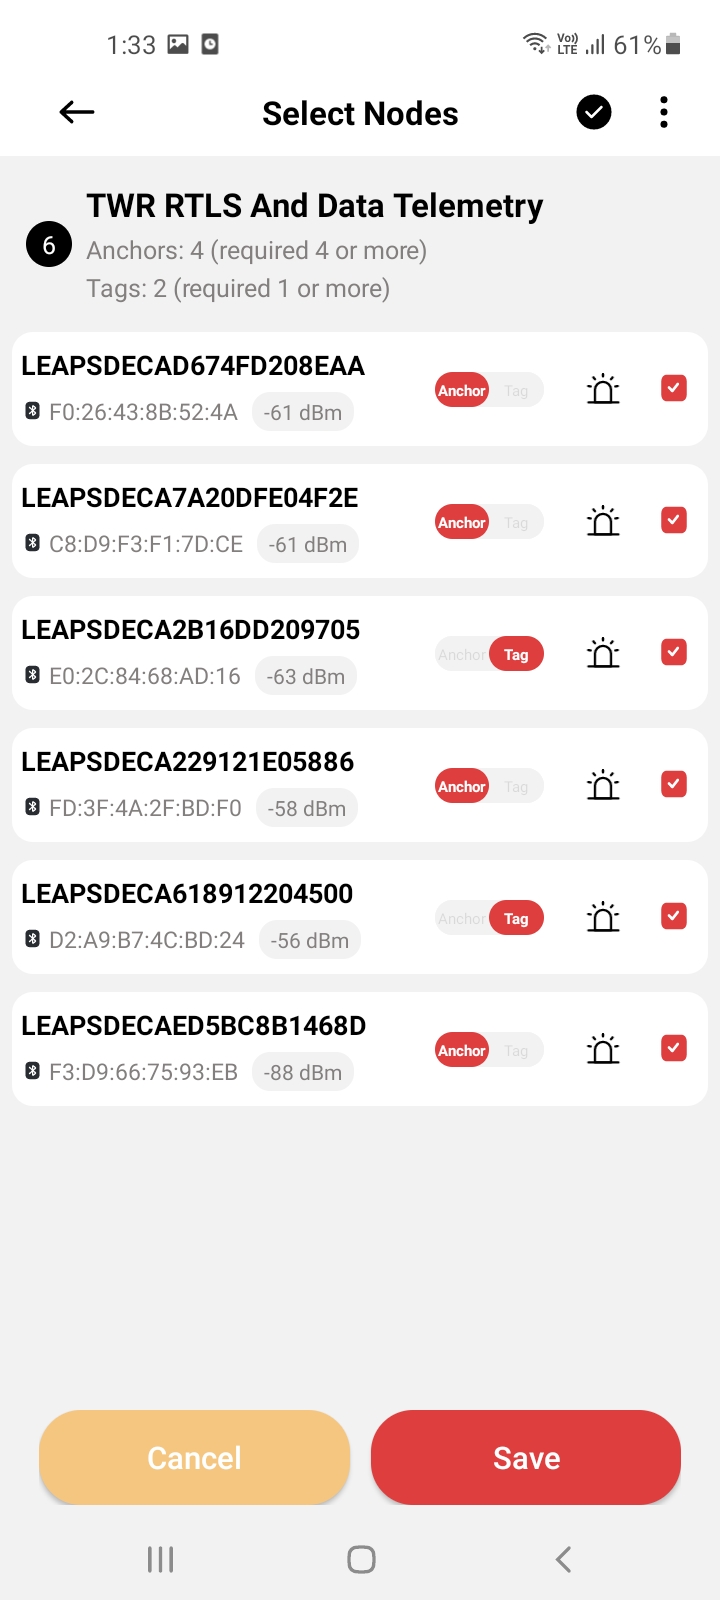
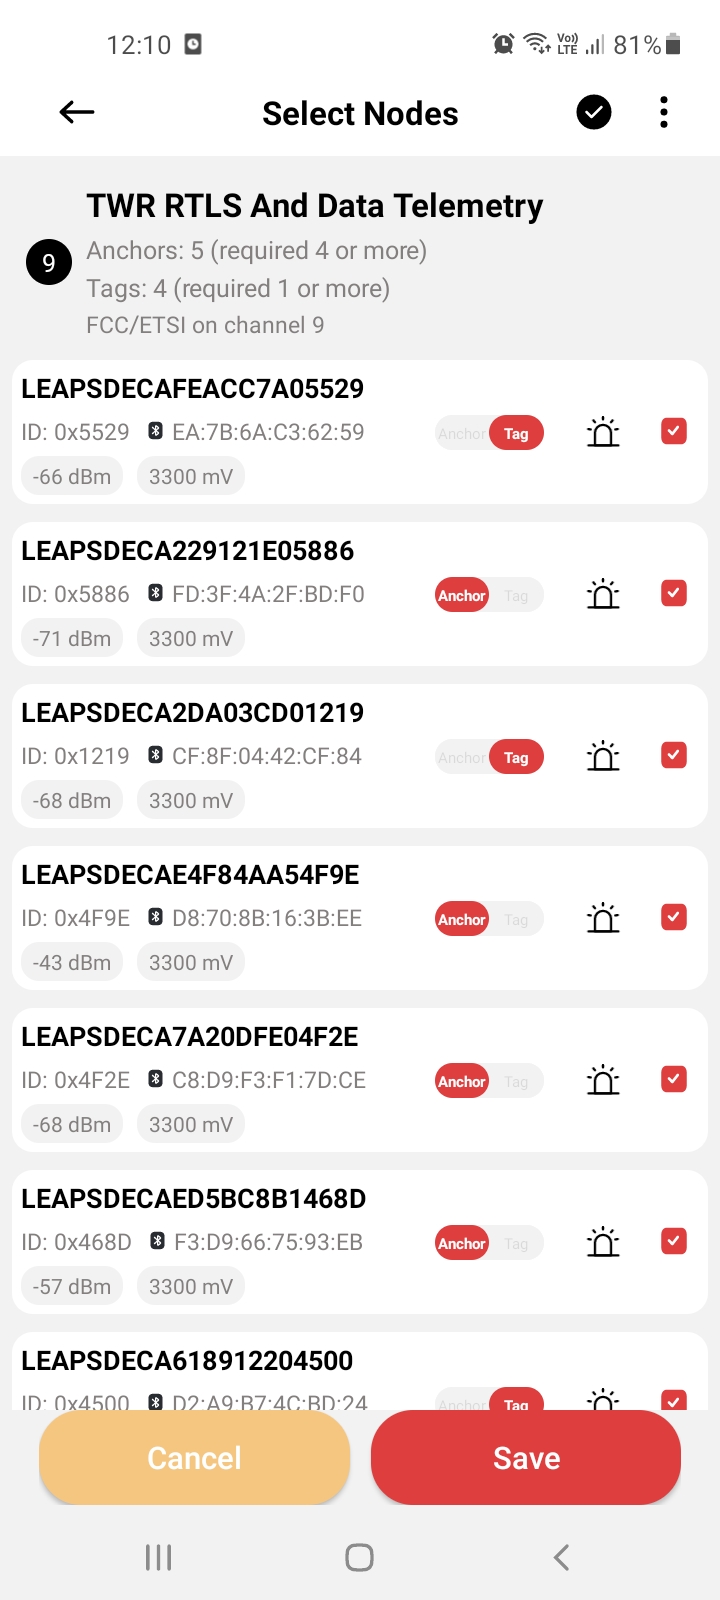
TWR RTLS およびデータテレメトリ デモ
例: TWR RTLS およびデータテレメトリ デモ
|
|
|
|
|
|

|
|
+10dB、LNA/PA 設定に関する設定情報
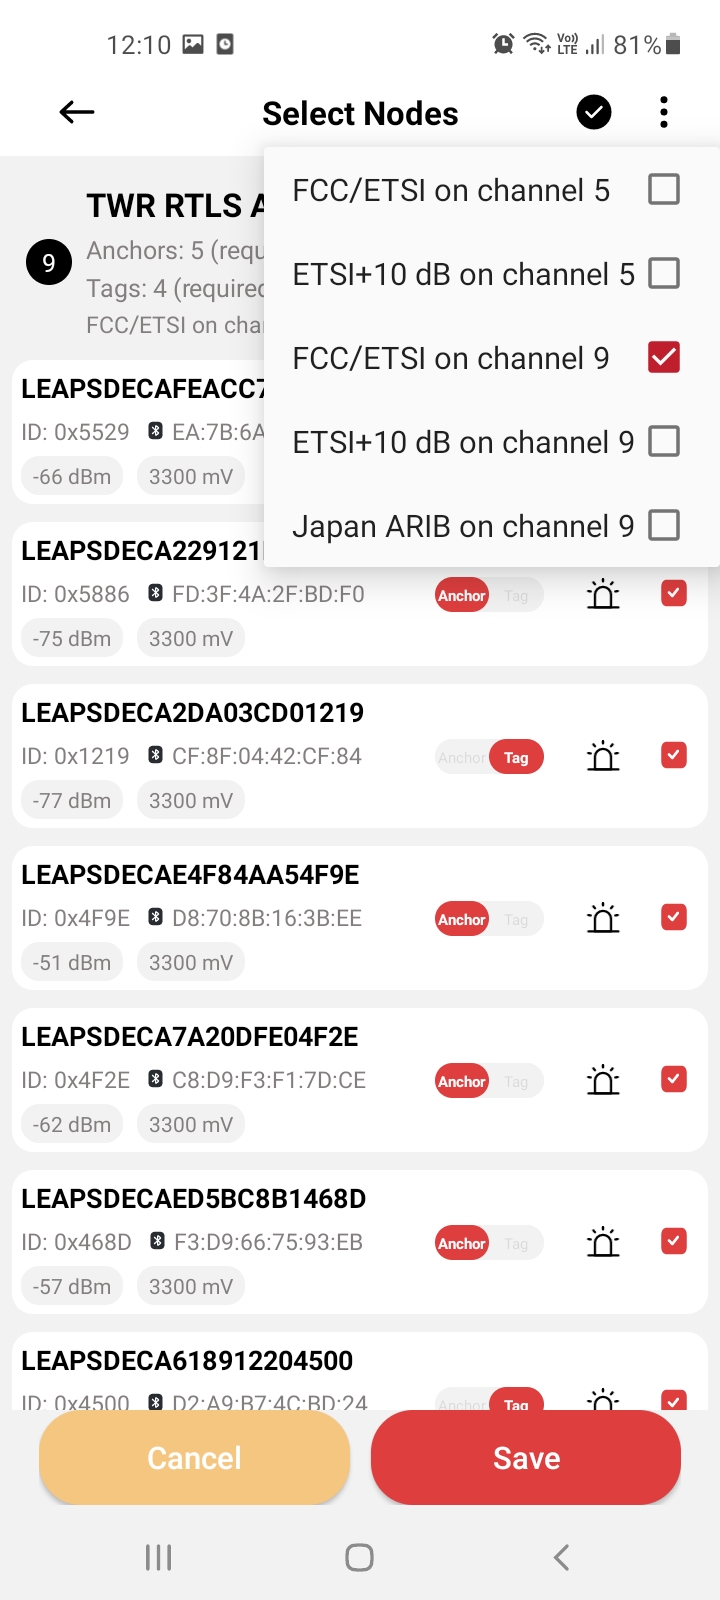
デモでは、+10dB 低雑音増幅器 (LNA) / パワーアンプ (PA) の設定に関する詳細情報を確認できます。この設定は、特定のアプリケーションに合わせて信号強度と品質を最適化するように設計されています。
設定:
FCC/ETSI on channel 5ETSI+10 dB on channel 5FCC/ETSI on channel 9ETSI+10 dB on channel 9Japan ARIB on channel 9
デモ版で利用可能:
インフラレス近接デモ
ダウンリンク TDoA RTLS デモ
高速ダウンリンク TDoA RTLS デモ
TWR RTLS およびデータテレメトリ デモ
設定方法:
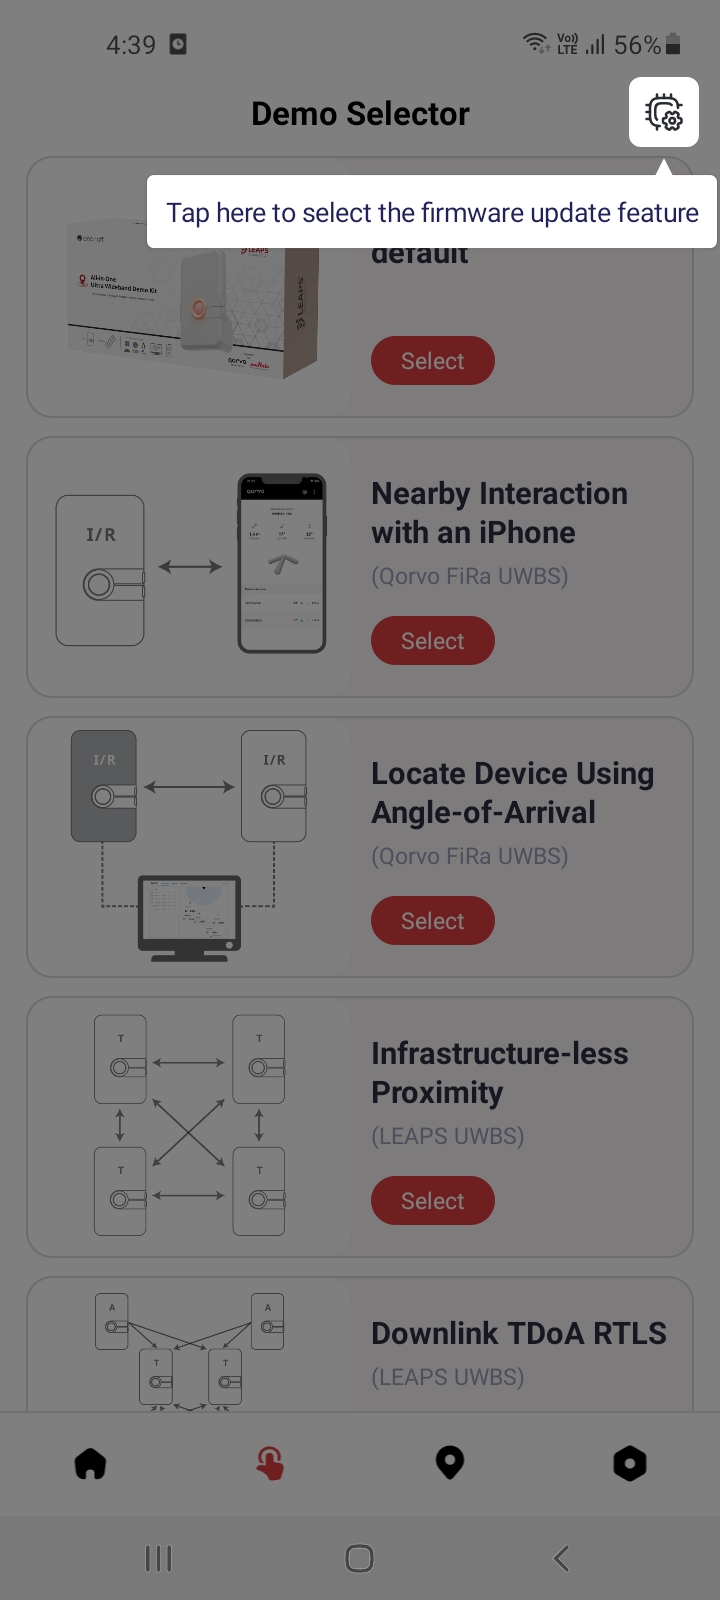
デモ画面の右上に移動します。
3つの点のアイコン(メニューアイコン)をクリックします。
対応する設定オプションを選択して、設定を表示または選択します。
|
|
BLE経由のファームウェア更新
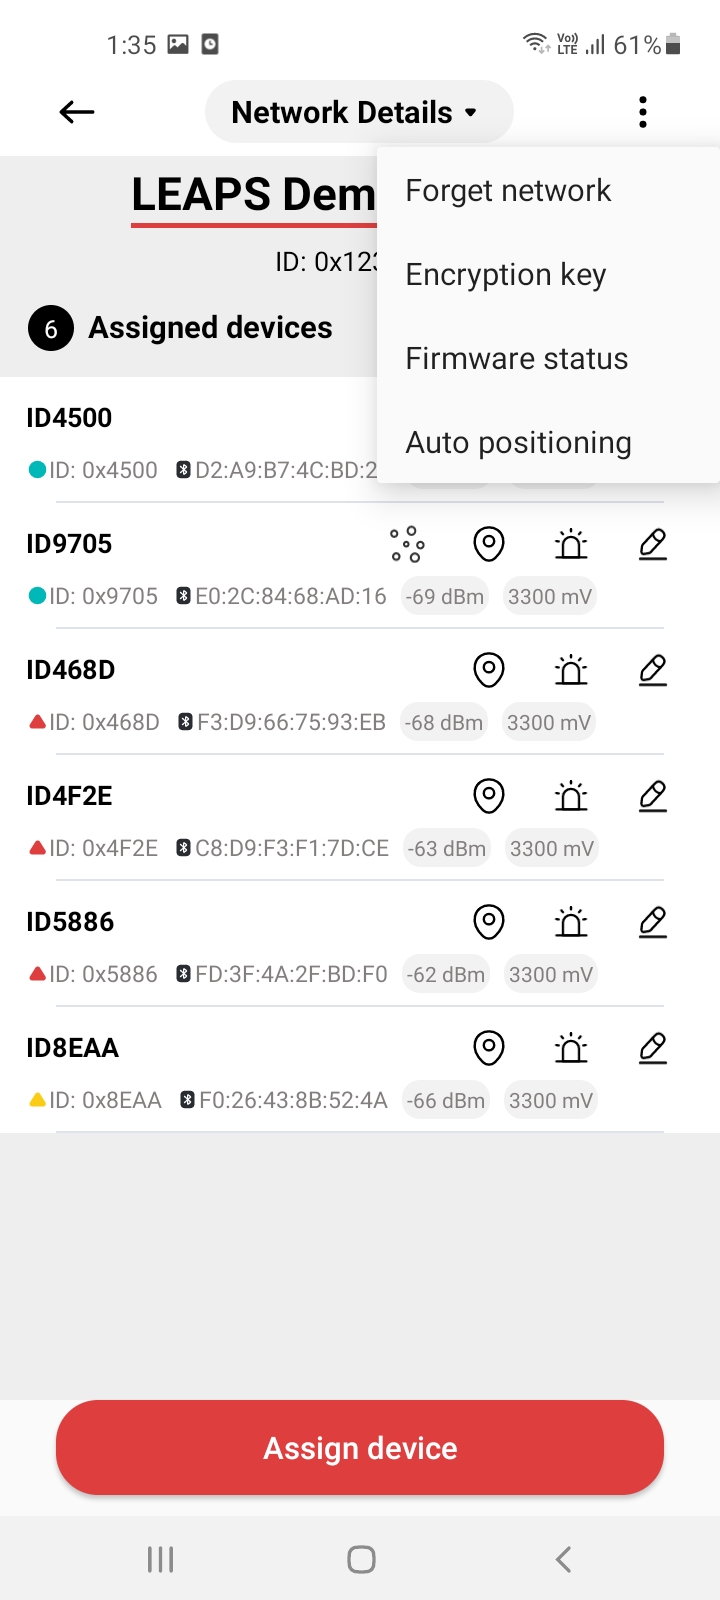
デモセレクター に移動します。また、作成したネットワークに移動して、ネットワーク内のデバイスを更新することもできます。
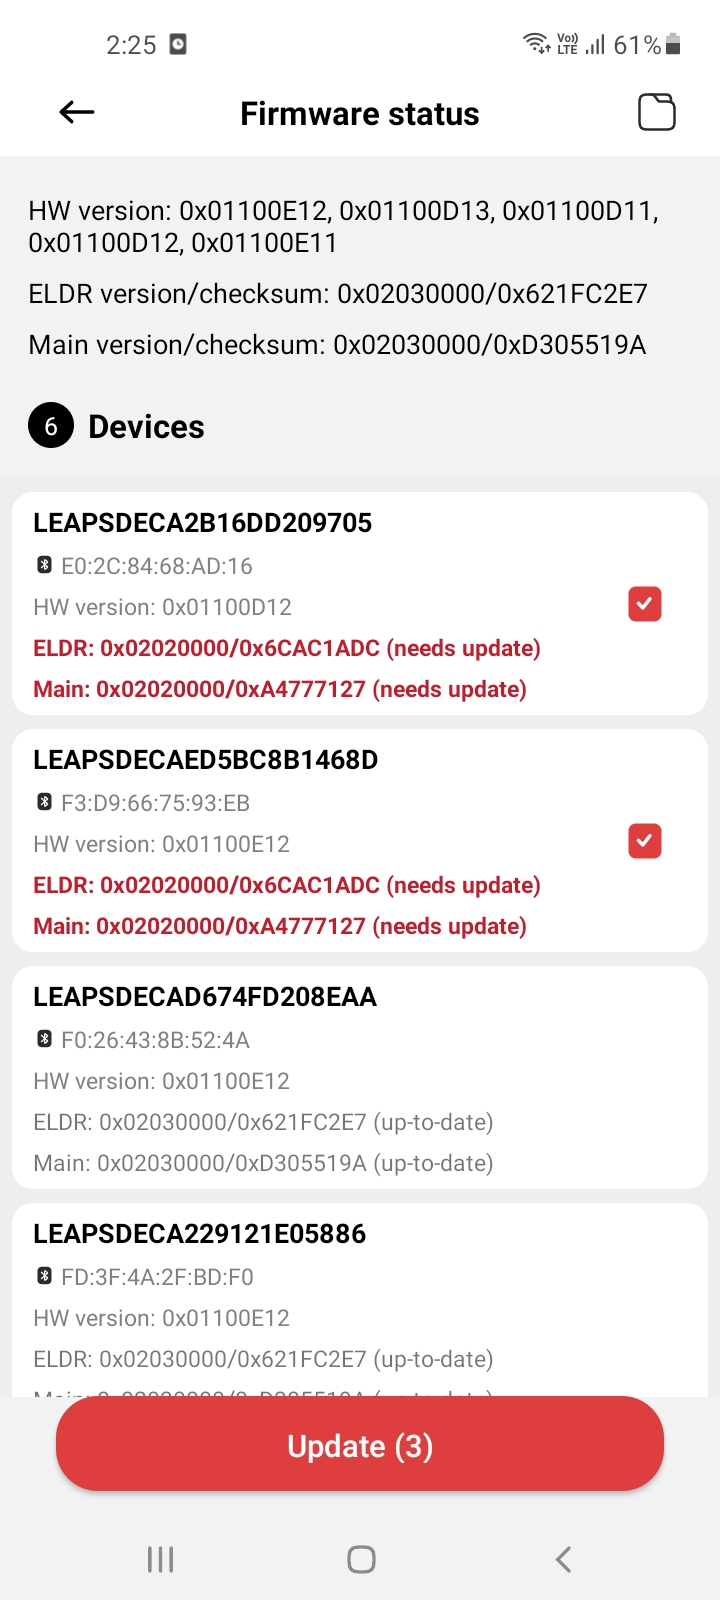
ファームウェアステータスにアクセスします。 アプリケーション内の オプションメニュー をタップします。 (縦に3つの点で表示) をタップします。 Firmware status オプションを探し、選択します。
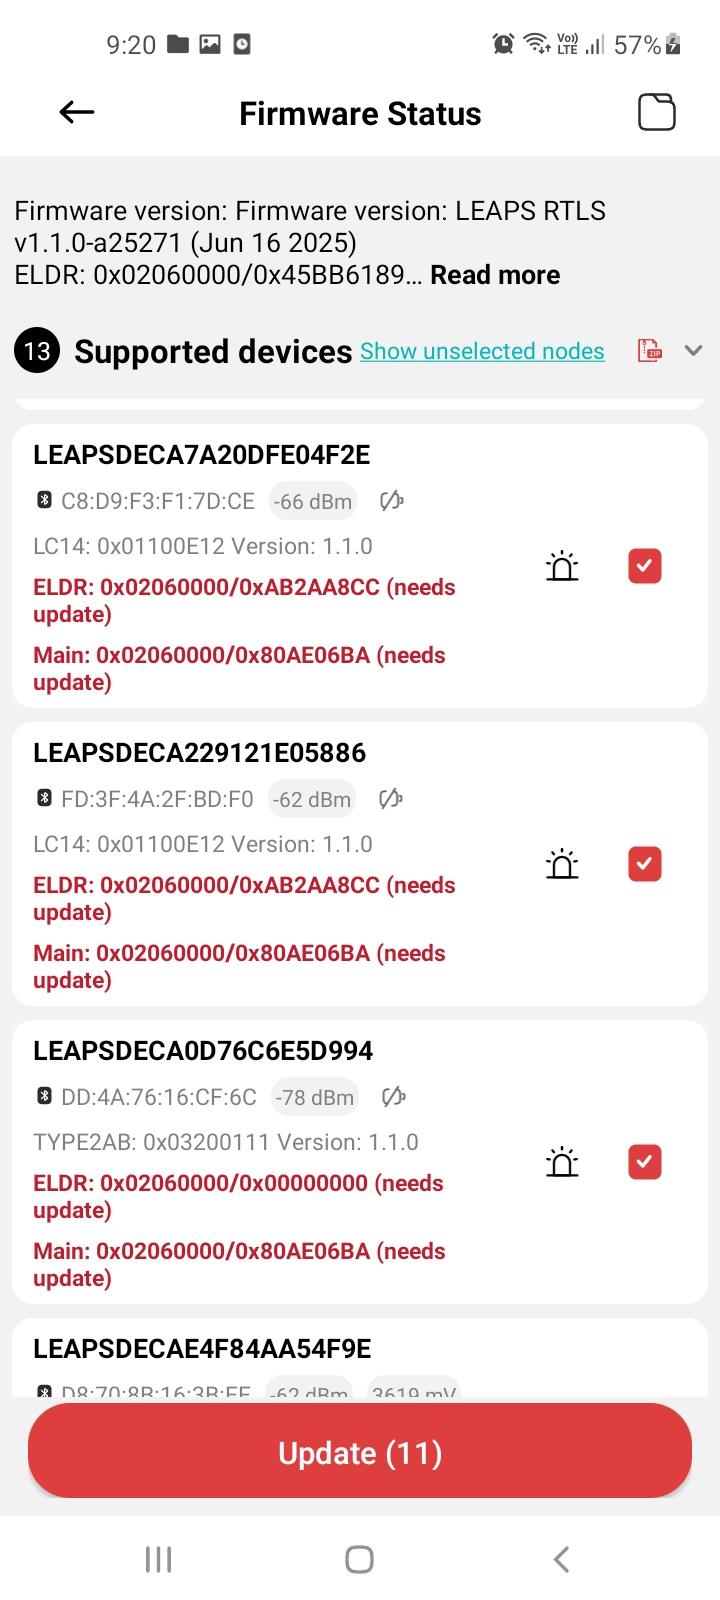
更新するデバイスを選択します。
注釈
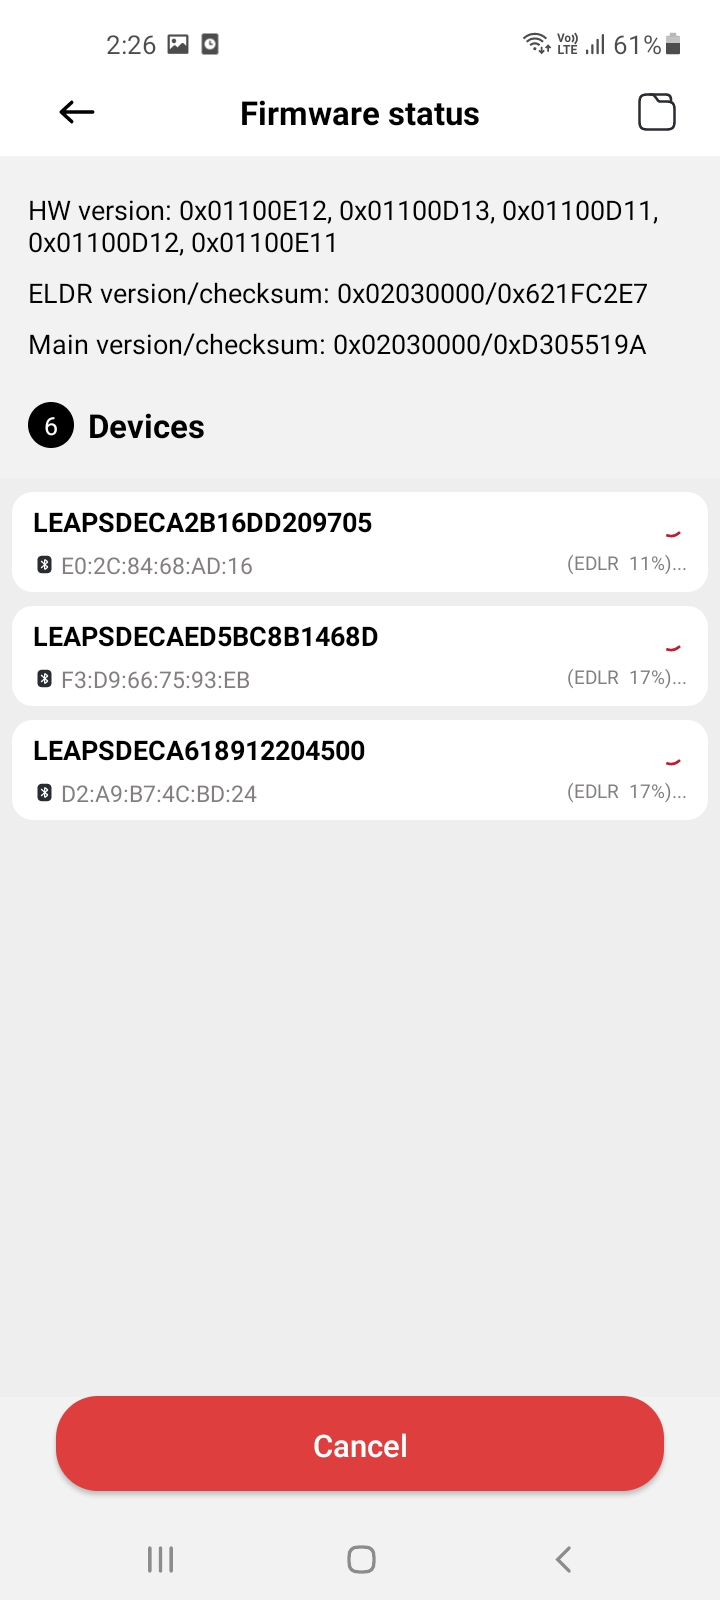
BLE経由のファームウェアの速度は約1.6kBpsです。
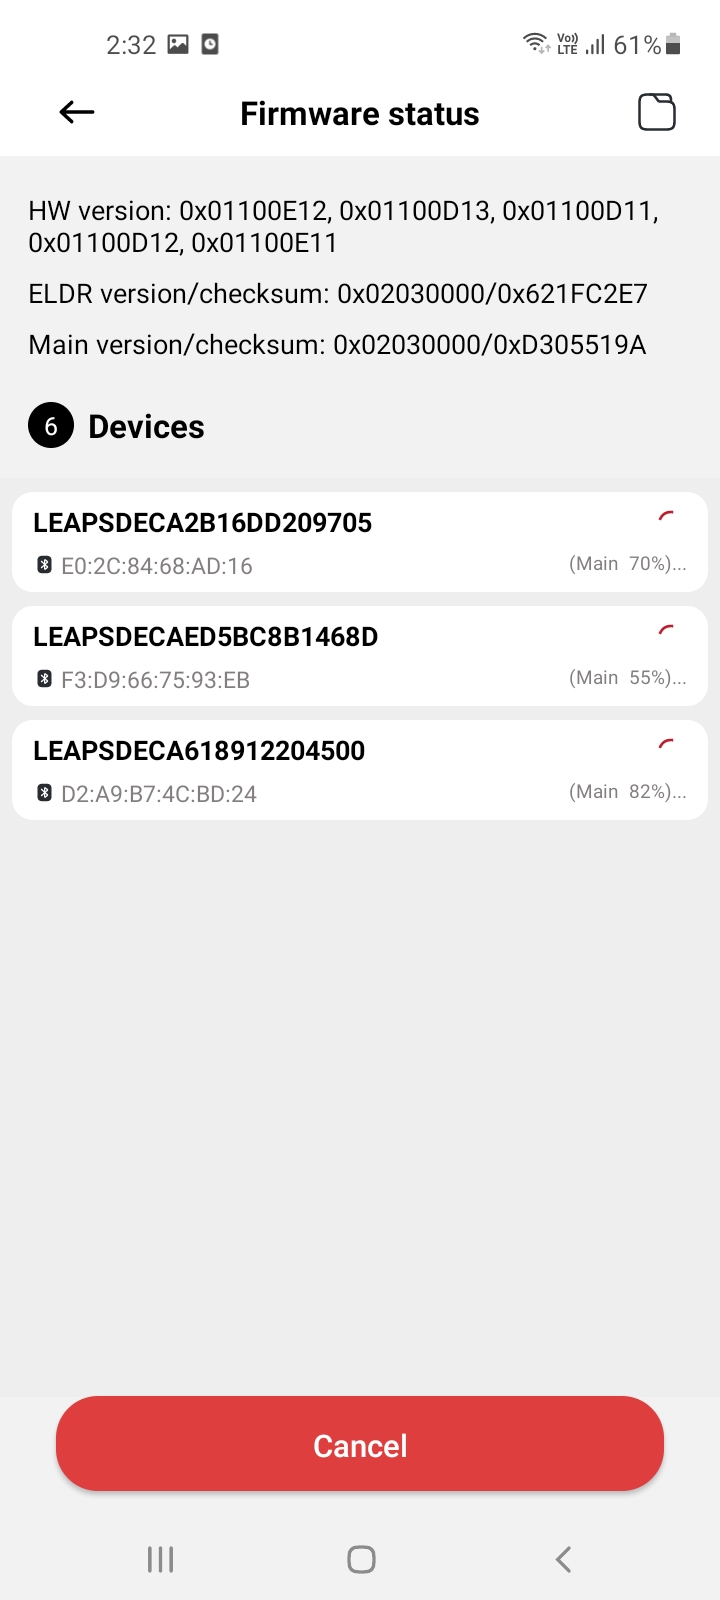
アプリは、更新の進行状況を示す視覚的なインジケーターまたは進行状況バーを提供します。アップデートプロセスが完了するまで、辛抱強く待ってください。
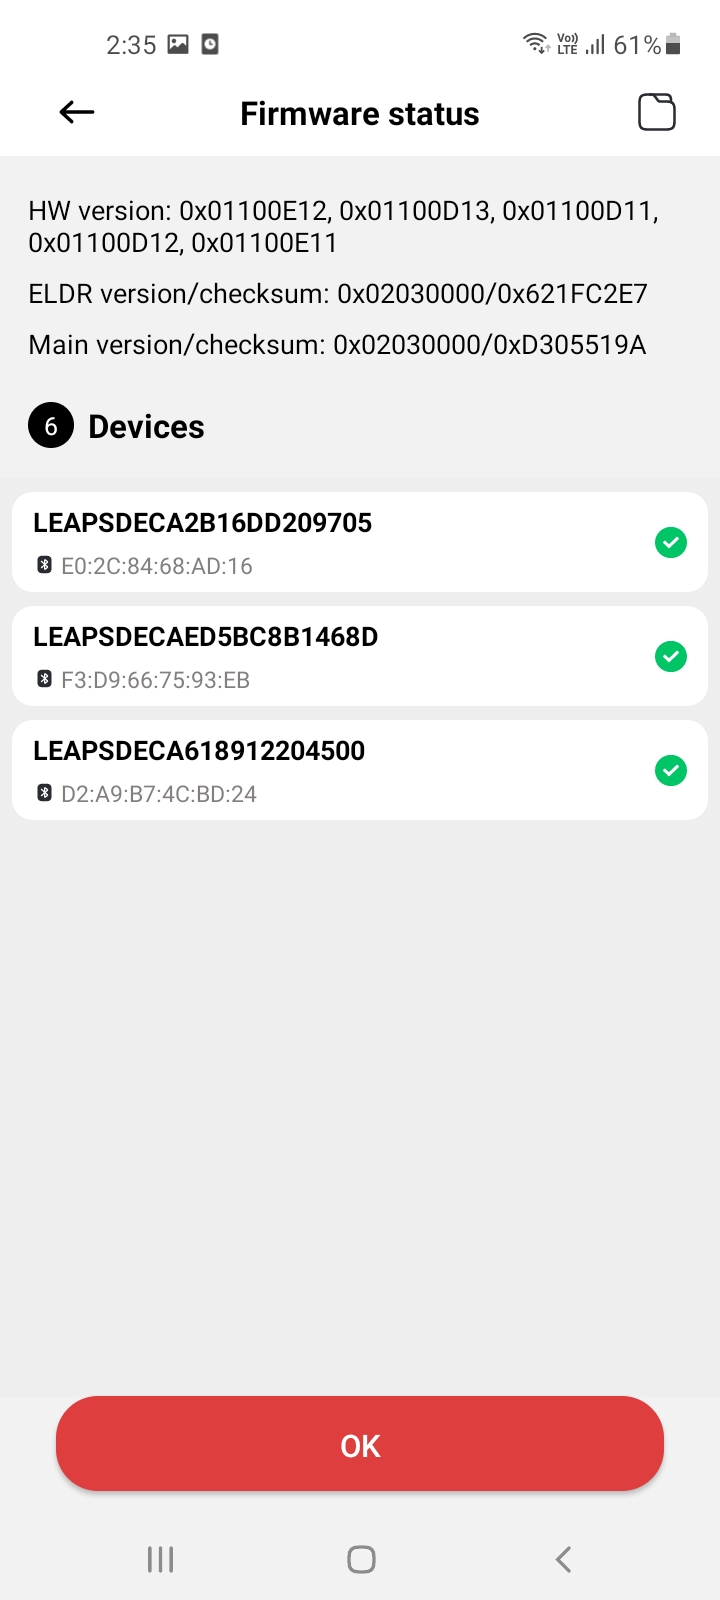
更新が完了すると、ステータスが完了 と表示されます。さらに、デバイスは更新が成功したことを示すビープ音を2回鳴らします。ボードはプロセスの一環として自動的にリセットされます。
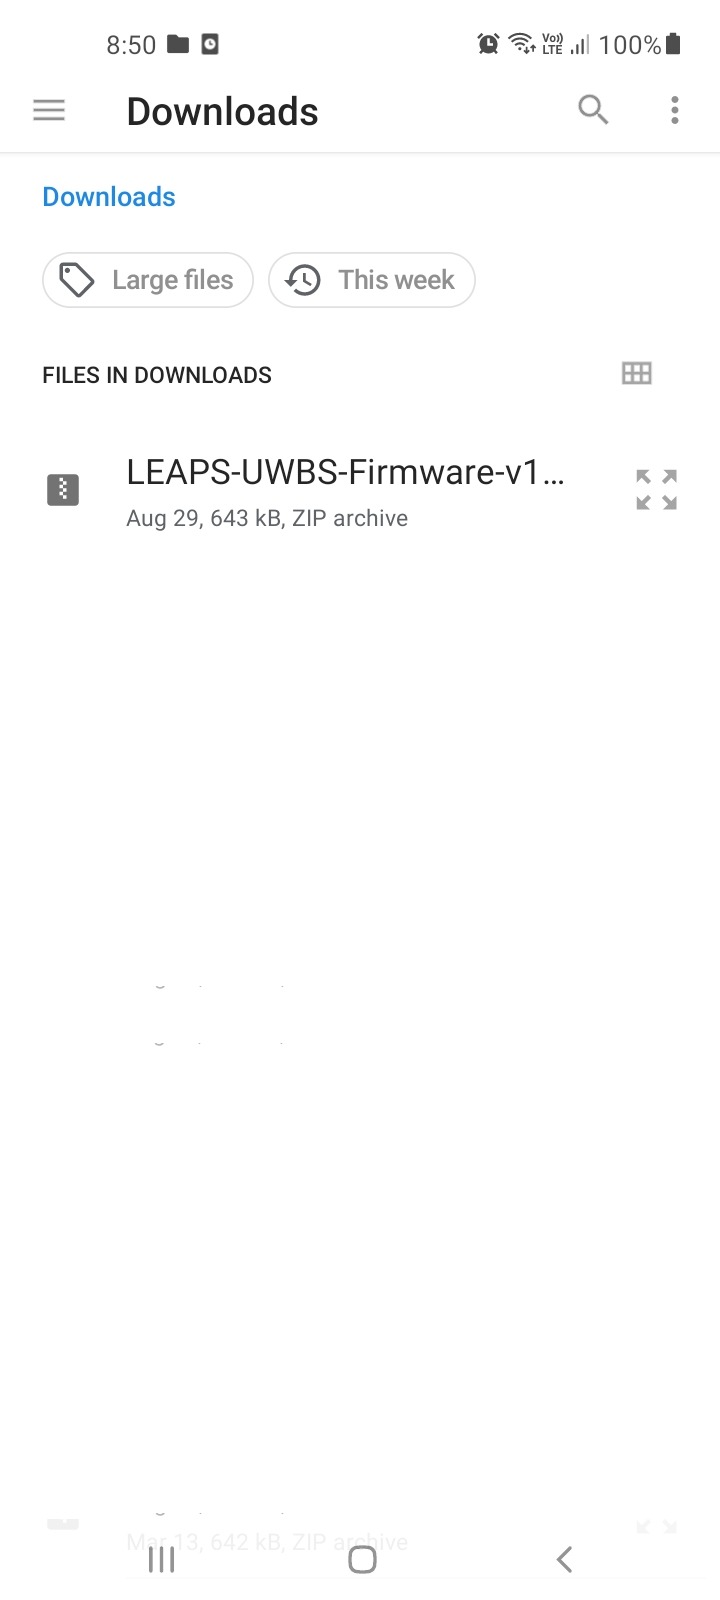
Download the LEAPS-UWBS-Firmware-v1.1.0-package.zip file to your PC. Use a program like WinZip or 7-Zip to extract the contents of the downloaded file.
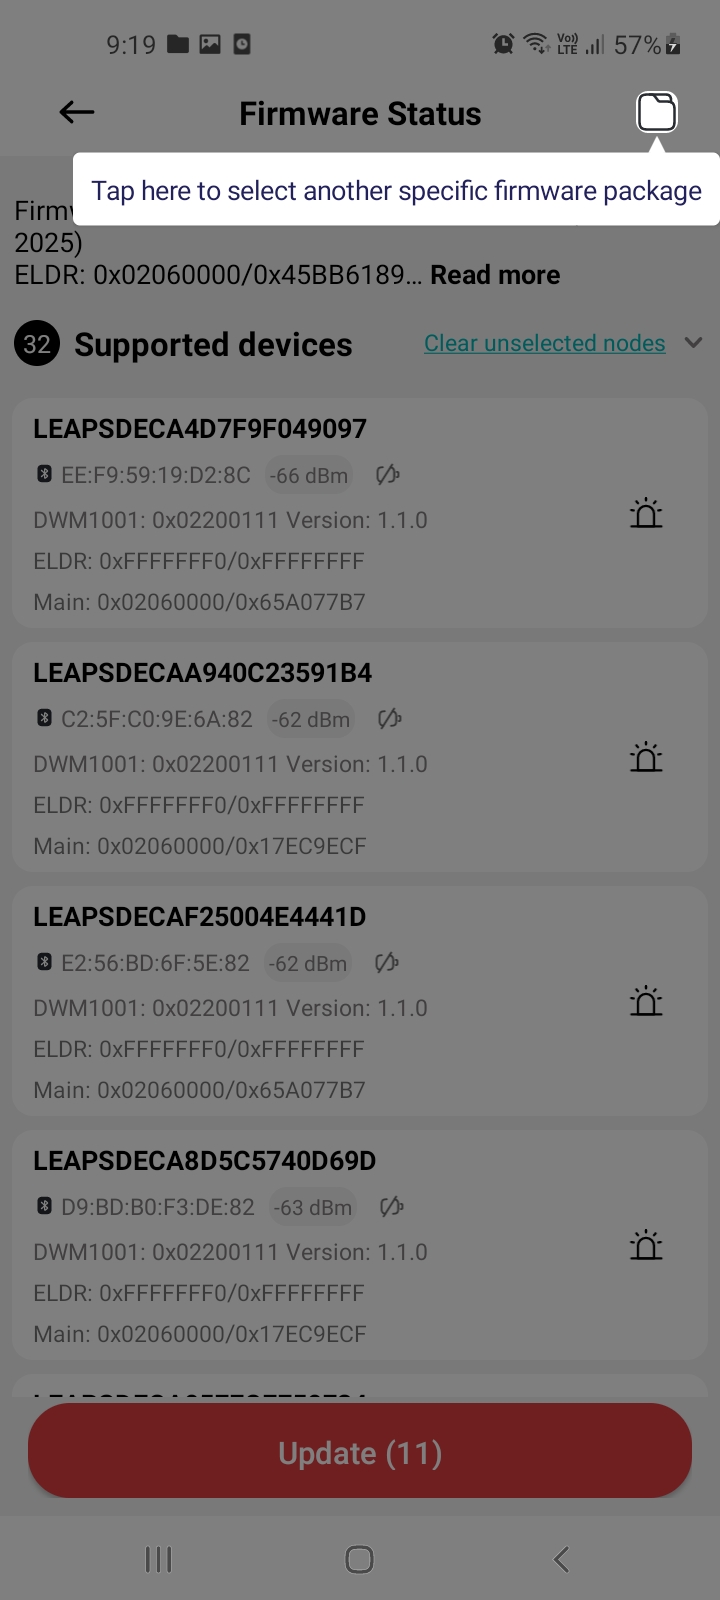
Open the LM and navigate to the Demo Selector. Additionally, you can navigate to the created network to update the devices in the network. Access firmware status. Tap the options menu (represented as three vertical dots) within the application. Look for the Firmware status option and select it.
In the top-right corner, click button to select the firmware Package.
After successfully selecting the package, choose the devices to update.
アプリは、更新の進行状況を示す視覚的なインジケーターまたは進行状況バーを提供します。アップデートプロセスが完了するまで、辛抱強く待ってください。
更新が完了すると、ステータスが完了 と表示されます。さらに、デバイスは更新が成功したことを示すビープ音を2回鳴らします。ボードはプロセスの一環として自動的にリセットされます。
オートポジショニング
1. はじめに
このガイドでは、アプリケーションでこのツールを効果的に使用する方法について説明します。
自動配置機能を使用すると、選択したアンカーに基づいてノードを正確に配置できます。最適なパフォーマンスを得るには、適切な設定が不可欠です。
はじめに
自動配置へのアクセス
アンカーの選択
計算モードの設定
測定の開始
位置の再計算
マップ上でノードの位置を表示および調整する
設定の保存
よくある質問
2. 自動配置へのアクセス
自動配置機能にアクセスするには、ネットワークの状態に応じて、次のいずれかの方法でアクセスしてください:
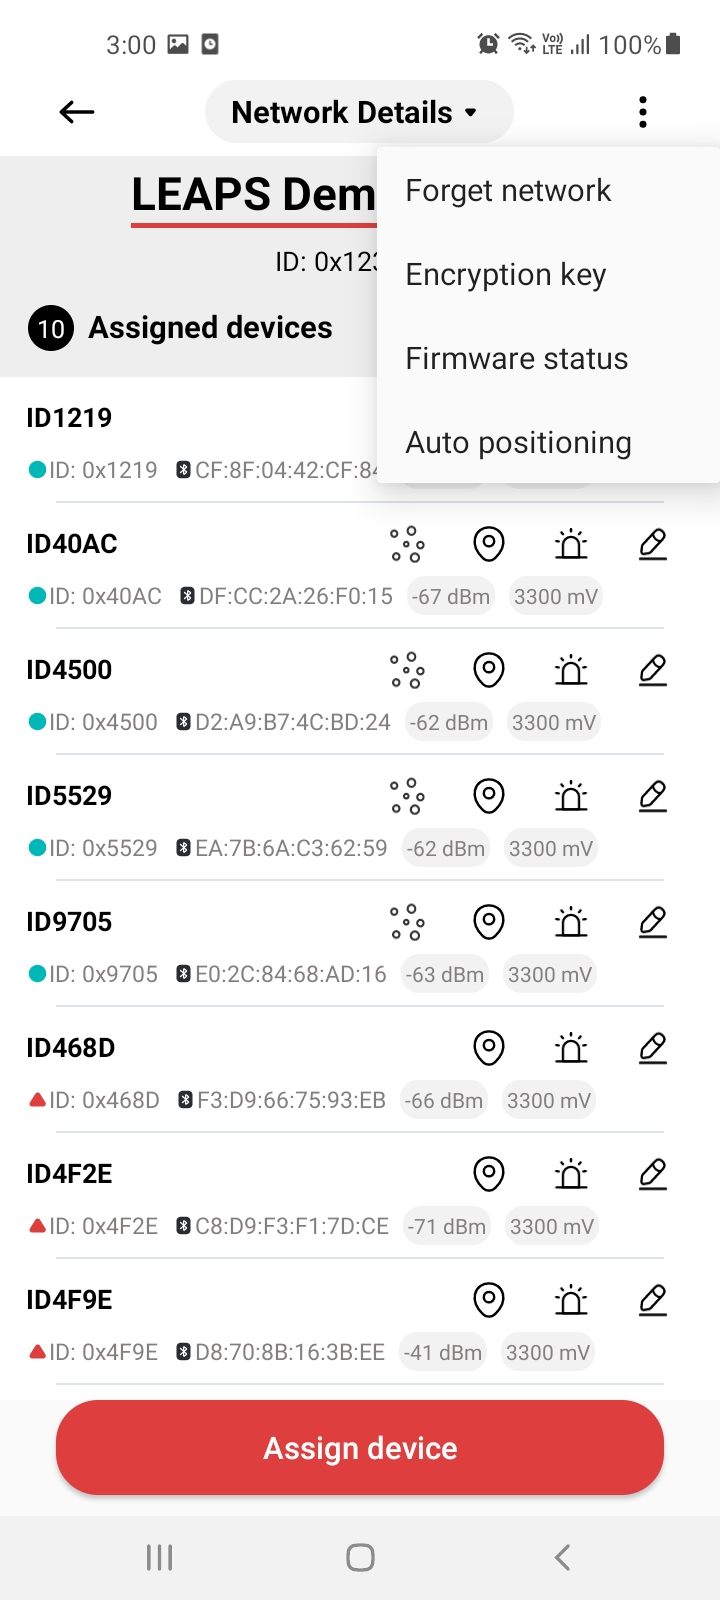
メニューへのアクセス
メニューアイコンをタップ:画面の
右隅にあるメニューアイコンをタップします。メニューから
自動配置機能を選択します。
自動配置を選択します。
Demo Selectorにアクセスします。そこから
自動配置オプションを選択します。
|
|
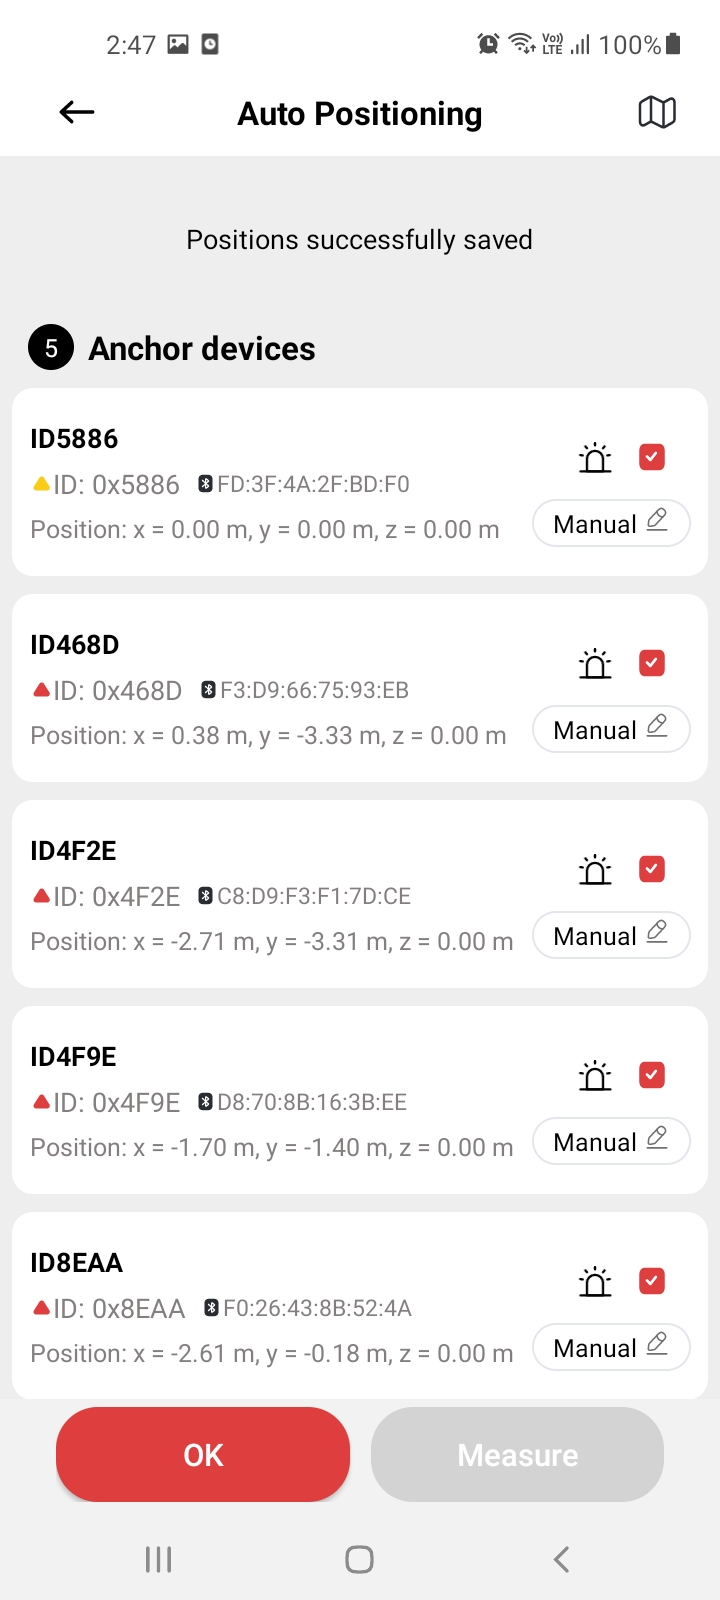
3. アンカーの選択
アプリケーションはアンカーのリストを表示します。
アンカーの選択:
少なくとも``2つのアンカー`` の横にあるチェックボックスをオンにしてください。
1つのアンカーが開始アンカーとして指定されていることを確認してください。正確な位置決めを行うには、アンカーが
直立し、互いに向き合っている必要があります。
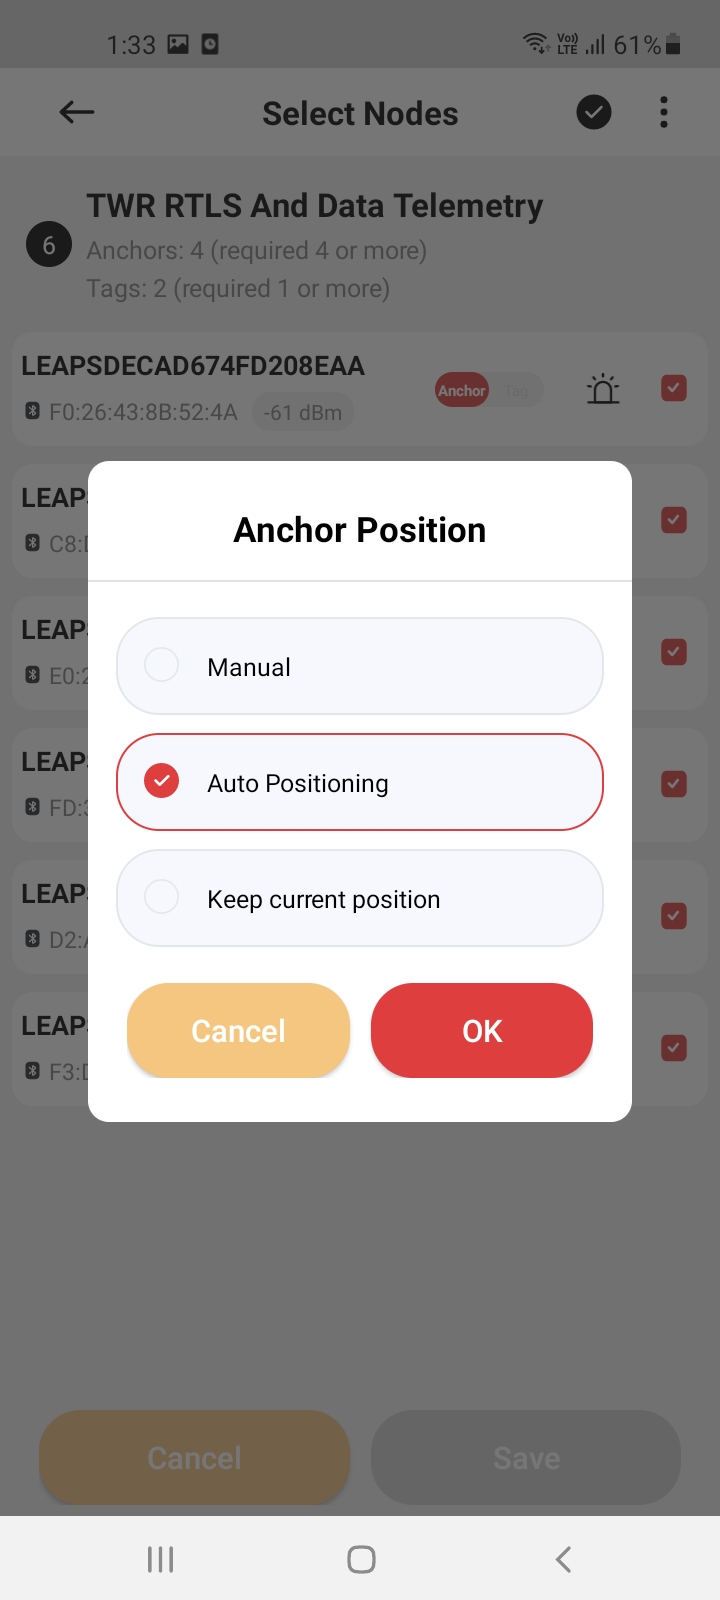
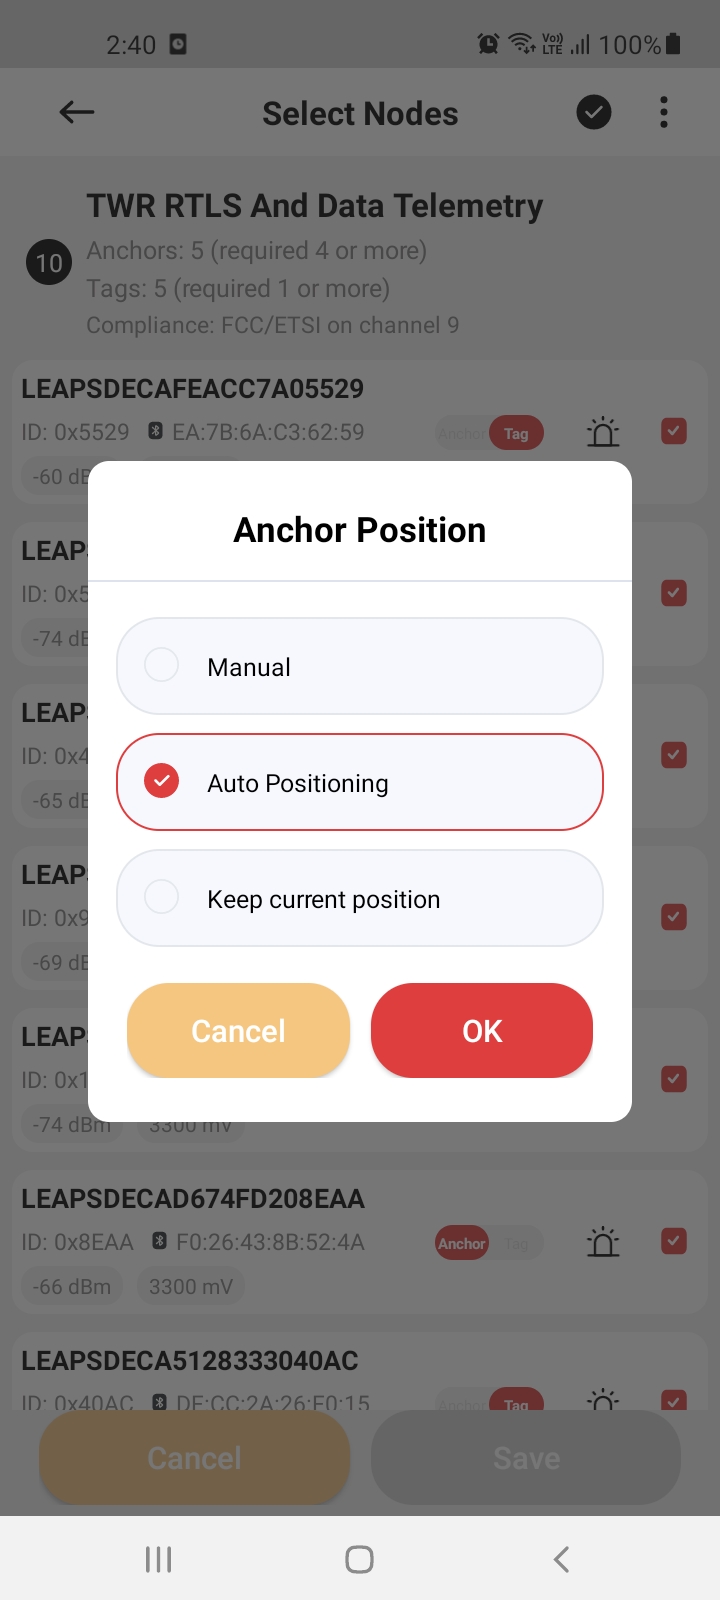
4. 計算モードの設定 (オプション)
計算モード: すべての設定を
計算に設定すると、アプリケーションはノードの位置を自動的に計算します。手動モード:
手動に設定すると、手動で調整または再計算するまで、位置はほぼ固定されたままになります。
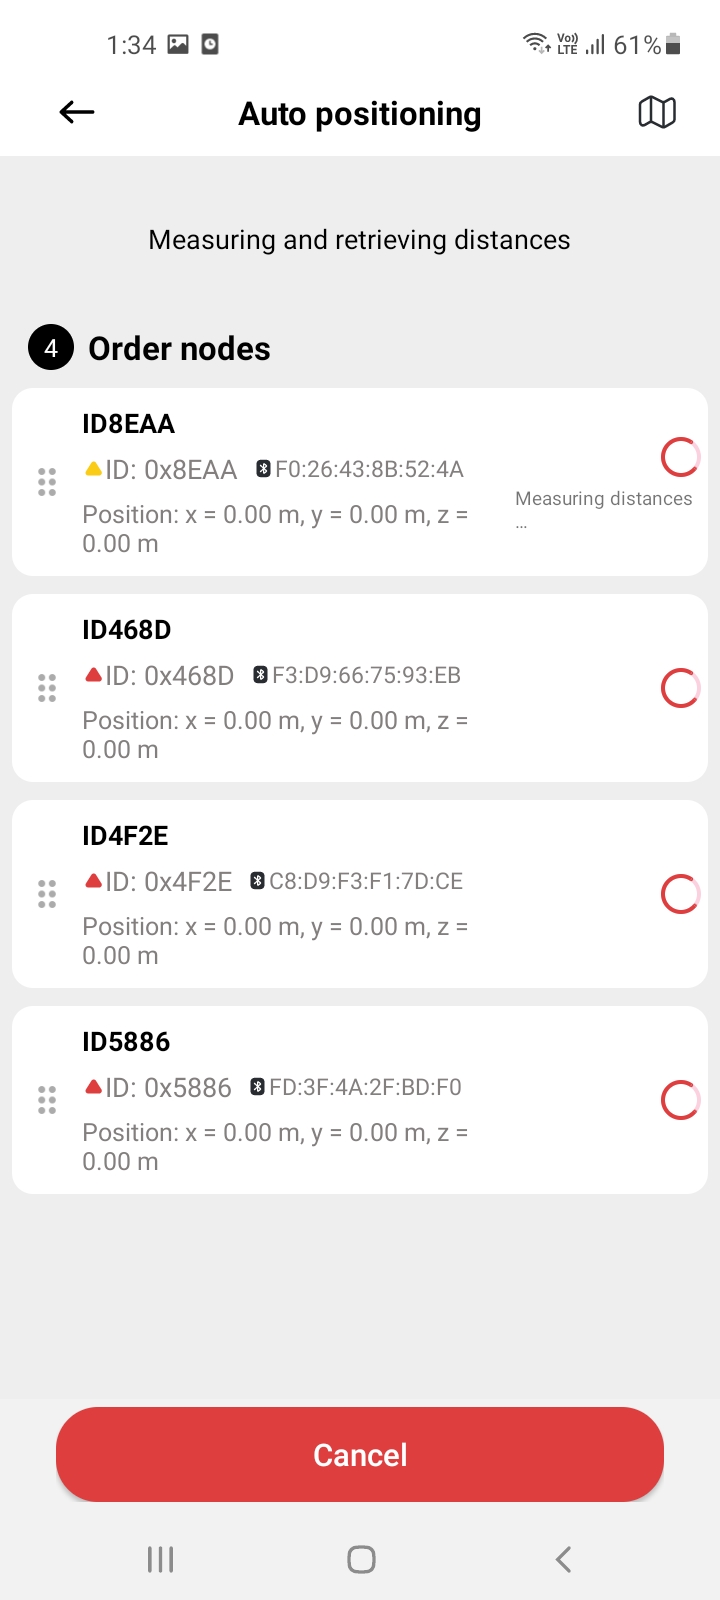
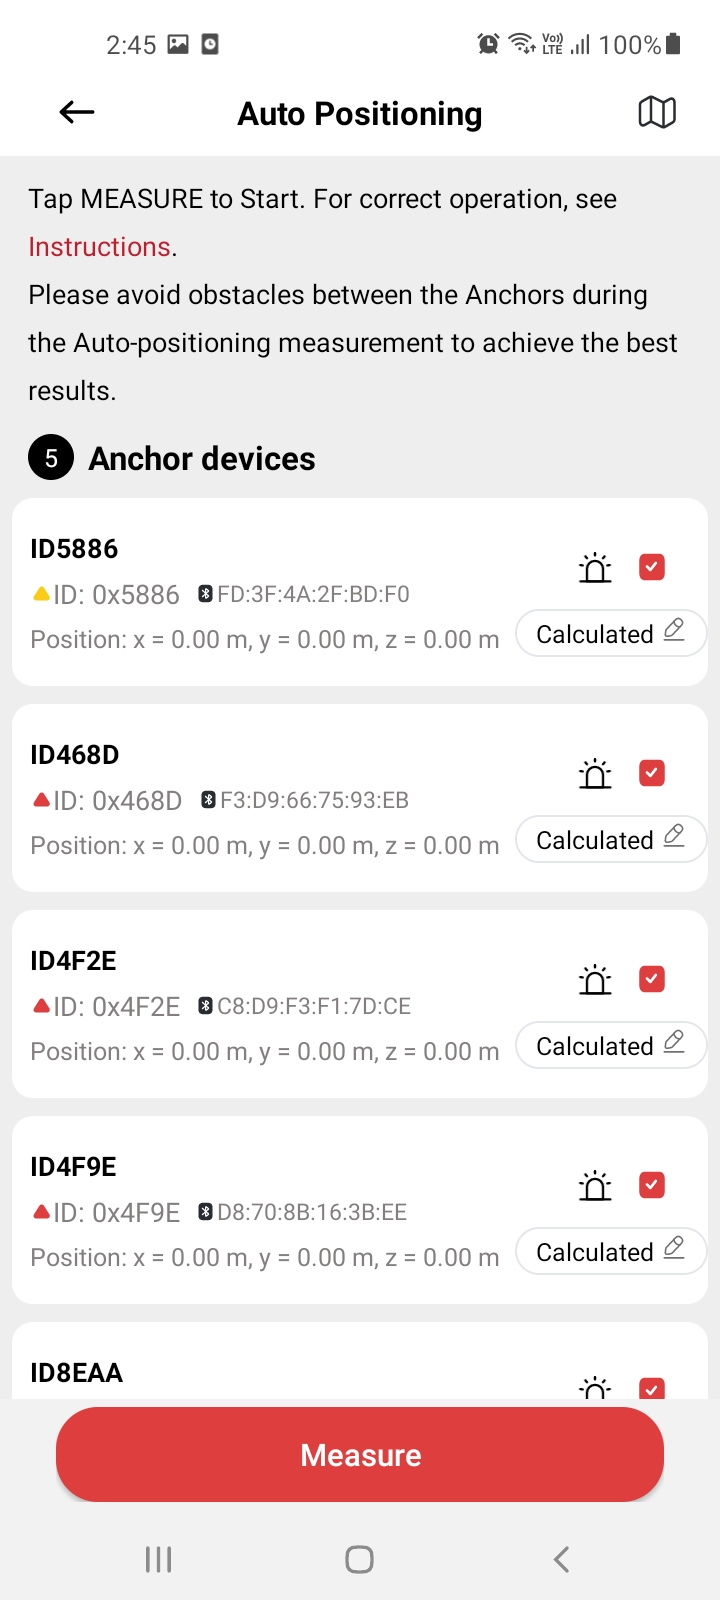
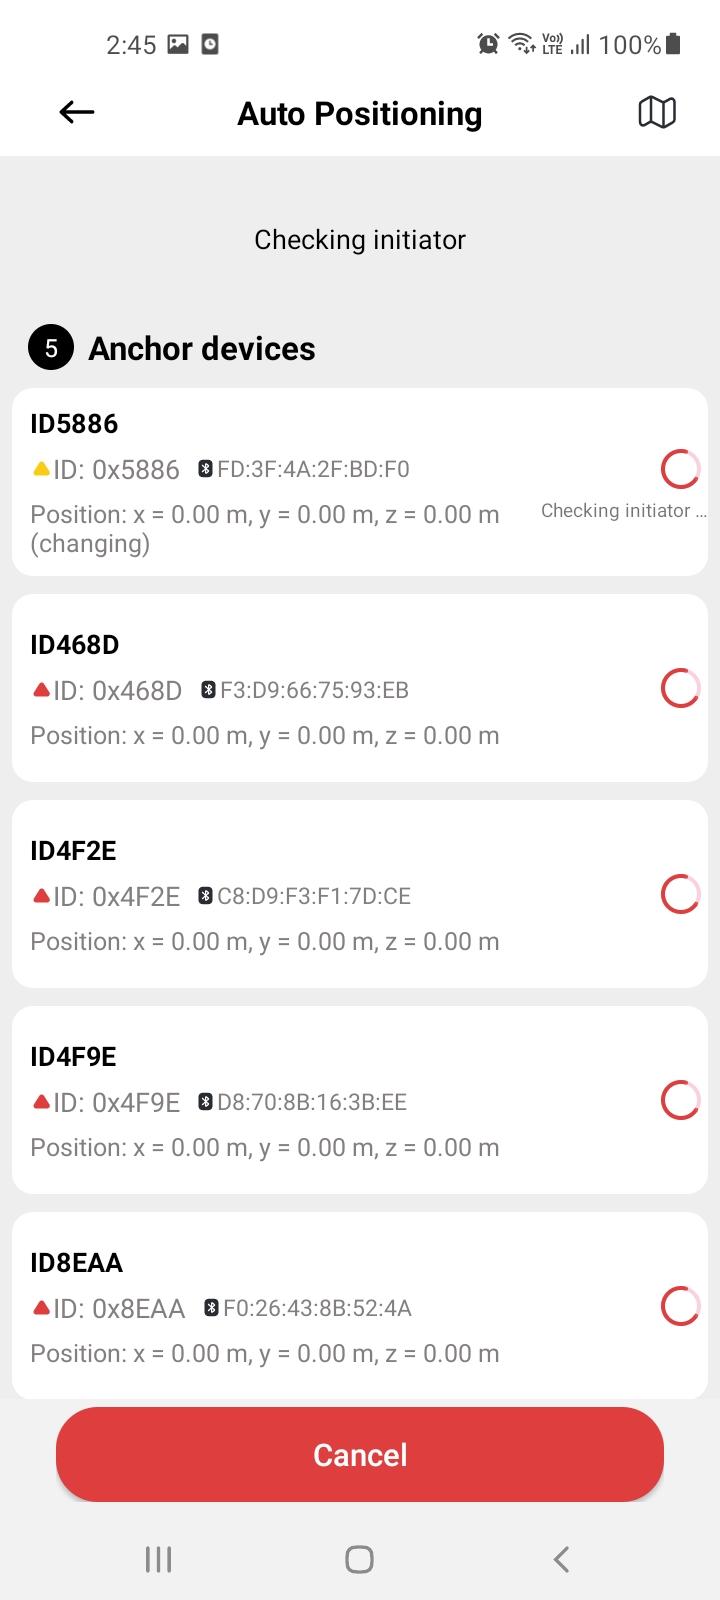
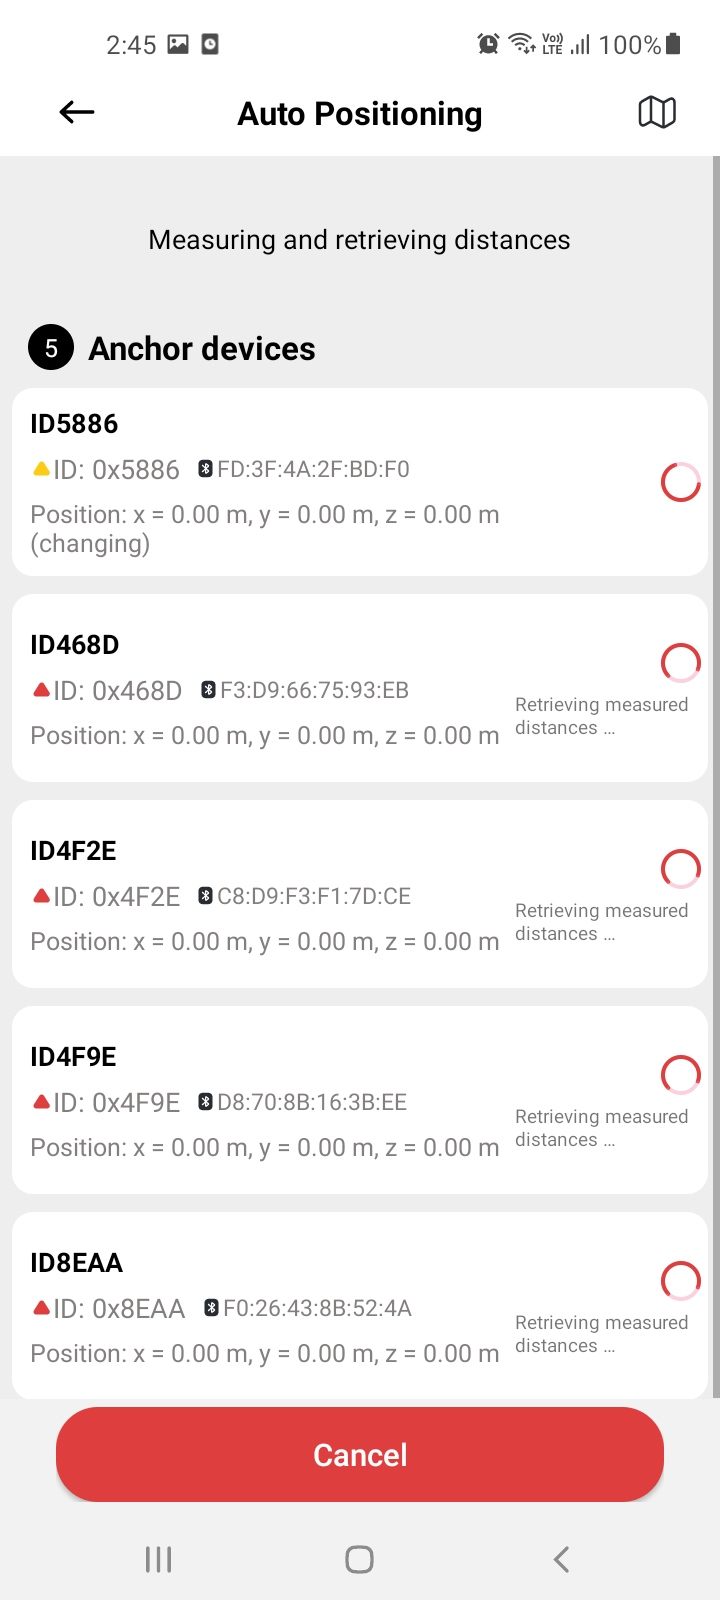
5. 測定の開始
アンカーを選択したら、測定 ボタンをクリックして位置決めプロセスを開始します。
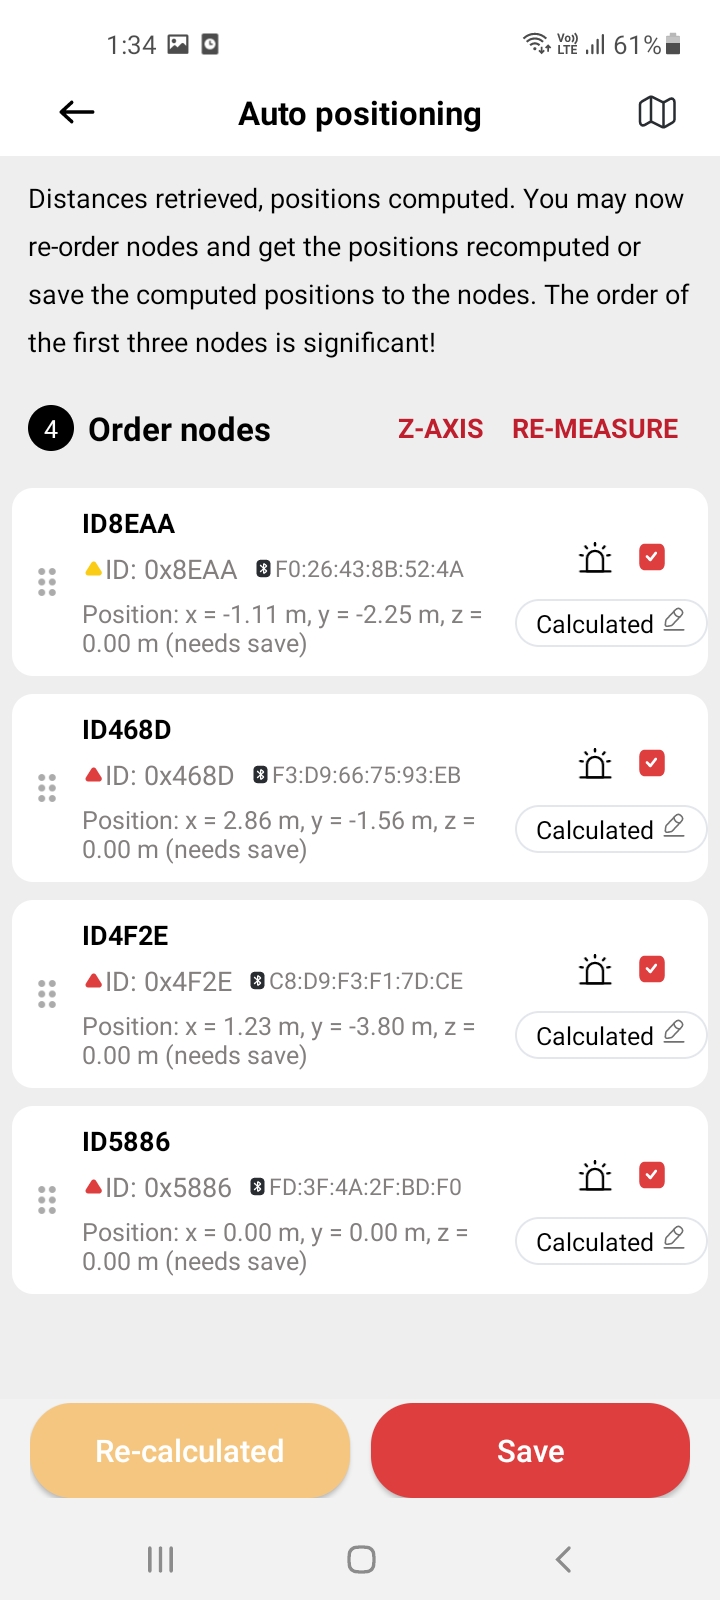
完了を待つ: プロセスが終了するまで待ちます。選択したノードの位置情報が表示されます。
|
|
|
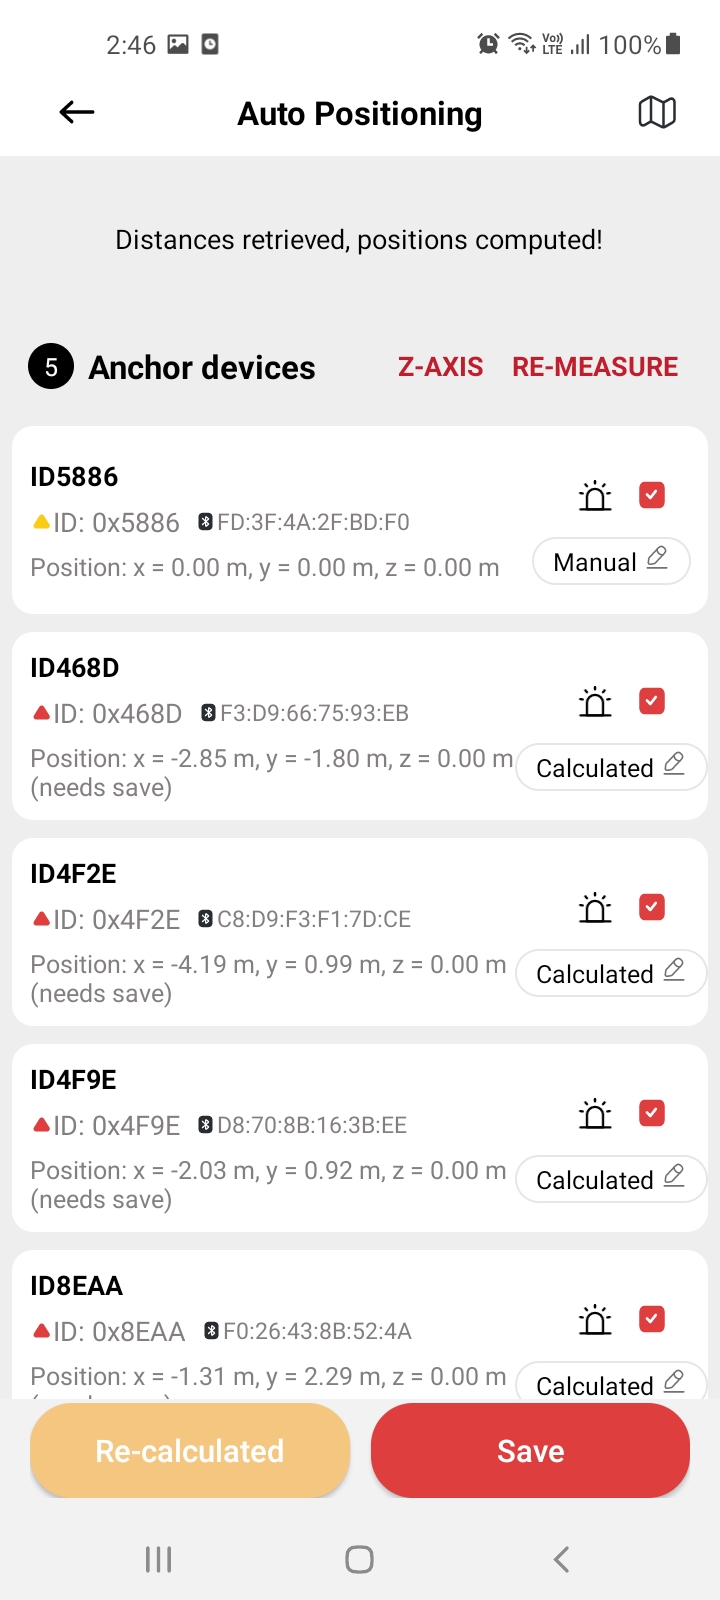
6. 位置の再計算 (オプション)
調整が必要な場合は、
再計算ボタンを押して再計算してください。
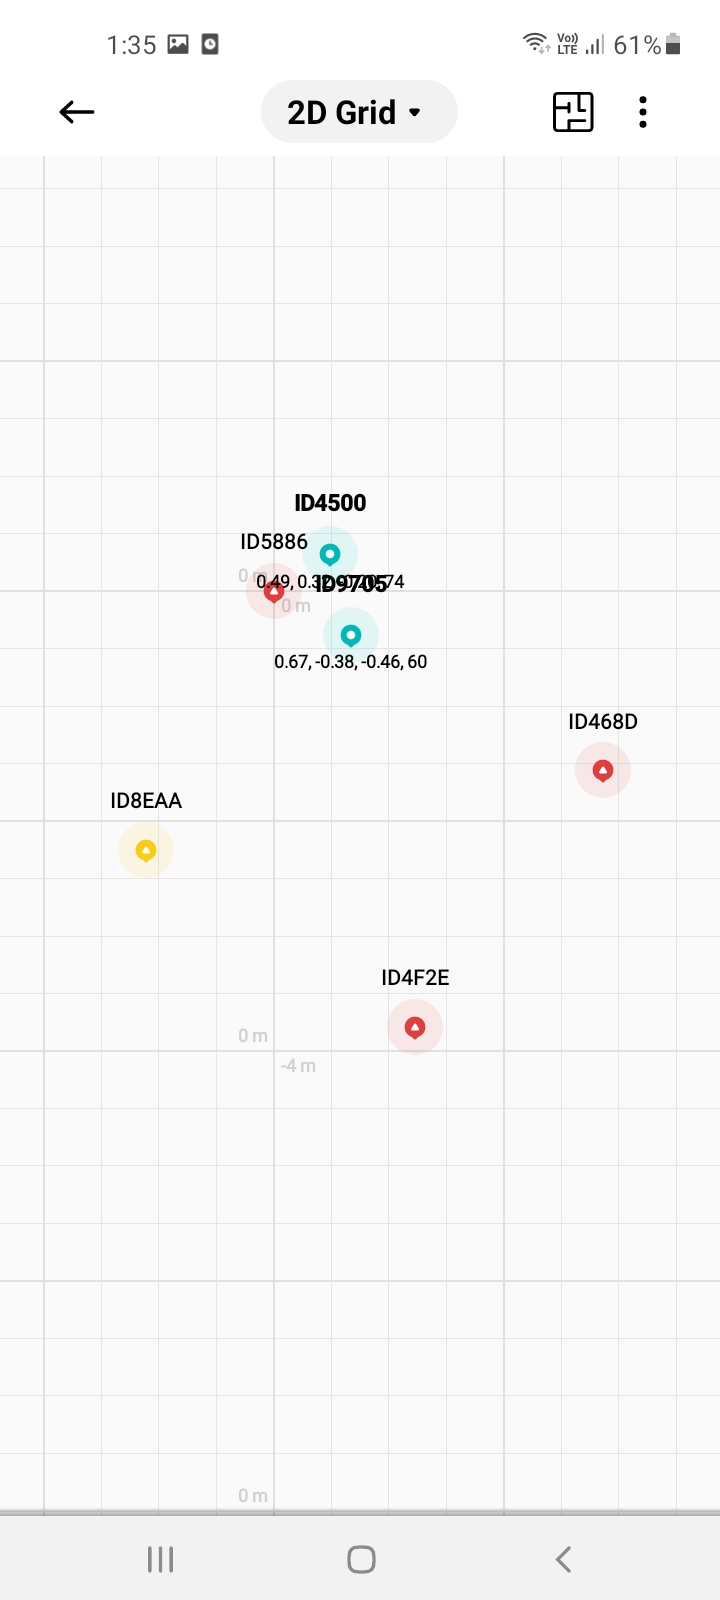
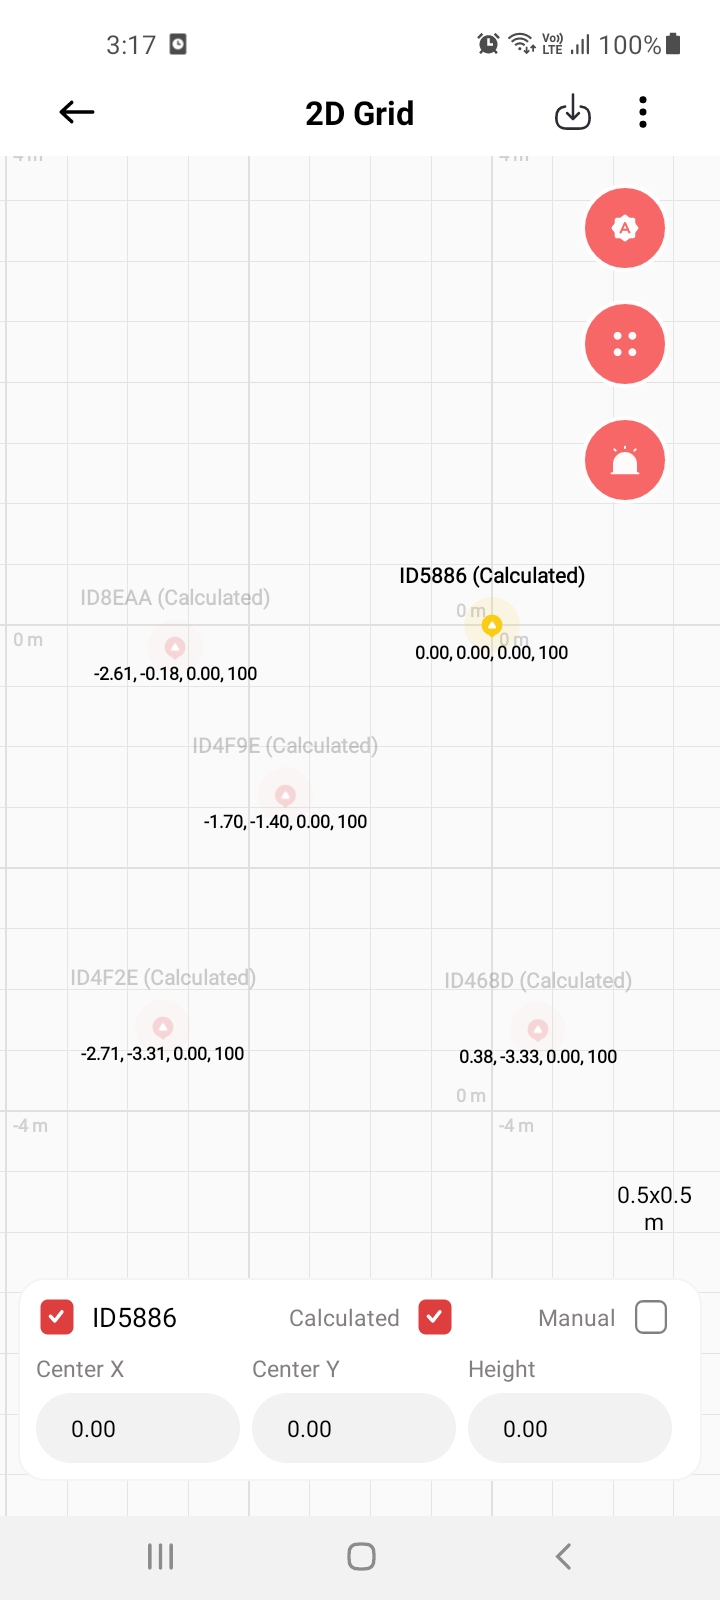
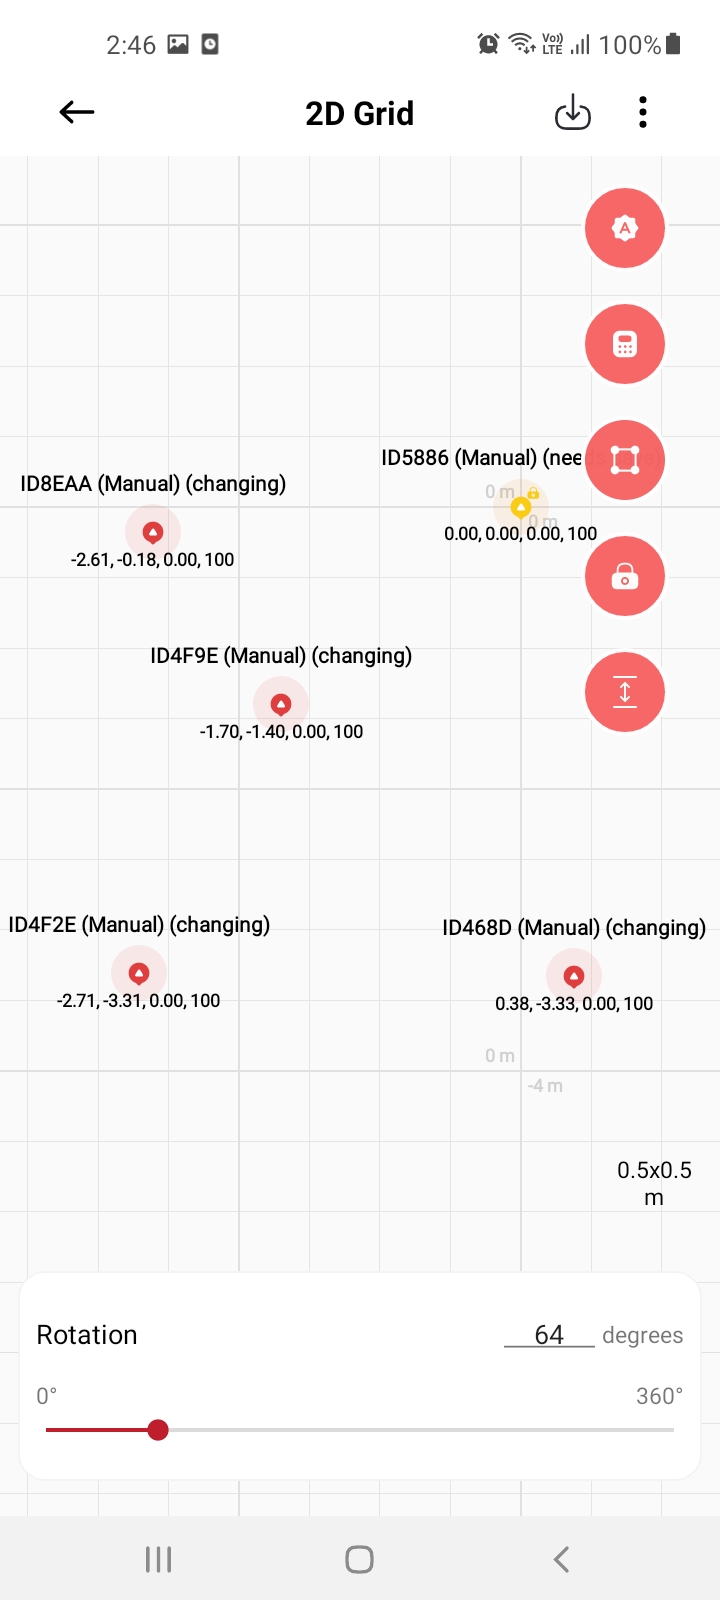
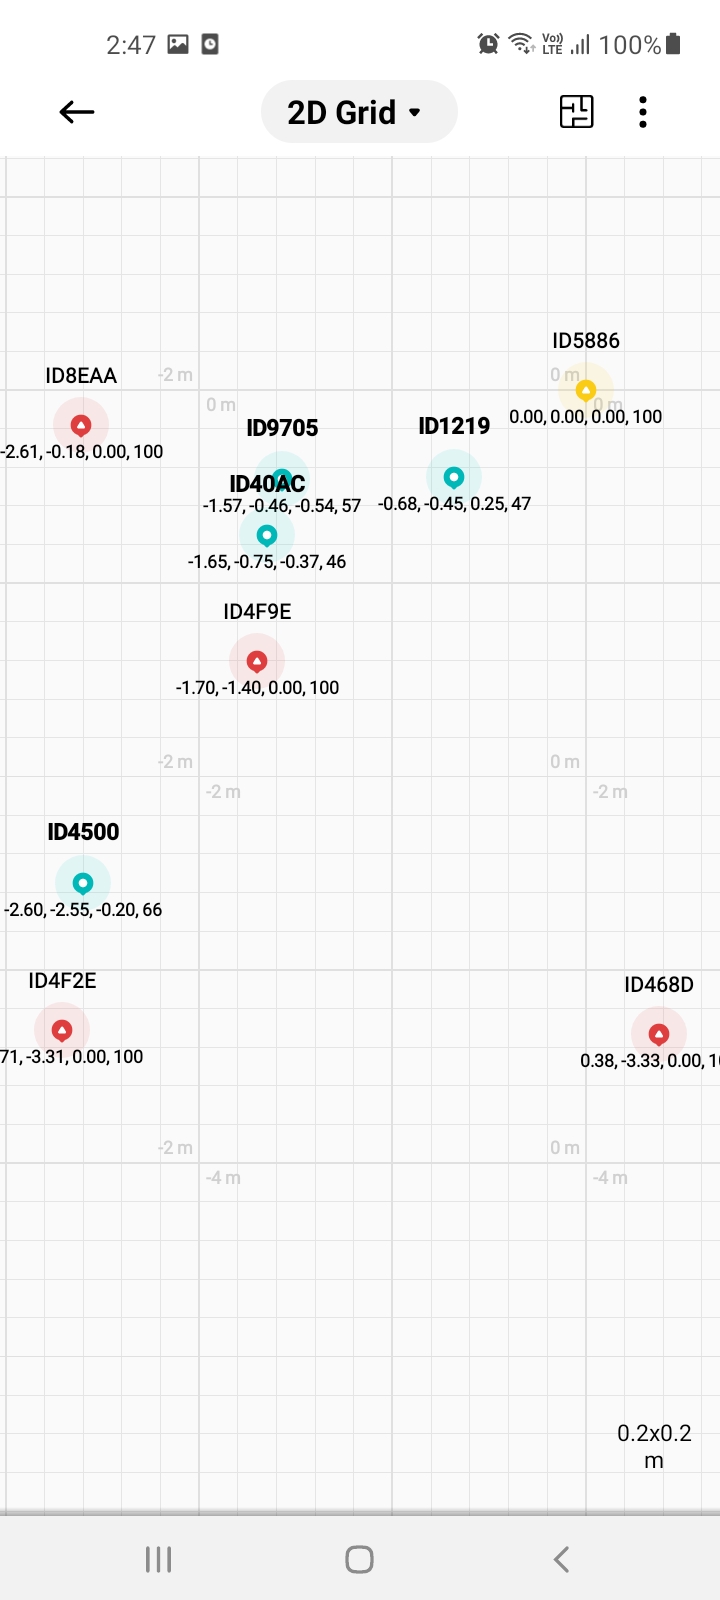
7. 2Dグリッド上のノード位置の表示と調整 (オプション)
マップへのアクセス:
右上隅のマップアイコンをタップすると、ノードのリアルタイム位置が表示されます。
ノード位置の調整:
回転機能を使用してノードを
回転します。必要に応じて、各ノードの
特定の位置を設定します。ノードを
ホールドすると、ノードを任意の場所に自由に移動できます。このインターフェースから自動配置や再計算を行うこともできます。
|
|
|
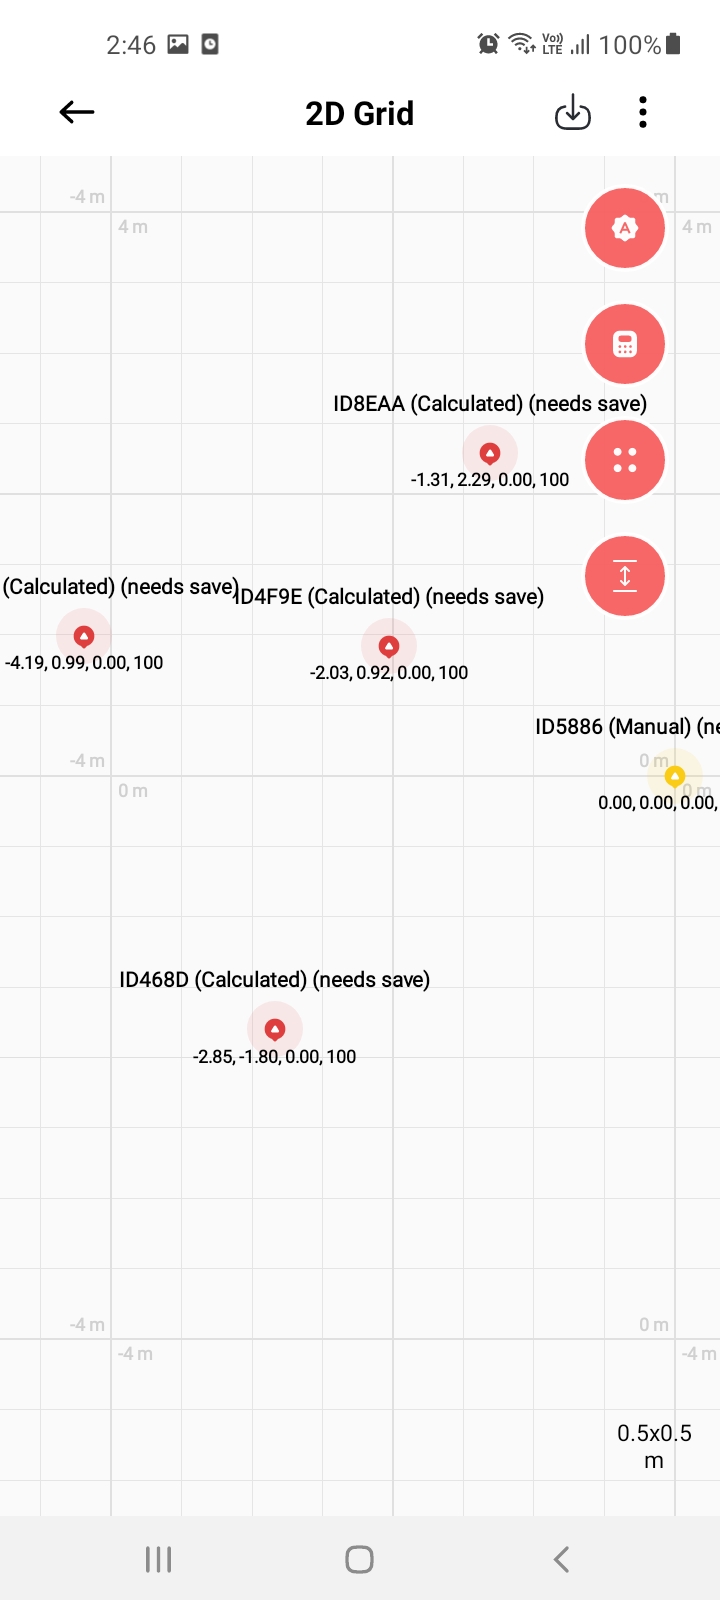
8. 設定の保存
調整が完了したら、2Dグリッドの
上部ツールバーにある保存ボタンまたは保存アイコンを押します。
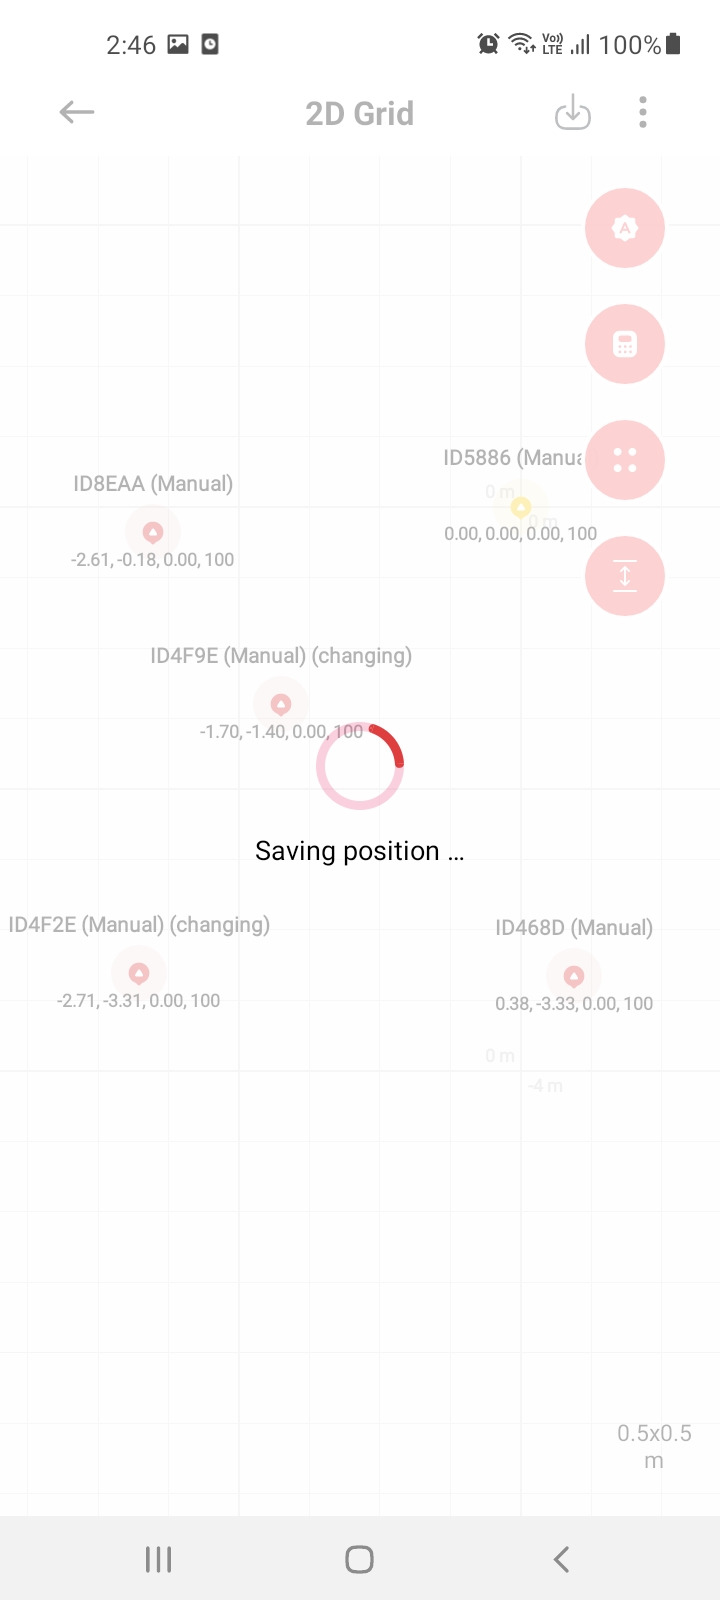
2Dグリッドに戻り、ネットワーク設定の作業を続行します。
よくある質問
- Q: リストにアンカーが表示されない場合はどうすればよいですか?A: ネットワークがアクティブで、環境内でアンカーが適切に設定されていることを確認してください。
- Q: 測位に1つのアンカーを使用できますか?A: いいえ、正確な結果を得るには、少なくとも2つのアンカーを選択する必要があります。
トラブルシューティング
BLE接続が安定していること、およびデバイスが通信範囲内にあることを常に確認してください。