Firmware Update
This section describes ways to update the firmware. We support many different ways, such as via Bluetooth, SWD, OpenOCD, or UWB.
For more detailed information, select the method you want to use below:
Via Bluetooth Interface
If one wants to update the entire network to a new firmware image while the network is operational, it is sufficient just to update the initiator via Bluetooth. The initiator will then automatically propagate the new firmware to all other devices over the UWB radio link. Note that as the initiator is updated first, it will restart the network, and as each device rejoins the network, its firmware will be updated. Thus, during the FW update, the nodes performing the update will be “offline”.
To get started, please download the PANS PRO Manager application (available in the Google Play)
By default, a login account with username is admin and password is admin in case settings enable user management.
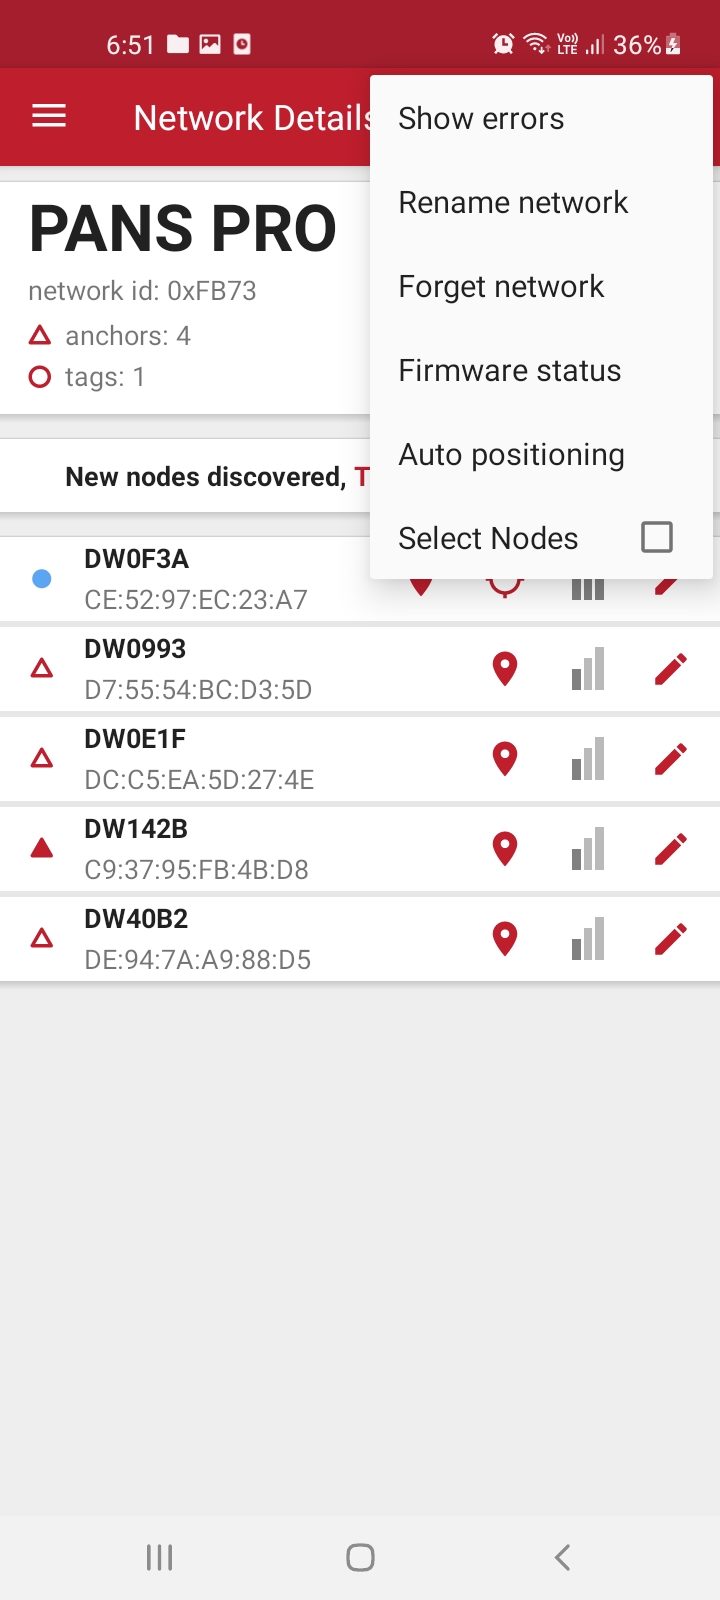
Access firmware status. Tap the options menu (represented as three vertical dots) within the application.
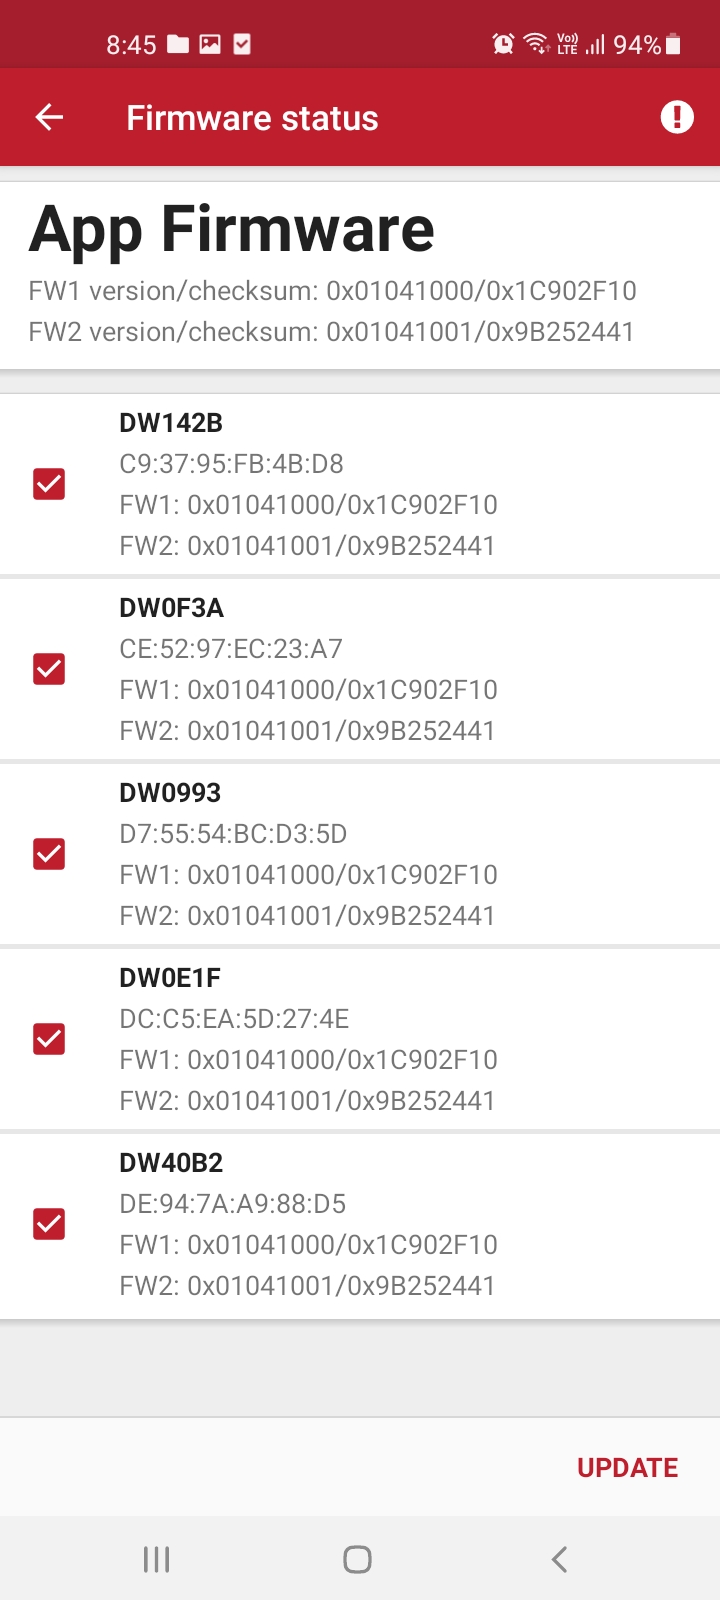
Look for the Firmware status option and select it.
Choose the devices to update.


Firmware update using SWD programmer
DWM1001C on LC4/LC5
Unnamed board
Programming the binary
The necessary steps to flash the factory image on the boards are described below. In order to reflash it is necessary to use J-Link or CMSIS-DAP programmers. The boards have to be powered via USB or via battery during the reflash as the programmer connector does not supply the power.
The J-Flash Light software tool can be used to flash the image. This method will be described below. An alternative way is to use the open source tool OpenOCD which is available on various platforms. The PANS PRO software package contains reflash scripts to be used with OpenOCD.
Download and install Segger J-Flash Lite (J-Link software suite): https://www.segger.com/downloads/jlink/#J-LinkSoftwareAndDocumentationPack
Connect the module with a micro USB data cable as shown below.
Open J-Flash Lite.
Choose nrf52832_XXAA as Device and SWD as interface for the DWM1001C. For the host MCU use ATSAME70N19. Use default speed 1000 and click “OK”

Click “Erase Chip” to do a full chip erase.

In Data File, click “…” and browse to the hex file provided in the PANS PRO Software package to flash. Then click “Program Device”. Firmware binaries compatibility
Please contact us for the download package at apps-support@leapslabs.com.
Firmware file |
Target |
Reflash address |
|---|---|---|
pan-pro-all-dwm1001c-vY.XX.hex |
DWM1001C module on LC4 Tag and LC5 Gateway |
0x00000000 |
pans-pro-all-lc5s-vY.XX.hex |
Host MCU SAME70 on LC5 Gateway |
0x00400000 |
Prepare for setup
At least one device.
A package includes a script and a binary for the update.
Installed OpenOCD.
Step-by-step instructions on how to update via OpenOCD (Open On-Chip Debugger):
Installing the OpenOCD Debugger.
Installing OpenOCD on Windows.
Download the binary zip file for Windows.
Extract into the
C:\xpack-openocd-0.11.0-1folder.Add the path:
C:\xpack-openocd-0.11.0-1\binto your Windows User Path environment variable.
Installing OpenOCD on Linux or macOS.
Download the binary tarball for Linux .
Untar the tarball and install into local.
mkdir -p ~/.local/xPacks/openocd
cd ~/.local/xPacks/openocd
tar -zxvf ~/Downloads/xpack-openocd-0.11.0-1-linux-arm.tar.gz (with PC’s AMD core, using … linux-x64.tar.gz with PC’s Intel core)
....
sudo chmod -R -w xpack-openocd-0.11.0-1/
~/.local/xPacks/openocd/xpack-openocd-0.11.0-1/bin/openocd --version
export PATH="~/.local/xPacks/openocd/xpack-openocd-0.11.0-1/bin/:$PATH"
cd ~
source .bashrc
Check the OpenOCD version.
openocd --version
xPack OpenOCD, x86_64 Open On-Chip Debugger 0.11.0-00155-ge392e485e (2021-03-15-16:43)
Licensed under GNU GPL v2
For bug reports, read
  http://openocd.org/doc/doxygen/bugs.html
Download and Extract the package to your PC. Use a program like WinZip or 7-Zip to extract the downloaded file.
Please contact us for the download package at apps-support@leapslabs.com.
Open your favorite terminal application.
On linux or macOS, like Terminal application.
On Windows, like Powershell.
Navigate to the folder containing the extracted package.
cd to /path/to/PANSPRO-Firmware-OpenOCD
Use a Micro USB data cable to connect the
Micro USB Data Portof devices to your PC.Execute the script to update the firmware automatically.
On linux or macOS, Use the reflash-panspro-rtls-2ab.sh command.
On Windows, Use the reflash-panspro-rtls-2ab.bat command.
Once the update is complete, the device will beep to indicate the update’s success. The board will automatically reset itself as part of the process.
The device successfully updated the firmware. Enjoy the latest features and improvements.
When the RTLS network is forming, the initiator anchor specifies the firmware version necessary for the network. When an automatic FW update is enabled, any device wishing to participate (join) the network must have the same firmware (version number and the checksum). If a new device does not have the correct firmware, it will be updated as per the subsections below.
Via UWB Interface
As introduced in the DWM1001 System Overview [4], the nodes will compare their firmware version to the network they want to join. If the firmware version is different, the nodes will try to update their firmware before joining. This firmware update function can be enabled/disabled in the configuration. Here, it lists the rules of the function that the nodes will follow.
Tag:
When enabled, the tag will always check the firmware version and try to synchronize its firmware version with the network by sending the update request to the nearby anchor nodes in the network before it starts ranging.
When disabled, the tag will start ranging without checking the firmware version. This can lead to version compatibility problems and must be dealt with very carefully.
Anchor:
When enabled, before joining the network, the anchor will check the firmware version and try to synchronize its firmware version with the network by sending the update request to the nearby anchor nodes. After having joined the network, the anchor will respond to nearby nodes’ requests to update their firmware.
When disabled, before joining the network, the anchor will directly send the join request and not check the firmware version. This can lead to version compatibility problems and must be dealt with very carefully. After having joined the network, the anchor will ignore the firmware update requests from the nearby nodes.


