LEAPS Center
LEAPS Center 是一个web应用程序,它为整个网络提供设备管理, 网络管理以及位置和遥测数据的可视化。
主要特点
二维和三维网格可提供实时位置更新和网络中设备的可视化。
其他有用的功能包括用户管理, 区域管理, 区域历史, 平面图管理, 位置历史和位置热图。
The LEAPS Center 通过 MQTT Broker 与 LEAPS Server 互联. 它作为一项服务在 Linux 和 Windows 上运行
安装
系统要求
Docker的系统要求因操作系统而异。
对于 Linux,您需要 64 位架构, 兼容的内核版本和特定的内核功能。
在 Windows 上,在启用虚拟化的 Windows 10上使用 Docker Desktop
在 macOS 上,请使用配备 macOS 10.13 或更新版本的Docker Desktop. 在硬件方面,建议至少配备 2GB 内存以及足够的 CPU 和磁盘空间。
注解
有关最新详情,请参阅 Docker 官方文档。
说明
在电脑上安装 Docker
此外,您还可以参考以下命令进行安装:
curl -fsSL https://get.docker.com -o get-docker.sh
sudo sh ./get-docker.sh
sudo usermod -aG docker $USER
准备配置软件包
创建包含 配置文件 的 leaps_center 目录
leaps-center-web.conf
应用程序。属性
leaps-center-history.properties
leaps-center-web.properties
Or you can download the LEAPSCenter configuration package.
在电脑上打开命令提示符或终端窗口。
导航至从 LEAPS Center配置包中提取的目录。
例如,在 Ubuntu (Linux) 上:
cd LEAPS_CENTER_DOCKER/
安装 LEAPS Center Docker 软件包并运行:
docker run -d -p 80:8080/tcp --name some_name -v /path/to/data/data/:/app/data/ -e LEAPS_CENTER_HOME=/app/data/ leapslabs/leaps_center:tag sh -c "cd /app && java -jar leaps-center-web.jar"其中
some_name是要分配给容器的名称,tag是指定要使用的leaps-center-web版本的标记。leaps_center 映像必须与外部挂载的文件夹一起运行,该文件夹包含配置文件以及应用程序日志和配置/节点历史数据库的空间。
选项
-v /path/to/data/:/app/data/将位于/path/to/data/的文件夹挂载到内部的/app/data文件夹. 数据文件夹必须包含以下文件。
推荐的运行选项
--user $(id -u):$(id -g)在特定用户和组下运行实例。
--restart unless-stopped在服务器崩溃时自动重启实例。可选运行选项
--security-opt seccomp=unconfined在 32 位 Raspberry Pi 镜像(Raspbian)上需要这个选项,因为它包含一个过时的 seccomp 库,其中的一个错误会对 Docker 镜像产生负面影响(无法连接到 MQTT 服务器). 该选项允许我们覆盖这一问题。
LEAPS Center安装程序将开始。
例如,在 Ubuntu (Linux) 上:
docker run -d -p 80:8080/tcp --name leaps_center -v $PWD/leaps_center/:/app/data/ -e LEAPS_CENTER_HOME=/app/data/ leapslabs/leaps_center:latest sh -c "cd /app &&  java -jar leaps-center-web.jar"

Unable to find image 'leapslabs/leaps_center:latest' locally
latest: Pulling from leapslabs/leaps_center
a458657ccc71: Pull complete
Digest: sha256:a19b127656d41d8607f043c2c83924e5b9a5cbd4dc23cfbed070be3b9cfc6b9a
Status: Downloaded newer image for leapslabs/leaps_center:latest
320d3768289874e063619f75faca7a24dd75a08884df8cd8fb2cc9b54c6f0a46
确认安装成功,运行:
例如,在 Ubuntu (Linux) 上:
docker ps

CONTAINER ID   IMAGE                    COMMAND                  CREATED          STATUS                          PORTS     NAMES
b1145b72db35   leapslabs/leaps_center:latest   "sh -c 'cd /app &&  …"   37 seconds ago   11 seconds ago                            leaps_center
打开网络浏览器,输入以下 http://localhost:80;LEAPS Center应用程序将在网络浏览器中加载。
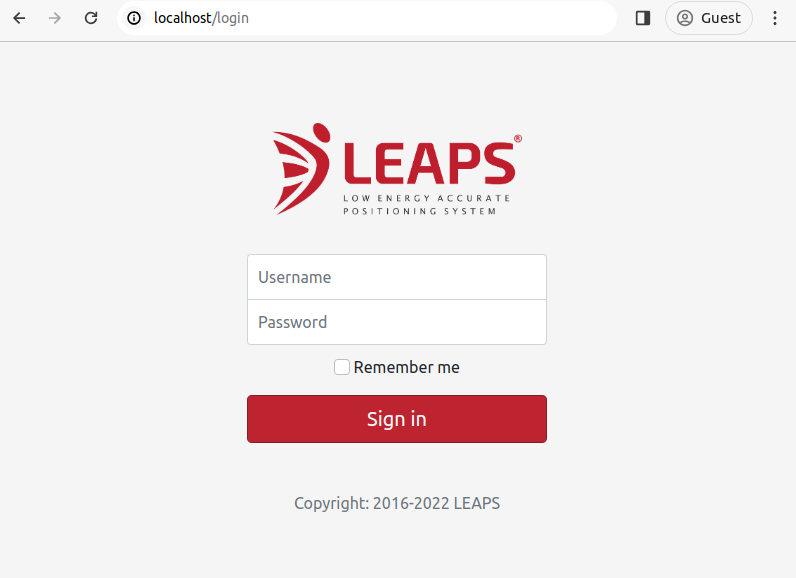
至此,您已在电脑上成功安装并启动了 LEAPS Center。
配置文件
leaps-center-web.conf
JAVA_OPTS="-Xms256m -Xmx512m -Xss256k"应用程序。属性
leaps-center-history.properties
leaps-center-web.properties
该配置文件控制应用程序日志记录。
#
#     LEAPS - Low Energy Accurate Positioning System - LEAPS Center.
#
#     Copyright (c) 2016-2026, LEAPS.
#
#     Licensed under the Apache License, Version 2.0 (the "License");
#     you may not use this file except in compliance with the License.
#     You may obtain a copy of the License at
#
#     http://www.apache.org/licenses/LICENSE-2.0
#
#     Unless required by applicable law or agreed to in writing, software
#     distributed under the License is distributed on an "AS IS" BASIS,
#     WITHOUT WARRANTIES OR CONDITIONS OF ANY KIND, either express or implied.
#     See the License for the specific language governing permissions and
#     limitations under the License.

#default WINDOWNS("user.home"/leaps-center-log/leaps-center-web.log), UNIX(/var/log/leaps-center-web.log)

# Logging file
#logging.file.name=/app/data/log/leaps-center-web.log

# Level log TRACE < DEBUG < INFO < WARN < ERROR < OFF, default is OFF
logging.level.root=OFF
该配置文件控制节点位置历史记录。
#
#       LEAPS - Low Energy Accurate Positioning System - LEAPS Center.
#
#       Copyright (c) 2016-2026, LEAPS.
#
#       Licensed under the Apache License, Version 2.0 (the "License");
#       You may not use this file except in compliance with the License.
#       You may obtain a copy of the License at
#
#       http://www.apache.org/licenses/LICENSE-2.0
#
#       Unless required by applicable law or agreed to in writing, software
#       distributed under the License is distributed on an "AS IS" BASIS,
#       WITHOUT WARRANTIES OR CONDITIONS OF ANY KIND, either express or implied.
#       See the License for the specific language governing permissions and
#       limitations under the License.
#

# history enabled (default false)
history.enabled=false
history.position.enabled=true
history.zone.enabled=true

# use node position message timestamp (default true)
history.use.position.timestamp=false

# =======================================================================================================
# Export Options
# =======================================================================================================

# add headers (default false)
history.export.headers=false

# maximum number of records (default 1000000)
history.export.max.lines=1000000

# compress export file (default true)
history.export.compress=true

# number of decimal places for x, y, z values (default 4)
history.export.position.decimal.places=2

# format network id to hex value (default true)
history.export.hex.network.id=true

# format node  ID to hex value (default true)
history.export.hex.node.id=true

# =======================================================================================================
# Position History Options
# =======================================================================================================

# interval time to add a history record (default 10000)
history.node.position.interval.time=10000

# minimun quality value (default 0)
history.node.position.min.quality=0

# =======================================================================================================
# Heatmap Options
# =======================================================================================================
# maximum number of records for heatmap (default 100000)
heatmap.max.results=100000

# =======================================================================================================
# Purge Options
# =======================================================================================================

# time to purge database records in days (default 30 days)
history.purge.time=30

# backup purged records to a file in /history folder (default false)
history.purge.backup.records=true

# max number of backup files (default 10)
history.purge.max.backup.files=5

# =======================================================================================================
# DBMS (SQLITE, POSTGRESQL, MY_SQL, ORACLE, SQL_SERVER or CUSTOM)
# =======================================================================================================

# History - SQLite Database Example (default).
# history.dbms=SQLITE
# history.db.jdbc.url=jdbc:sqlite:leaps-center-history.db
# history.db.username=
# history.db.password=

# History - PostgreSQL Database Example
# history.dbms=POSTGRESQL
# history.db.jdbc.url=jdbc:postgresql://localhost:5432/leaps_center_history
# history.db.username=leaps_center
# history.db.password=pwd
该配置文件控制 leaps_center 应用程序。
#
#       LEAPS - Low Energy Accurate Positioning System - LEAPS Center.
#
#       Copyright (c) 2016-2026, LEAPS.
#
#       Licensed under the Apache License, Version 2.0 (the "License");
#       you may not use this file except in compliance with the License.
#       You may obtain a copy of the License at
#
#       http://www.apache.org/licenses/LICENSE-2.0
#
#       Unless required by applicable law or agreed to in writing, software
#       distributed under the License is distributed on an "AS IS" BASIS,
#       WITHOUT WARRANTIES OR CONDITIONS OF ANY KIND, either express or implied.
#       See the License for the specific language governing permissions and
#       limitations under the License.
#

# database (SQLITE, POSTGRESQL, MY_SQL, ORACLE, SQL_SERVER or CUSTOM)
db.dbms=SQLITE

# History - SQLite Database Example.
# dbms=SQLITE
# db.jdbc.url=jdbc:sqlite:leaps-center-db
# db.username=
# db.password=

# History - PostgreSQL Database Example
# db.dbms=POSTGRESQL
# db.jdbc.url=jdbc:postgresql://localhost:5432/leaps_center
# db.username=postgres
# db.password=qwe123

# =======================================================================================================
# Network
# =======================================================================================================

# create the default network if it does not exist when starting. (default true)
network.create.default.network=true
network.create.default.floor.plan=false

# change the networkId via the gateway message.
network.change.network.id.via.gateway.message=false

network.default.id=1234
network.default.name=LEAPS

# network type, PANS or LEAPS
network.default.network.type=LEAPS

# PAN_ID or HOST
network.default.mqtt.connection.type=HOST

# WS or SSE
network.default.web.client.connection.type=SSE

# MQTT
mqtt.host=localhost
mqtt.ws.port=15675
mqtt.tcp.port=1883
mqtt.username=leaps
mqtt.password=leaps

mqtt.topic.prefix=leaps
mqtt.tag.topic.prefix=node
mqtt.anchor.topic.prefix=node

# define if the network id will be added in the topic prefix
mqtt.add.network.id.topic.prefix=true

# Enable/Disable MQTT TLS
# mqtt.tls=true
# mqtt.tls.host.name.verification.enabled=false
# CA_SIGNED_CERTIFICATE (signed by a publicly trusted CA), CA_FILE_CERTIFICATE (file certificate), SELF_SIGNED_CERTIFICATE (self signed file certificate);
# mqtt.tls.certificate.type=SELF_SIGNED_CERTIFICATE
# TLS Protocol: TLS_V1 (TLSv1), TLS_V1_1 (TLSv1.1), TLS_V1_2 (TLSv1.2), TLS_V1_3(TLSv1.3);
# mqtt.tls.protocol=TLS_V1_2
# mqtt.tls.certificate.file=/app/data/certs/cacert.pem

# mqtt.tls.client.certificate.file=/app/data/certs/leaps-center-broker-clientcert.pem
# mqtt.tls.client.key.file=/app/data/certs/leaps-center-broker-clientkey.pem
# mqtt.tls.client.password=

# =======================================================================================================
# Web server settings
# =======================================================================================================

# http session timeout
server.servlet.session.timeout=-1

# maximum number of http sessions per user (-1 is unlimited)
server.max.sessions.per.user=-1

# mod-jk/ajp connector configuration
tomcat.ajp.enabled=false
# tomcat.ajp.port=8009
# tomcat.ajp.secret.required=false
# tomcat.apr.enabled=false

# server port (2-65535), (default 8080)
server.port=8080

# enable / disable https
server.ssl.enabled=false
# keystore format
# server.ssl.key-store-type=PKCS12
# keystore location
# server.ssl.key-store=/usr/share/leaps_center/key-store.p12
# keystore alias
# server.ssl.key-alias=leaps_center
# keystore password
# server.ssl.key-store-password=password
# SSL protocol to use
# server.ssl.protocol=TLS
# Enabled SSL protocols
# server.ssl.enabled-protocols=TLSv1.2

#server.servlet.context-path=/leaps_center
server.sent.events.timeout=2
开始
默认情况下,登录账户的用户名为 admin,密码为 admin。
LEAPS Server Docker
Start LEAPS Center, run:
docker start leaps_centerStop LEAPS Center, run:
docker stop leaps_centerRestart LEAPS Center, run:
docker restart leaps_centerRemove LEAPS Center, run
docker rm --force leaps_center
网络配置
To configure the network, go to the menu and select Networks. Then, click the Add button at the bottom right to create a new network.
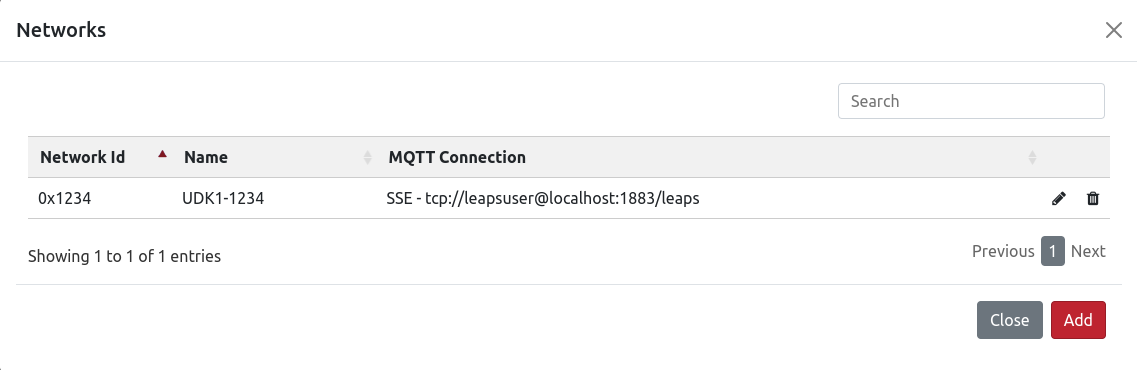
现在,填写所需的配置参数:
名字
主机
TCP 端口
用户名
主题前缀
网络类型
如果不知道网络 ID,可以使用 LEAPS Manager 或 Shell 查找。
填写完毕后,点击 Save 按钮连接并接收网络 ID。
最后,您可以单击 Test 按钮检查连接情况,然后单击 Save 按钮保存配置。
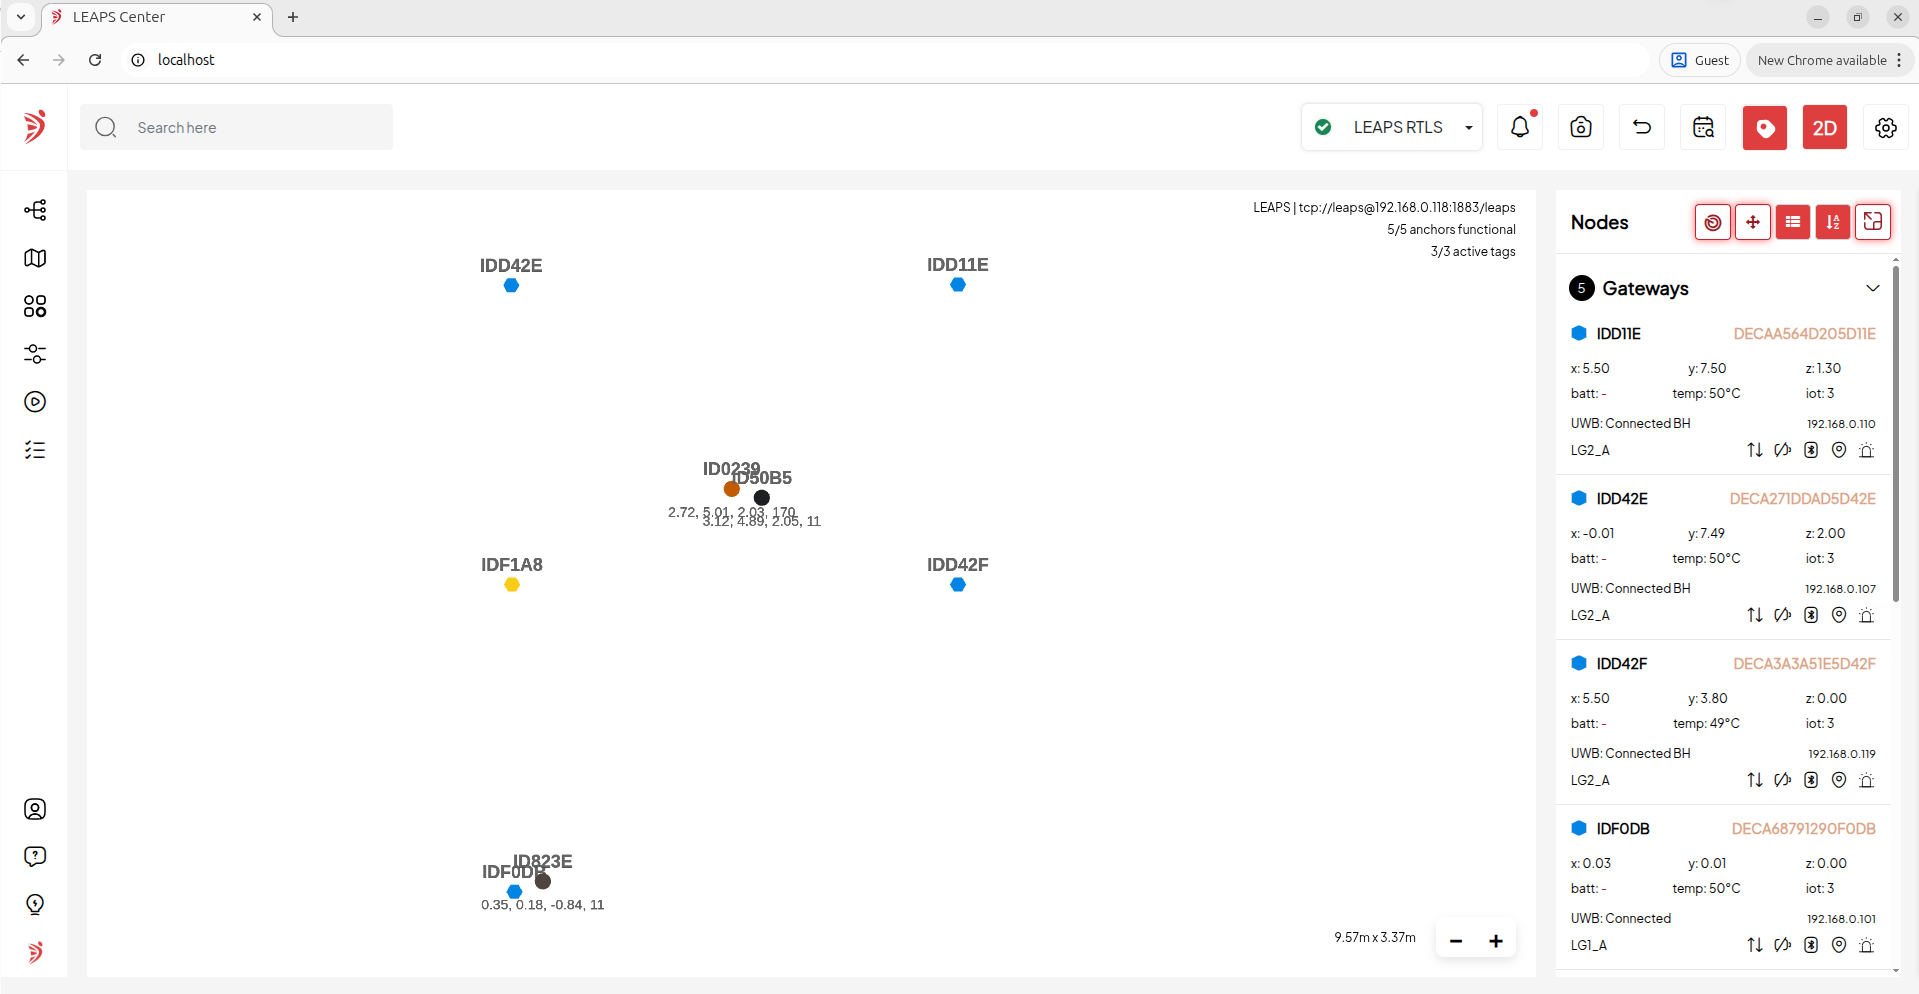
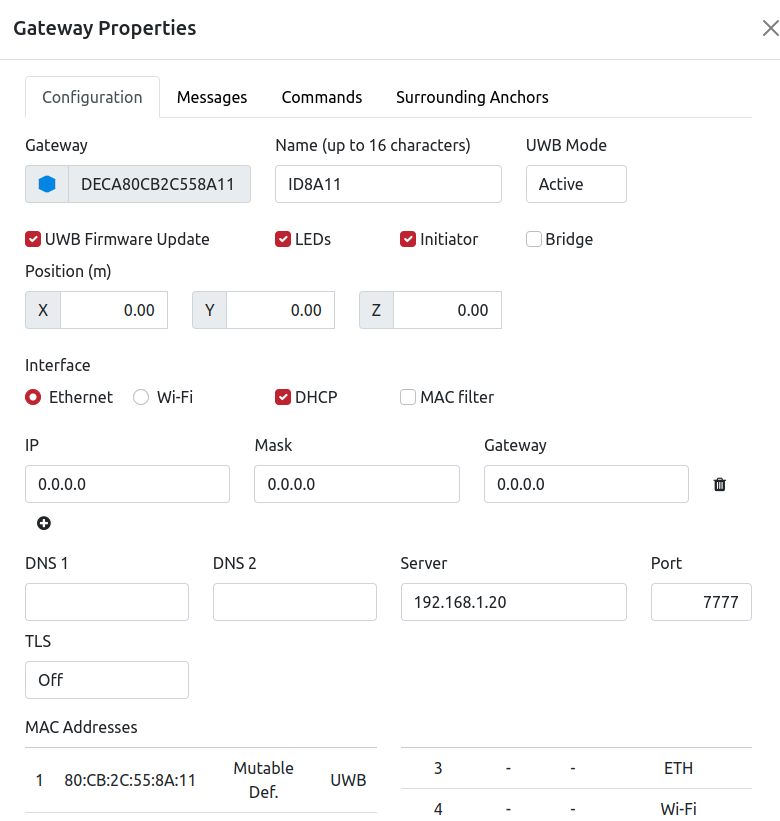
平面图
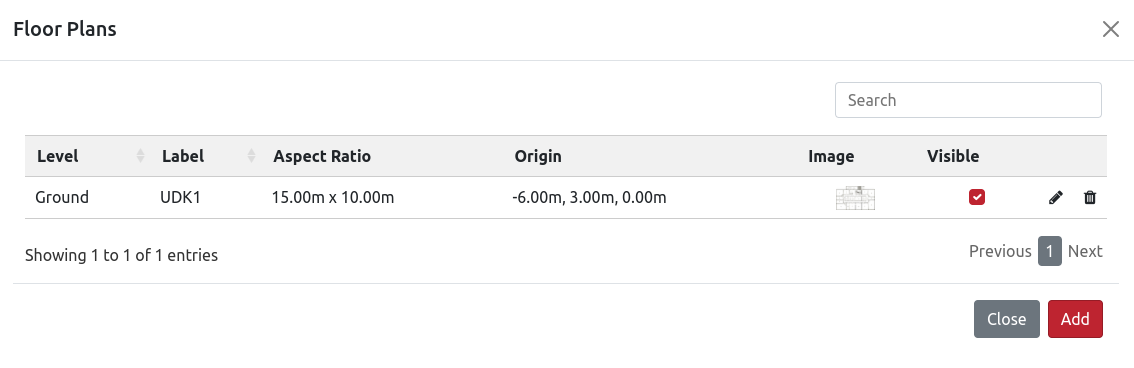
要配置平面图,请进入菜单并选择 Floor Plans。
Click the Add button in the bottom right. Then, import the Floor Plans you want to configure and fill in the corresponding parameters.
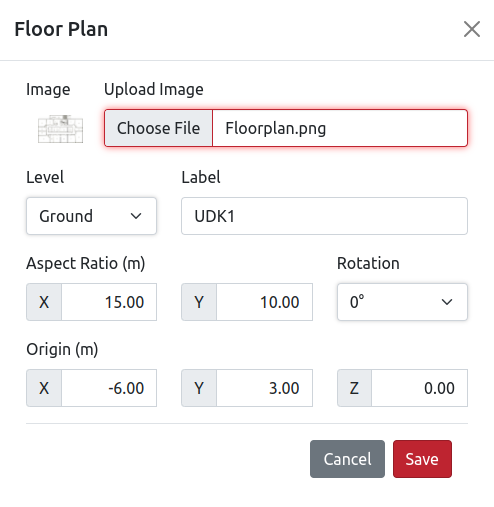
填写完毕后,点击 Save 按钮保存配置. 使用 Visible 复选框启用地图上的可见性。
区域
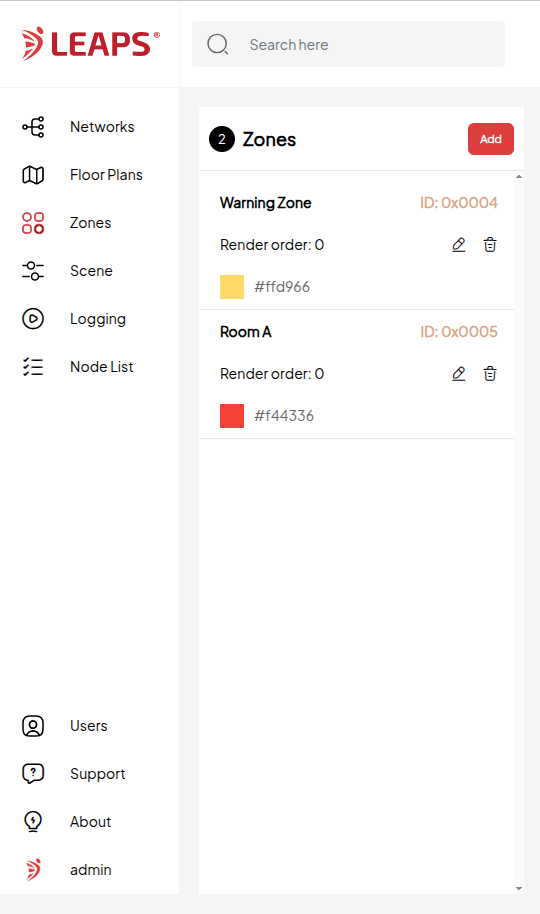
要配置区段,请进入菜单并选择 Zones。
Click the Add button in the bottom right. Then, fill in the corresponding parameters and add the configuration for Save.
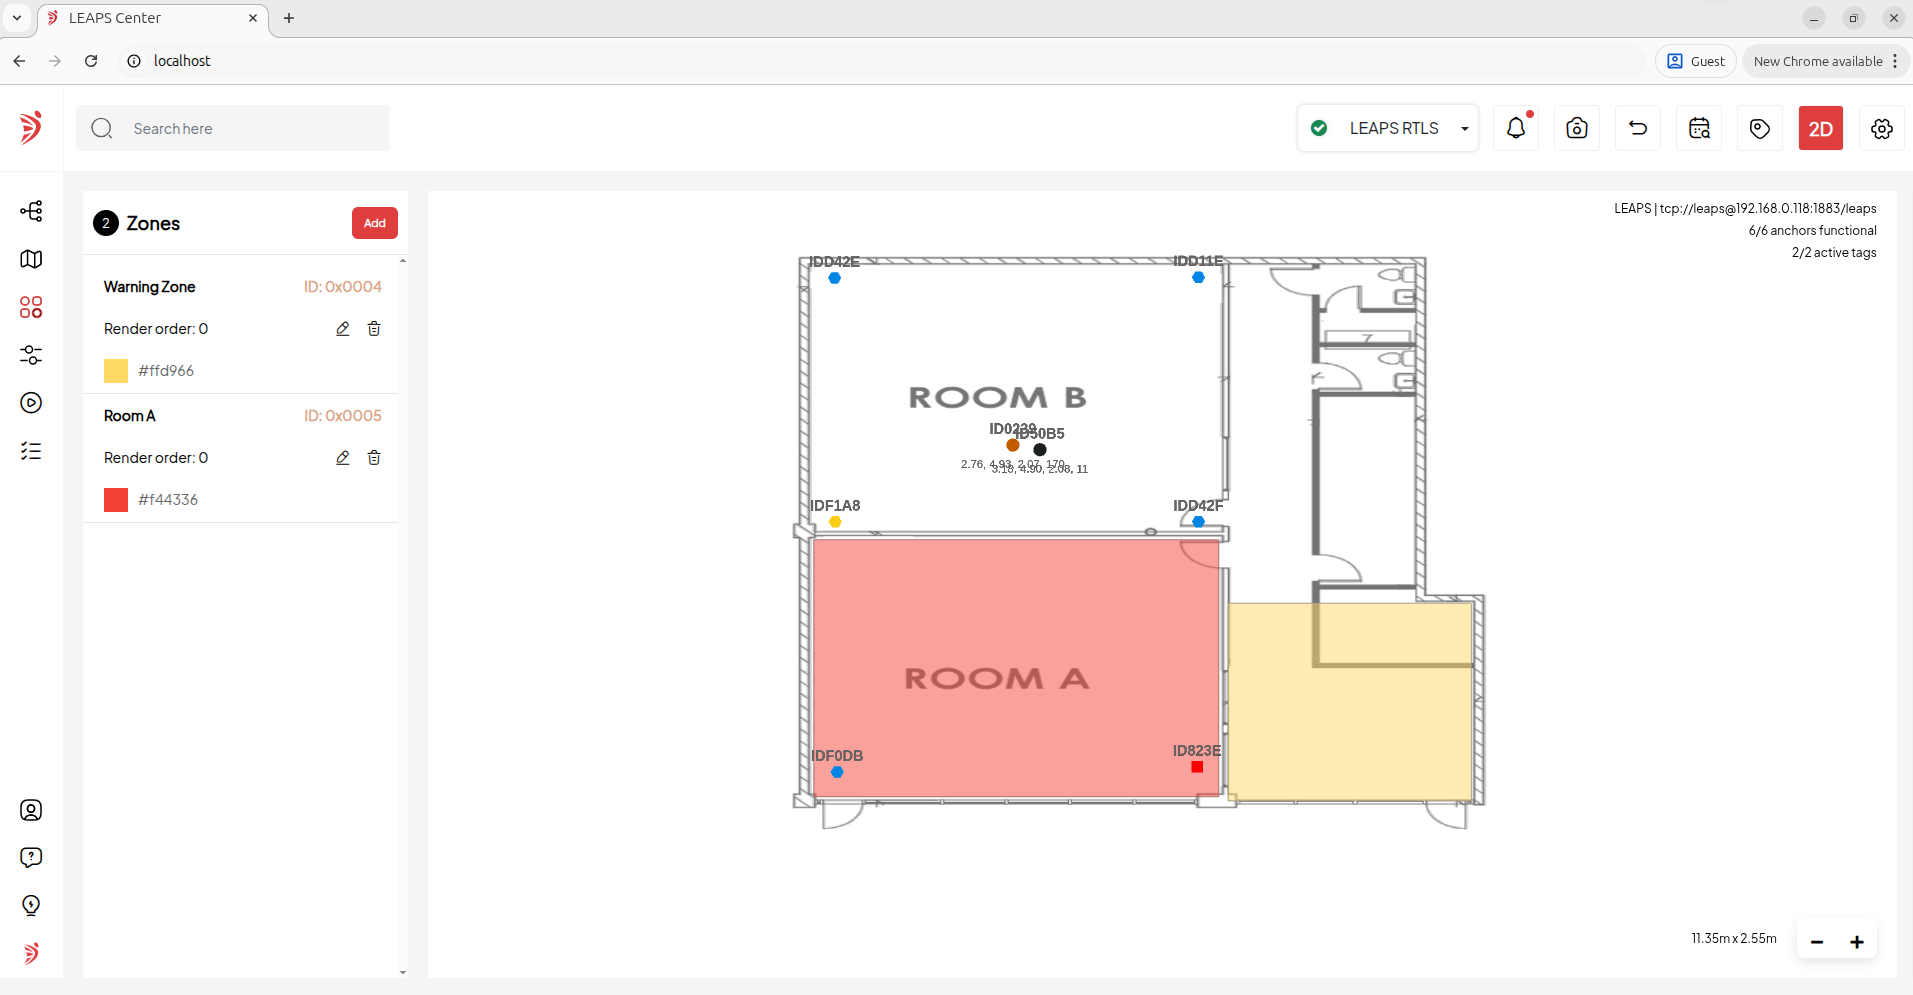
Once you’ve filled it in, click the Save button to save the configuration.
用户
要配置用户,请进入菜单并选择 Users。
默认情况下,应用程序已预先配置了一个管理员账户和一个普通账户。
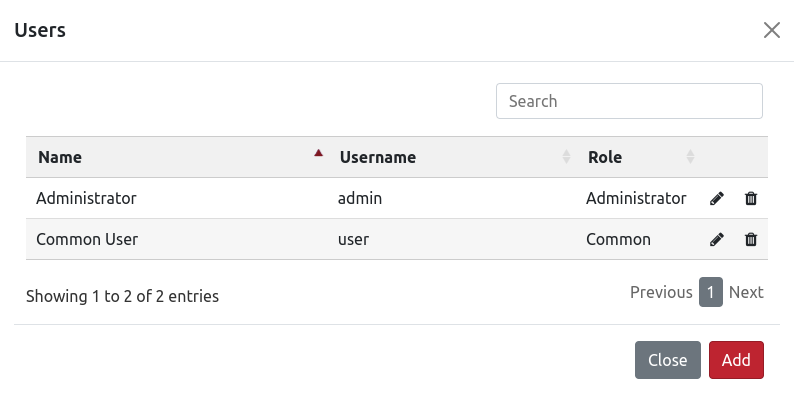
适用于管理员账户或普通账户。
应用程序接口授权
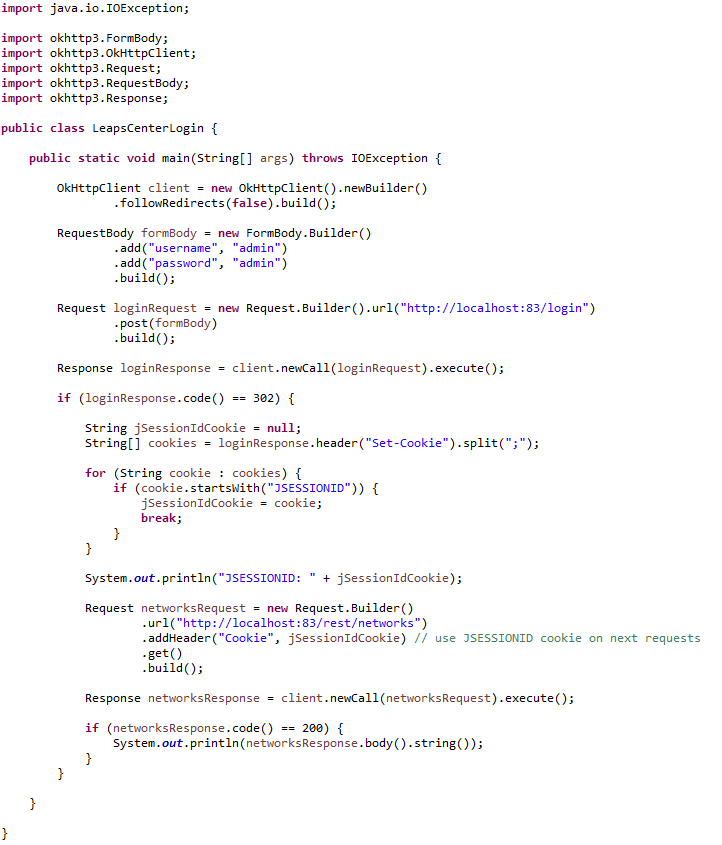
用户需要向/login发送一个简单的HTTP POST,并传递以下参数(以admin:admin为例)。
用户名: admin
密码:admin
记住我:开启
登录后会生成 JSESSIONID cookie,用户需要在后续请求中使用它。
注解
这不是强制性的,如果用户使用了它,会在响应中添加另一个 cookie(cookie REMEMBERME),用户可以在后续请求中使用它。
As the LEAPS Center performs a redirect after login and also when users are not authorized, it is necessary to properly set up the “follow redirects” parameter in user’s client. The response code after login is 302, but users need to handle it manually because if the user is not authorized the status code is also 302. Users can make any request to a REST service, for example, and if the response status code is not 200 the user will not be authorized.
下面是一个用 Java 编写的请求和查询网络的代码示例:
更多详情,请参阅以下两段视频,一段使用 Postman,另一段使用 Java 代码
Postman
Java Client
故障排除
Use the following command
docker restart leaps_centerto restart LEAPS Center.Check the logs when LEAPS Center is running, open the docker desktop and select the leaps_center container.
Open via Safari: If the interactive floor plan fails to load when you open the app, a Safari experimental feature is likely causing a conflict. Go to Settings > Safari > Advanced > Experimental Features and disable ‘requestIdleCallback’.