Locate Device using Angle-of-Arrival (AoA) Demo
Prepare for setup
UWB Ranging & AoA Demo App desktop program is installed on your computer.
One LC13 (gray) device and at least one LC14 (white) device.
USB-C data cables for the connected devices.
Optional: LEAPS Manager application installed.
Optional: batteries for the Responder devices.
Setup time: less than 5 minutes
Overview
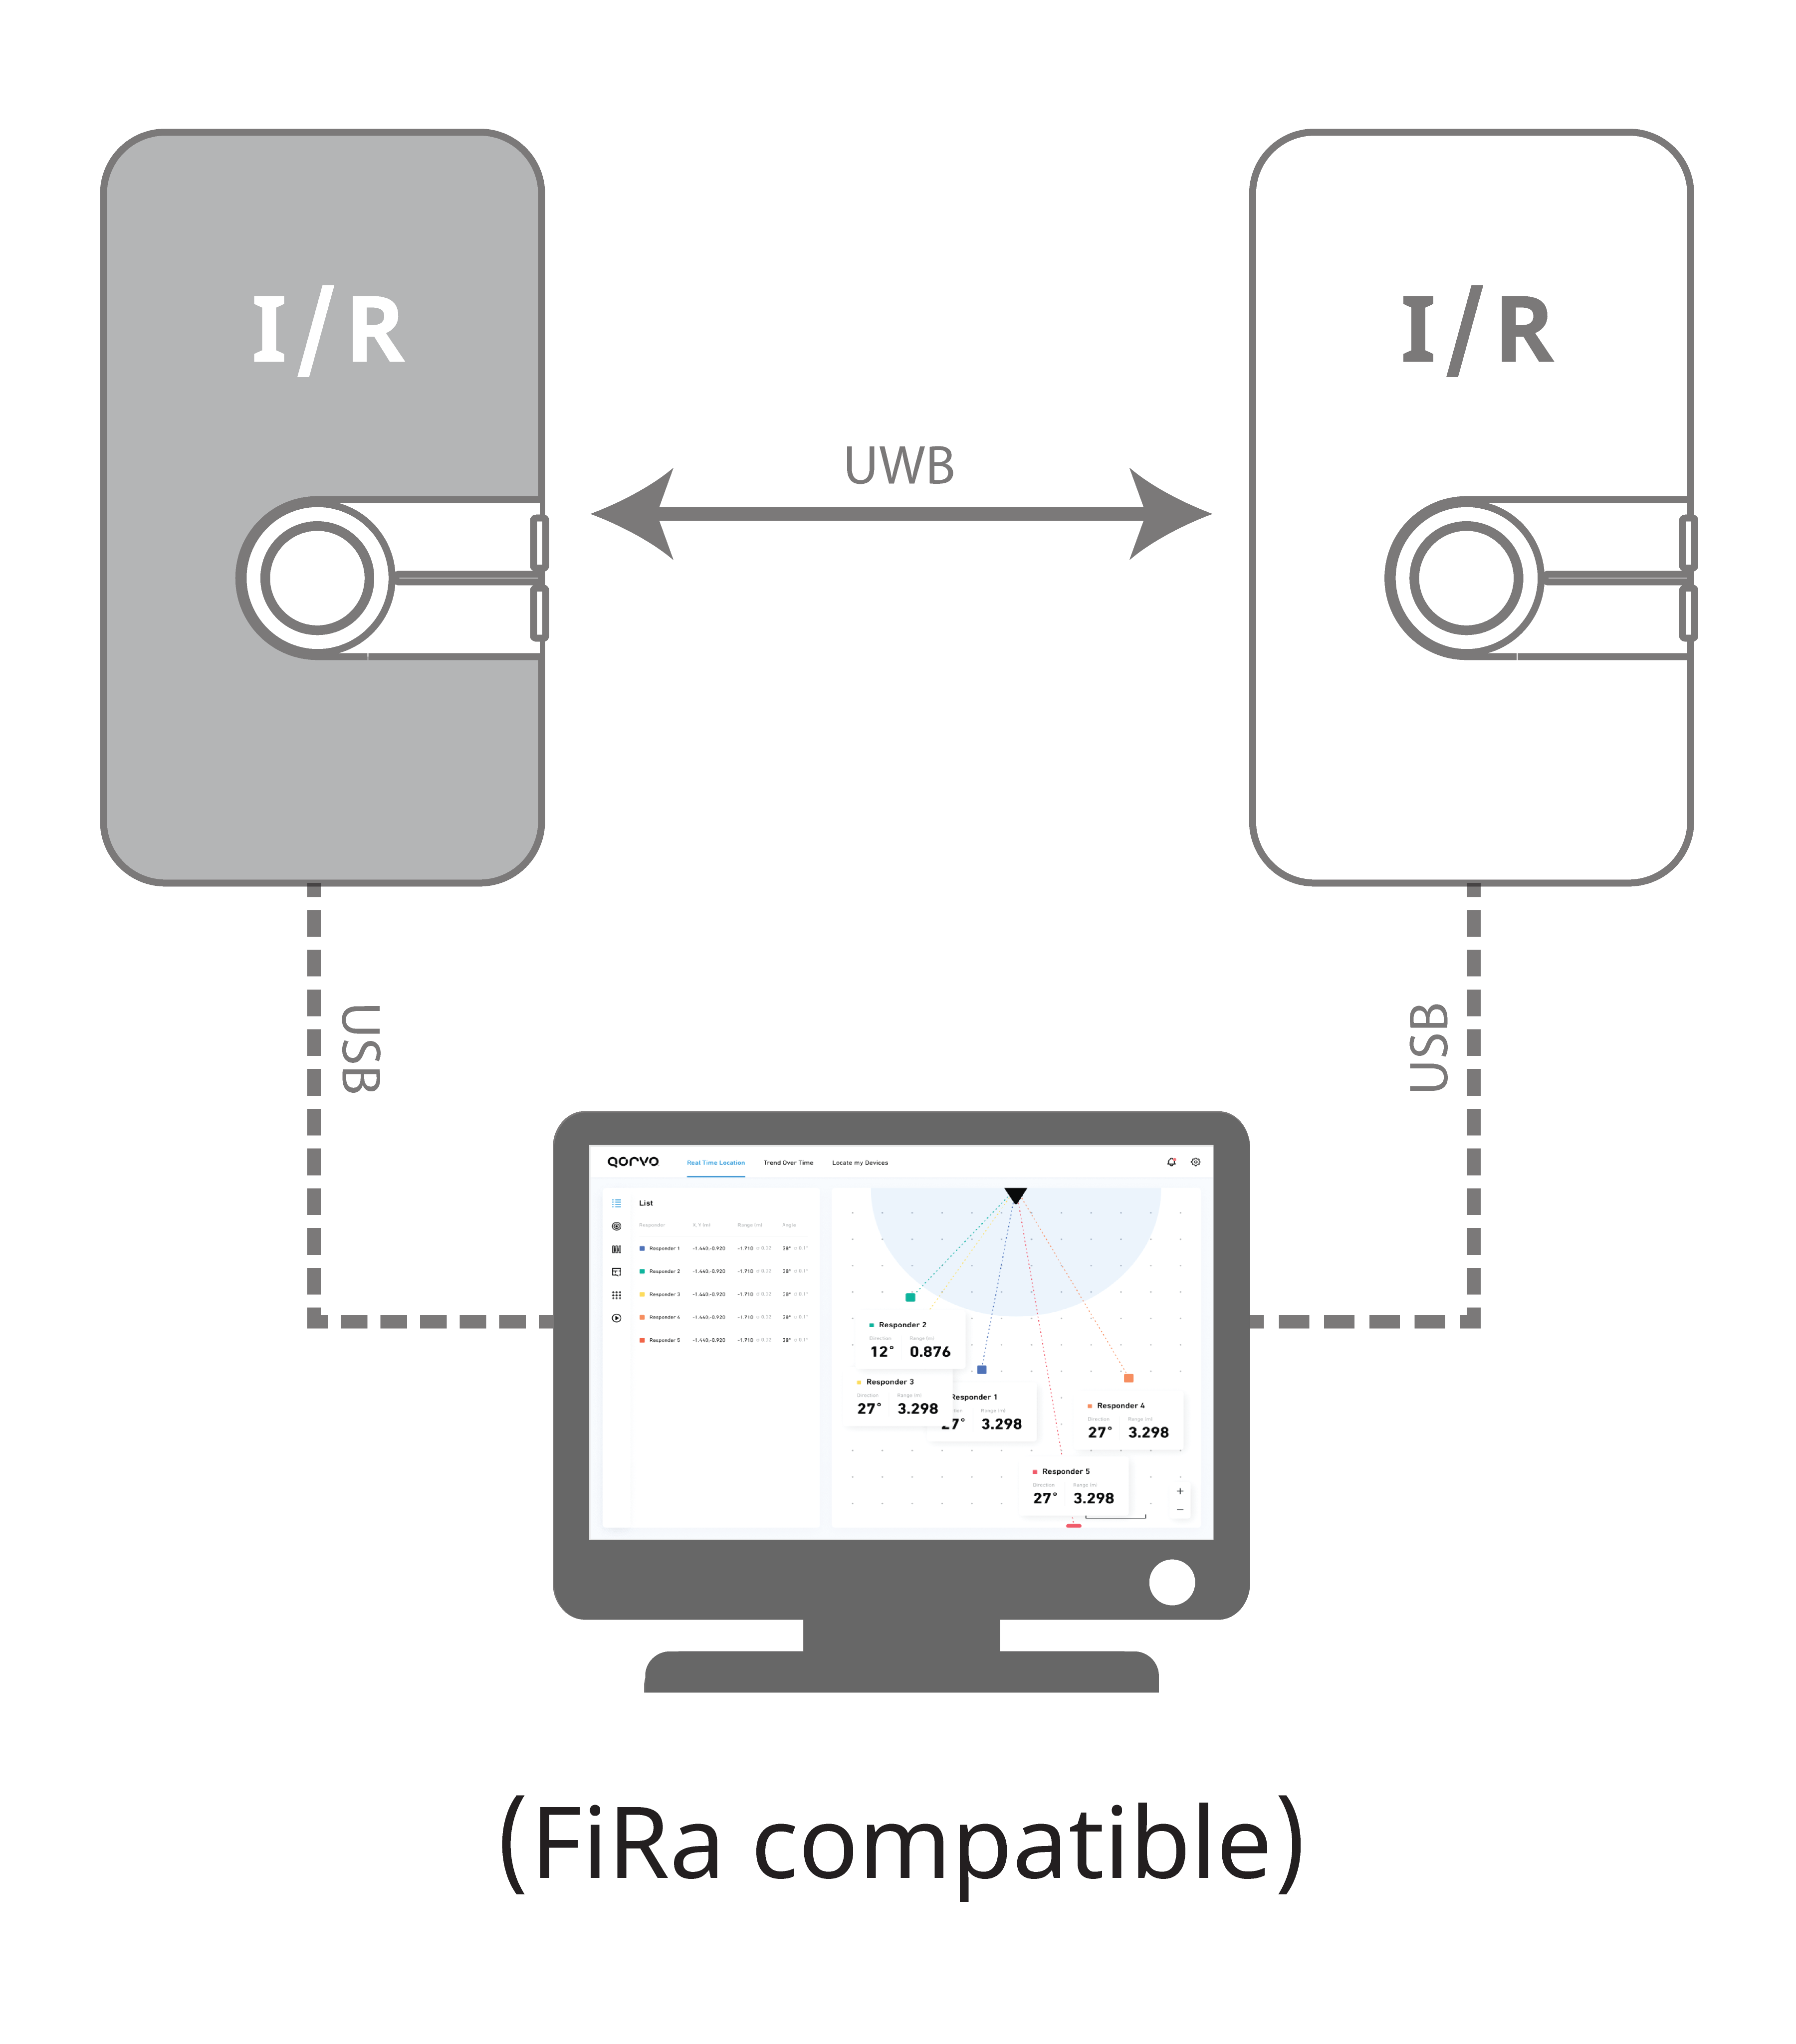
This setup demonstrates FiRa compatibility between devices. Distance and angle measurement shows the direction between the Initiator and the Responder devices in the desktop application.
Typical applications: Access control, follow me, locate and track objects or devices within an indoor environment.
Setup instructions
Download and install the application on your computer.
See details in the UWB Ranging & AoA Demo App installation instructions.
Power ON the LC13 and LC14 devices.
The LC13 will function as an Initiator, and the LC14(s) will function as a Responder(s) in this demo.
Configure the device into the Qorvo UCI mode using one of the following options:
Configure the device using the button.
3.1. Press and hold the Button B until you hear a beep sound and the GREEN LED blinks.
3.2. If a RED or BLUE color appears, please repeat step a.
3.3. When the device blinks GREEN LED after the beep sound, the device is configured in the Qorvo UCI mode.
Configure using the demo selector in the LEAPS Manager:.
3.1. Open the LEAPS Manager and select the Demo Selector from the main page.
3.2. select the Locate Device Using Angle-of-Arrival.
3.3. A list of discovered devices via Bluetooth will appear on the list. Swipe down to update the list if needed.
3.4. Select the devices that will be used for the demo. The Required devices on the top side indicates the amount of devices needed for the demo.
3.5. Press the SAVE to configure the device(s) into the Qorvo UCI mode.
3.6. Please check visually that the GREEN LED blinks when the device starts.
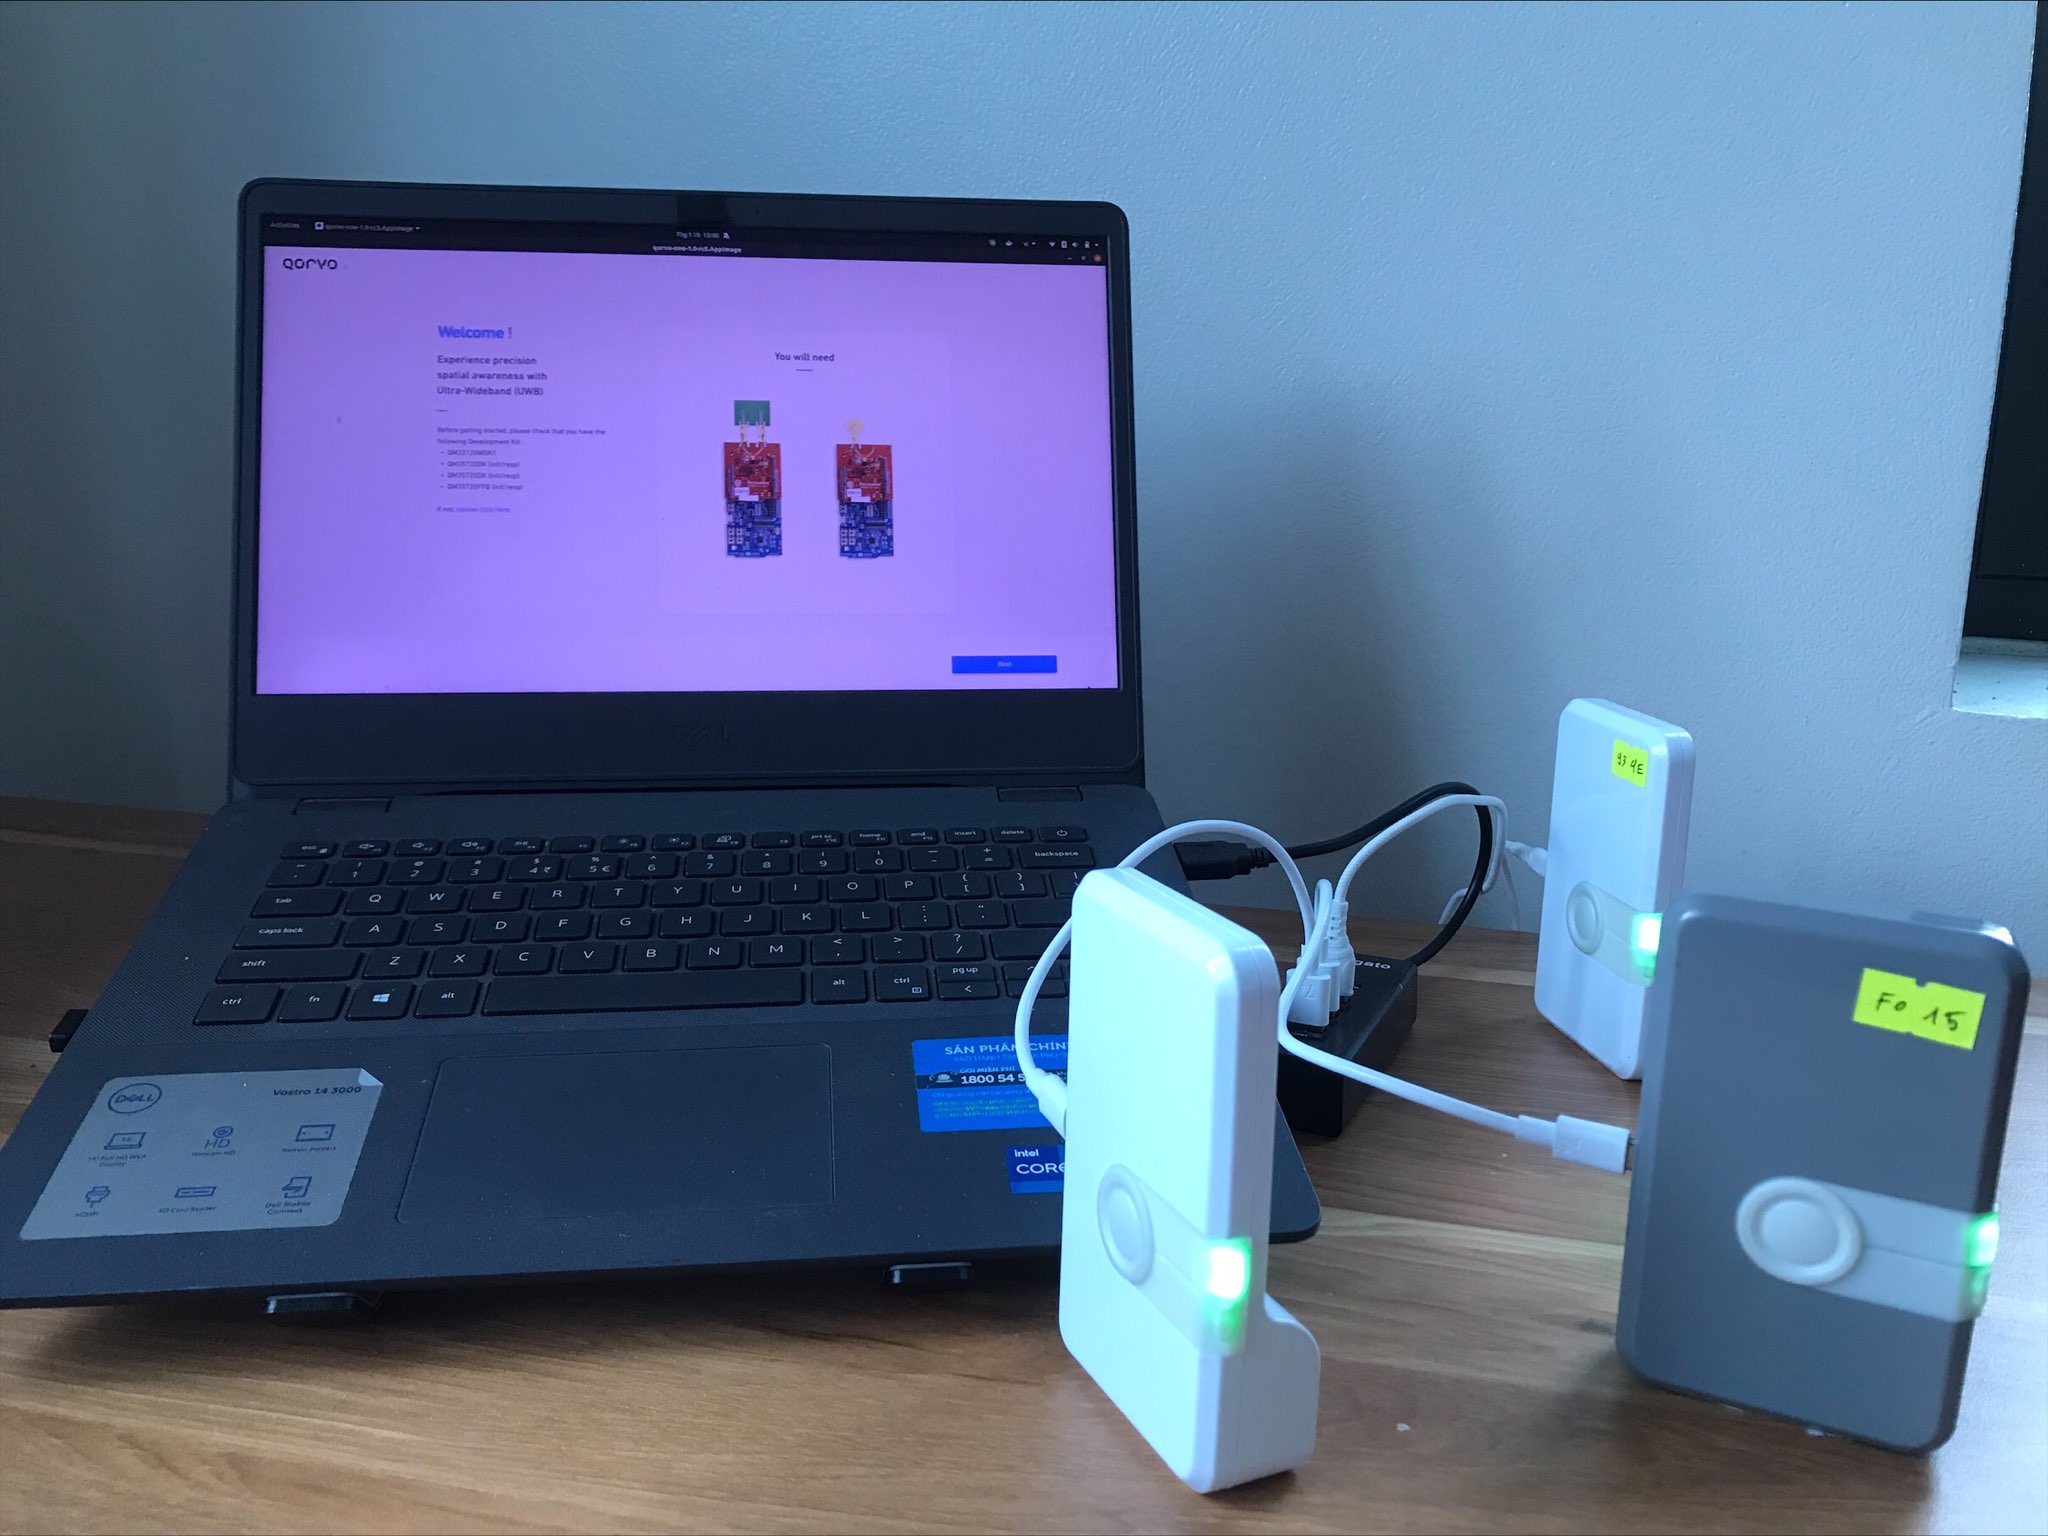
Use USB-C data cables to connect the devices and use USB-C Data Port 1 to the PC.
Optional: Plug the batteries into the Responder device(s) if you want to disconnect the device from the PC to move it freely after starting the demo.
Open the UWB Ranging & AoA Demo App on your desktop. click the Next to get into the device list.
The USB connected devices will appear on the device list, which might take a few seconds. Review the list and identify the device(s) you want to use. By default, all the discovered devices via the USB will be selected.
Additional configuration per device or Fira Configuration can be changed if needed. The default values should work fine to start with.
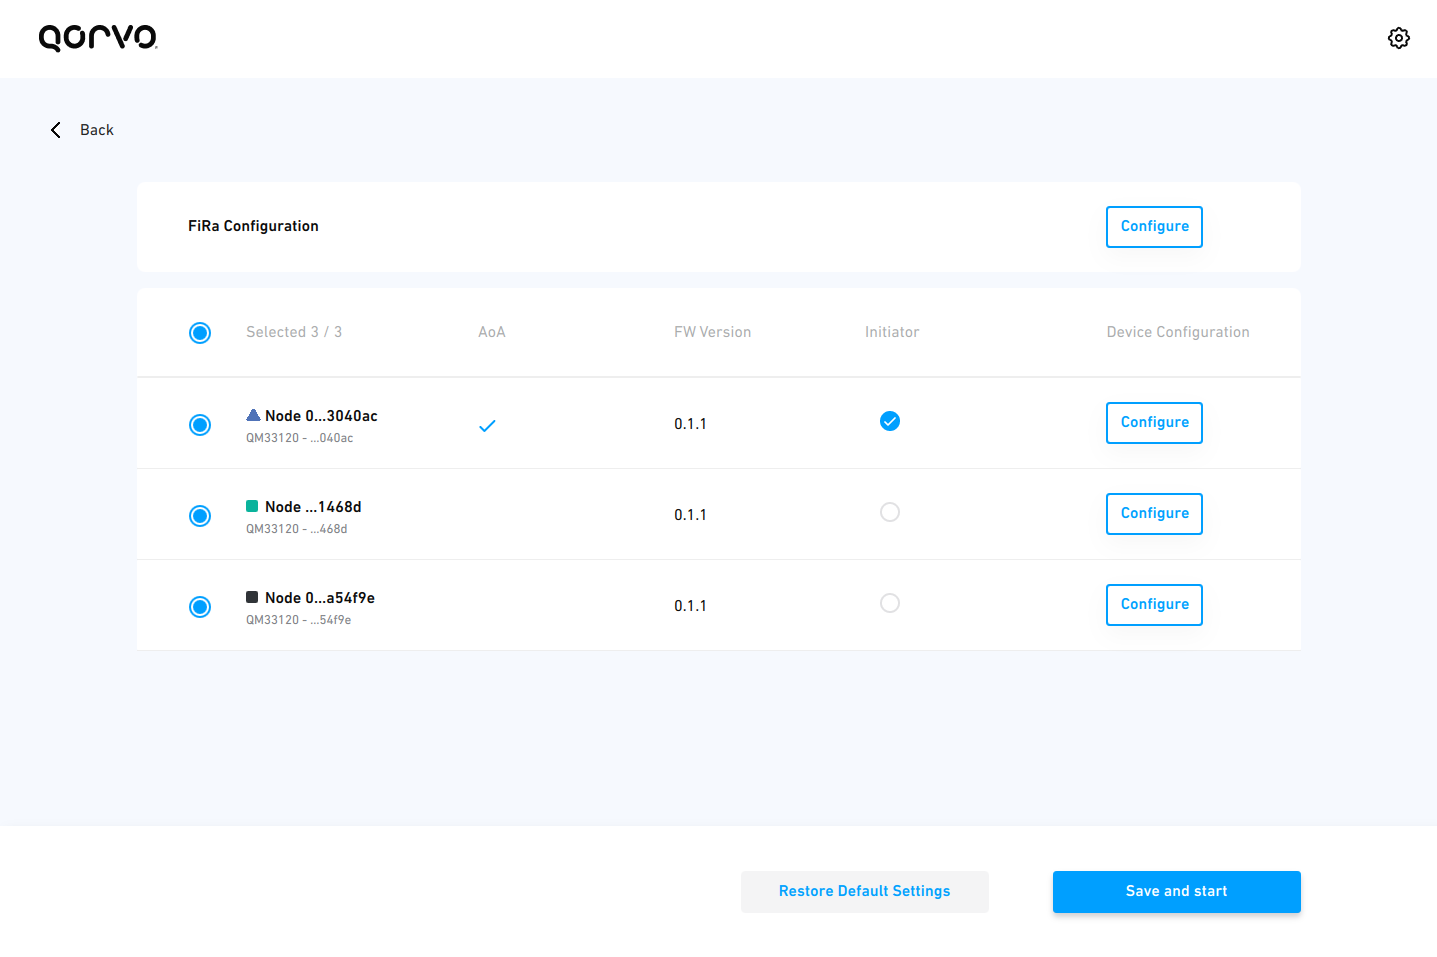
Press the Save and start to start the demo. The following Real Time Location window will display a coordinate map with distances and angles between the selected Initiator and Responder(s).

The Responder device(s) can be unplugged from the PC if powered by a battery. That will allow moving the Responder freely for evaluation purposes. The device will need to be re-plugged into the PC using the USB-C Data Port 1 to start the session again.
The UWB Ranging & AoA Demo App offers a wide range of useful options for evaluation including
Real-Time Location displaying distance, angle and X-Y position.
Trend Over Time displaying in real-time distance and angle values.
Locate My Device displaying direction from the Initiator to the selected Responder.
Geofencing
Floorplan
Grid
Logging
Please refer to the UWB Ranging & AoA Demo App for more details.
Advanced setup
Get ready for the advanced setup! We’ll tap into the terminal’s power to help you configure your device like a pro. Just follow these steps and you’ll be all set.
Use a USB-C Data Cable to connect the USB-C Data Port 1 or USB-C Data Port 2 of devices to your PC.
Connect to a serial port using your desired terminal application, such as Putty, Teraterm, Minicom, or your favorite terminal application. We need to configure the baud rate to 115200.
For example use Minicom, on Ubuntu (Linux):
minicom -b 115200 -D /dev/ttyACM0
Press double enter on the shell console to access the command line control system
For example open /dev/ttyACM0 and press double enter, on Ubuntu (Linux):
minicom -b 115200 -D /dev/ttyACM0

  Welcome to minicom 2.7.1

  OPTIONS: I18n
  Compiled on Dec 23 2019, 02:06:26.
  Port /dev/ttyACM0, 16:02:57

  Press CTRL-A Z for help on special keys


  Low Energy Accurate Positioning System

  FOR DEMO PURPOSE ONLY, NOT FOR SALE.

  Copyright :  2016-2023 LEAPS
  License   :  Please visit https://www.leapslabs.com/leaps-rtls-license
  Compiled  :  Jan  6 2024 09:38:07 (v0.15.0-ab84fb)

  Help      :  ? or help

  leaps>
Use the command fuci to update FiRa UCI mode.
Low Energy Accurate Positioning System

FOR DEMO PURPOSE ONLY, NOT FOR SALE.

Copyright :  2016-2023 LEAPS
License   :  Please visit https://www.leapslabs.com/leaps-rtls-license
Compiled  :  Jan  6 2024 09:38:07 (v0.15.0-ab84fb)

Help      :  ? or help

leaps>
leaps> fuci
Please check visually that the GREEN LED blinks when the device starts.
Now successfully configured Qorvo UCI mode Refer to the following steps on Quick Start.
When Bluetooth Low Energy (BLE) and the LED are both off, users may erroneously perceive the board as non-functional. In this scenario, the only recourse for the user is to initiate a Factory Reset (frst) command.
Here are some tips for fixing some issues related to the installation process.
Please check the version. We recommend you use the latest official version.
Use the Reset devices to default feature in Demo Selector on the LEAPS Manager when you don’t know the current state of the devices. Refer to the following GIF Image.
Note
For any comments or questions about our products, we encourage you to visit our LEAPS Forum.
For detail of known limitation and issue list, please refer section Releases