Programming/Upgrading firmware
This section provides instructions on how to update the firmware. We support many ways, such as via MSD, WebUSB, Serial-COM, OpenOCD or SEGGER J-Link.
Note
Stay connected during the update process and use the correct Device and Interface.
For more detailed information, select the method you want to use below:
Prepare for setup
At least one device.
A binary file to update.
Step-by-step instructions on how to update via MSD
Use a USB-C Data Cable to connect the USB-C Data Port 2 of devices to the PC.
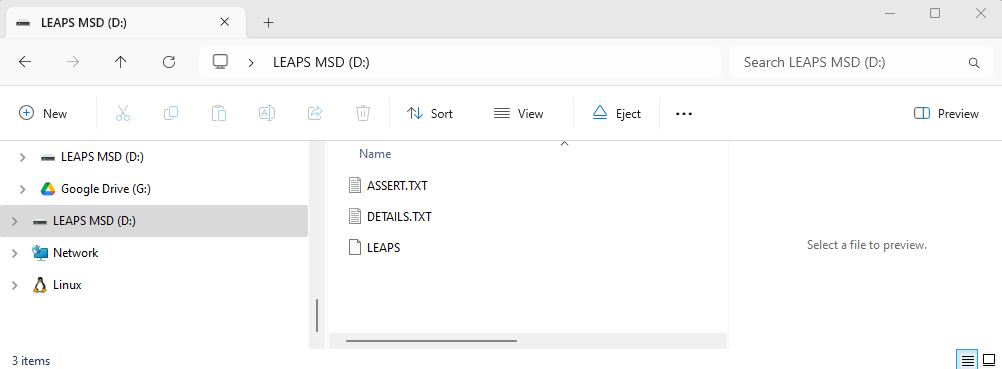
Once connected, the LEAPS MSD drive will appear on your PC. Open the LEAPS MSD drive.
For example, on Windows:
Download the LEAPS-UWBS-Firmware-v0.16.3.zip file to your PC. Use a program like WinZip or 7-Zip to extract the contents of the downloaded file.
Locate the binary file at
LEAPS-UWBS-Firmware-v0.16.3/LEAPS-UWBS-Firmware-OpenOCD/udk1-leaps-uwbs-v0.16.3.bin. Copy this file to the LEAPS MSD drive.
For example, on Windows:
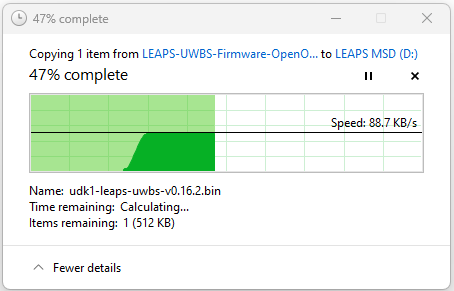
Wait for the copying and flashing process, until the copying is successful. The board will automatically reset as part of the process, the RGB LEDs will light up and the hardware will beep to indicate a successful update.
The device successfully updated the firmware. Enjoy the latest features and improvements.
Prepare for setup
At least one device.
A binary file to update.
Step-by-step instructions on how to update via WebUSB
Download and Install Node.js.
Go to the official Node.js website at https://nodejs.org/en/download.
Download the recommended version of Node.js.
Run the downloaded installer and follow the installation prompts to complete the installation.
Install Dependencies.
Open your favorite terminal application on your computer.
On linux or macOS, like Terminal application.
On Windows, like Powershell.
To install the webusb dependency, run the following command:
npm install webusbNext, install the usb dependency by running the following command:
npm install usbFinally, install the node-hid dependency using the following command:
npm install node-hid
Use a USB-C Data Cable to connect the USB-C Data Port 2 of devices to the PC.
Download and Extract the package to your PC. Use a program like WinZip or 7-Zip to extract the downloaded LEAPS-UWBS-Firmware-v0.16.3.zip file.
Open Website DAPLink Flash .
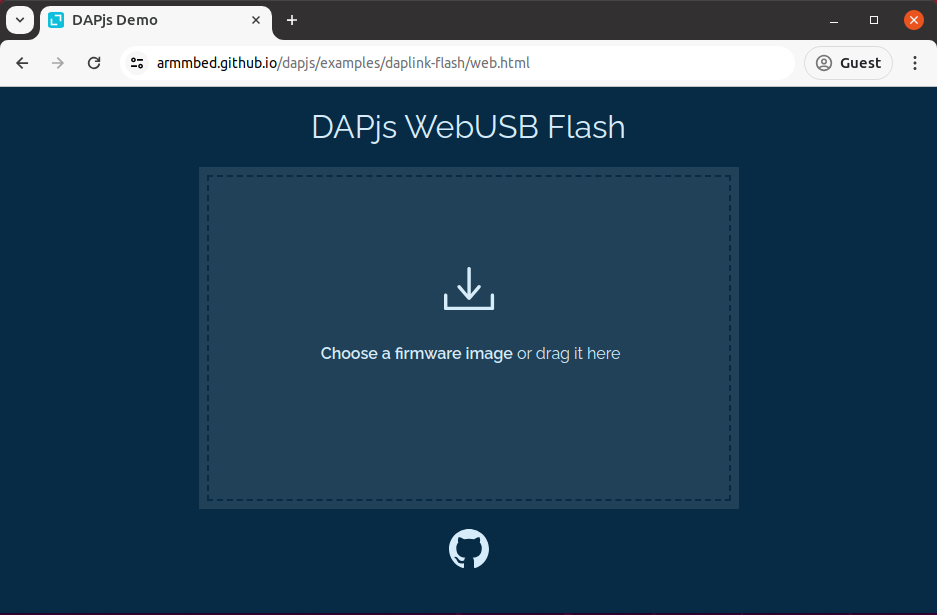
Click Choose a firmware image and go to select binary file at
LEAPS-UWBS-Firmware-v0.16.3/LEAPS-UWBS-Firmware-OpenOCD/udk1-leaps-uwbs-v0.16.3.hex.

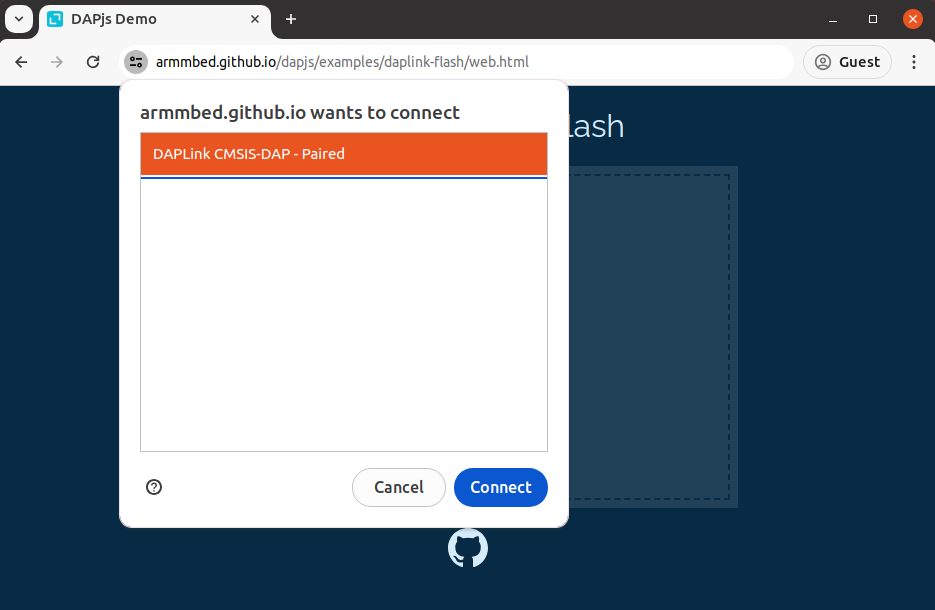
Click the SELECT DEVICE button then select the DAPLink CMSIS-DAP port that is connected to the PC .
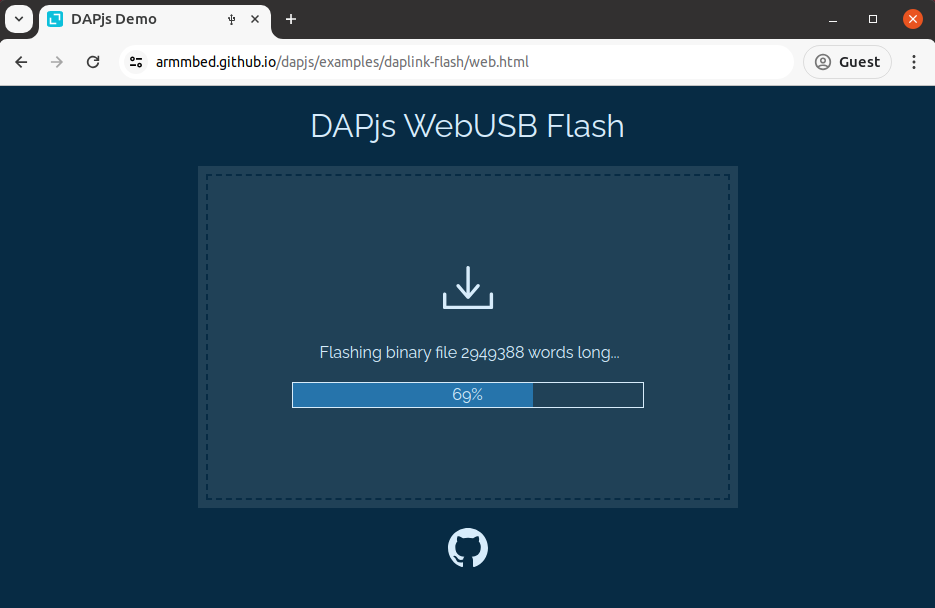
After selecting a firmware image, the binary file flashing process will begin. Make sure the hardware is connected throughout the process.
Note
Some unexpected problems may appear, please disconnect the board from the computer and start again.
After the Flash completed!. The board will automatically reset as part of the process, the RGB LEDs will light up and the hardware will beep to indicate a successful update.

The device successfully updated the firmware. Enjoy the latest features and improvements.
You will need:
At least one device connected via the USB port.
The script and the firmware binary included in the package.
The python3 installed on you system.
Step-by-step instructions on how to update via Serial-COM:
Download and Extract the package to your PC. Use a program like WinZip or 7-Zip to extract the downloaded LEAPS-UWBS-Firmware-v0.16.3.zip file.
Open your favorite terminal application.
On linux or macOS, like Terminal application.
On Windows, like Powershell.
Navigate to the folder containing the extracted package.
Install python dependencies.
$ pip install pyserial libusb tqdm
Can choose to use one of two ports for the update.
If using USB-C Data Port 1, you can update ELDR binaries and MAIN binaries independently. On the contrary, if you use USB-C Data Port 2 you can update multiple devices continuously at the same time.
Use USB-C Data Cable to connect the USB-C Data Port 1 of the device.
Run the following command to update the ELDR and the MAIN binaries.
~/LEAPS-UWBS-Firmware-Serial-COM$ sudo python3 ./udk1-leaps-uwbs-serial-com.py --main ./udk1-leaps-uwbs-fira-v0.15.0-rc8.bin --eldr ./udk1-leaps-uwbs-eldr-v0.15.0-rc8.bin
03:11:55 Device 01/02 (SerialNumber=3DB15A2CCB8053C8): Reset
03:11:55 Device 02/02 (SerialNumber=904AD29FD29D2452): Reset
15:12:15 Device 01/02 (SerialNumber=904AD29FD29D2452): Uploading MAIN: 100%|████████████████████████████| 716192/716192 [00:16<00:00, 44623.94it/s]
15:12:15 Device 02/02 (SerialNumber=3DB15A2CCB8053C8): Uploading MAIN: 100%|████████████████████████████| 716192/716192 [00:16<00:00, 44630.31it/s]
15:12:37 Device 01/02 (SerialNumber=904AD29FD29D2452): Uploading ELDR: 100%|████████████████████████████| 235748/235748 [00:05<00:00, 42419.44it/s]
15:12:37 Device 02/02 (SerialNumber=3DB15A2CCB8053C8): Uploading ELDR: 100%|████████████████████████████| 235748/235748 [00:05<00:00, 42498.01it/s]
03:12:43 Resetting devices
Use a USB-C Data Cable to connect the USB-C Data Port 2 of the device. Run the following command to update either the ELDR or the MAIN binary:
Note
Might need to install the udev rules to be able to update the firmware over the USB-C Data Port 2. Can refer to the udev rules installation for the Debian-like distributions.
~/LEAPS-UWBS-Firmware-Serial-COM$ python3 ./udk1-leaps-uwbs-serial-com.py -d /dev/ttyACM0 --eldr ./udk1-leaps-uwbs-eldr-v0.15.0-rc8.bin
02:54:30 Resetting device
02:54:33 Uploading file /home/leaps/LEAPS-UWBS-Firmware-v0.15.0/LEAPS-UWBS-Firmware-Serial-COM/udk1-leaps-uwbs-eldr-v0.15.0-rc8.bin (235748 bytes)
100%|████████████████████████████| 235748/235748 [00:28<00:00, 8129.43it/s]
02:55:07 Ok (upload time = 34.70 seconds)
02:55:10 Resetting device

~/LEAPS-UWBS-Firmware-Serial-COM$ python3 ./udk1-leaps-uwbs-serial-com.py -d /dev/ttyACM0 --main ./udk1-leaps-uwbs-fira-v0.15.0-rc8.bin
02:56:25 Resetting device
02:56:28 Uploading file /home/leaps/LEAPS-UWBS-Firmware-v0.15.0/LEAPS-UWBS-Firmware-Serial-COM/udk1-leaps-uwbs-fira-v0.15.0-rc8.bin (716192 bytes)
100%|████████████████████████████| 716192/716192 [01:27<00:00, 8175.81it/s]
02:58:11 Ok (upload time = 102.74 seconds)
02:58:14 Resetting device
Wait for the update to finish.
Once the update is complete, the board will automatically reset as part of the process.
The device successfully updated the firmware. Enjoy the latest features and improvements.
Prepare for setup
At least one device.
A package includes a script and a binary for the update.
Installed OpenOCD.
Step-by-step instructions on how to update via OpenOCD (Open On-Chip Debugger):
Installing the OpenOCD Debugger.
Installing OpenOCD on Windows.
Download the binary zip file for Windows.
Extract into the
C:\xpack-openocd-0.11.0-1folder.Add the path:
C:\xpack-openocd-0.11.0-1\binto your Windows User Path environment variable.
Installing OpenOCD on Linux or Mac OS.
Download the binary tarball for Linux .
Untar the tarball and install into local.
mkdir -p ~/.local/xPacks/openocd
cd ~/.local/xPacks/openocd
tar -zxvf ~/Downloads/xpack-openocd-0.11.0-1-linux-arm.tar.gz (with PC’s AMD core, using … linux-x64.tar.gz with PC’s Intel core)
....
sudo chmod -R -w xpack-openocd-0.11.0-1/
~/.local/xPacks/openocd/xpack-openocd-0.11.0-1/bin/openocd --version
export PATH="~/.local/xPacks/openocd/xpack-openocd-0.11.0-1/bin/:$PATH"
cd ~
source .bashrc
Check the OpenOCD version.
openocd --version
xPack OpenOCD, x86_64 Open On-Chip Debugger 0.11.0-00155-ge392e485e (2021-03-15-16:43)
Licensed under GNU GPL v2
For bug reports, read
  http://openocd.org/doc/doxygen/bugs.html
Download and Extract the package to your PC. Use a program like WinZip or 7-Zip to extract the downloaded LEAPS-UWBS-Firmware-v0.16.3.zip file.
Open your favorite terminal application.
On linux or macOS, like Terminal application.
On Windows, like Powershell.
Navigate to the folder containing the extracted package.
cd to /path/to/LEAPS-UWBS-Firmware-OpenOCD
Use a USB-C data cable to connect the USB-C Data Port 2 of devices to your PC.
Execute the script to update the firmware automatically.
On linux or macOS, Use the reflash-leaps-rtls-2ab.sh command.
On Windows, Use the reflash-leaps-rtls-2ab.bat command.
./reflash-leaps-rtls-2ab.sh
xPack OpenOCD, x86_64 Open On-Chip Debugger 0.11.0-00155-ge392e485e (2021-03-15-16:43)
Licensed under GNU GPL v2
For bug reports, read
  http://openocd.org/doc/doxygen/bugs.html
DEPRECATED! use 'adapter speed' not 'adapter_khz'
set_test_mode
Info : Using CMSIS-DAPv2 interface with VID:PID=0x0d28:0x0204, serial=01100E003602002e003f4146570120313238
Info : CMSIS-DAP: SWD Supported
Info : CMSIS-DAP: FW Version = 2.1.0
Info : CMSIS-DAP: Serial# = 01100E003602002e003f4146570120313238
Info : CMSIS-DAP: Interface Initialised (SWD)
Info : SWCLK/TCK = 1 SWDIO/TMS = 1 TDI = 0 TDO = 0 nTRST = 0 nRESET = 1
Info : CMSIS-DAP: Interface ready
Info : High speed (adapter speed 10000) may be limited by adapter firmware.
Info : clock speed 10000 kHz
Info : SWD DPIDR 0x2ba01477
Info : nrf52.cpu: hardware has 6 breakpoints, 4 watchpoints
Info : starting gdb server for nrf52.cpu on 3333
Info : Listening on port 3333 for gdb connections
target halted due to debug-request, current mode: Thread
xPSR: 0x01000000 pc: 0x000031ec msp: 0x20003488
target halted due to debug-request, current mode: Thread
xPSR: 0x01000000 pc: 0xfffffffe msp: 0xfffffffc
Info : nRF52840-CKAA(build code: D0) 1024kB Flash, 256kB RAM
auto erase enabled
wrote 1048576 bytes from file leaps-rtls-all-2ab-v0.14-rc25.hex in 38.776192s (26.408 KiB/s)
Once the update is complete, the device will beep to indicate the update’s success. The board will automatically reset itself as part of the process.
The device successfully updated the firmware. Enjoy the latest features and improvements.
Prepare for setup
At least a device.
A binary file to update. (.hex or .bin)
Installed SEGGER J-Link.
Step-by-step instructions on how to update via SEGGER J-Link
Install the SEGGER J-Link.
Locate the Windows download file named
JLink_Windows_V766_x86_64.exe.
Double-click the file to initiate the installation process.
When prompted, enter the administrative password.
Please read and agree to the license terms by accepting them.
Accept the default destination folder for the installation, typically located at
C:\Program Files (x86)\SEGGER\JLink.Proceed with accepting the default USB driver.
Upon completion of the installation, you will find a folder and a set of driver files installed in the system folders. Please note that with each new installation, these files will be overwritten.
Locate the macOS download file named
JLink_MacOSX_V766_x86_64.pkg.
Double-click the file to initiate the installation process.
Please read and agree to the license terms by accepting them.
Enter the administrative password when prompted. This password is required to write in the Applications folder.
After the installation, you will find a folder in the following location:
/Applications/SEGGER/JLink_V766/. Please remember that each version will have a different folder. This folder will store all the executables and libraries associated with the application.Visit the SEGGER download site for GNU/Linux and locate the desired package. Choose between 32/64-bit versions.
Preferably, download the .tgz file and save it to your computer.
Open a terminal window.
For example, on Ubuntu (Linux), to install the 64-bit .tgz file, use the following commands:
mkdir -p ~/opt/SEGGER
cd ~/opt/SEGGER
tar xf ~/Downloads/JLink_Linux_V766_x86_64.tgz
chmod a-w ~/opt/SEGGER/JLink_Linux_V766_x86_64
ls -l ~/opt/SEGGER/JLink_Linux_V766_x86_64
After executing the above commands:
A folder will be created at ~/opt/SEGGER.
The contents of the downloaded .tgz file will be extracted to the ~/opt/SEGGER folder.
The permissions of the JLink_Linux_V766_x86_64 file will be modified.
Can verify the installation by checking the contents of the ~/opt/SEGGER/JLink_Linux_V766_x86_64 folder.
Please note that the installation will overwrite any existing files in the system folders during each new install.
Open the SEGGER J-Link, then flash the binary file.
Make sure that the latest J-Link software & documentation pack is installed.
Connect J-Link to the PC
Connect target system to J-Link
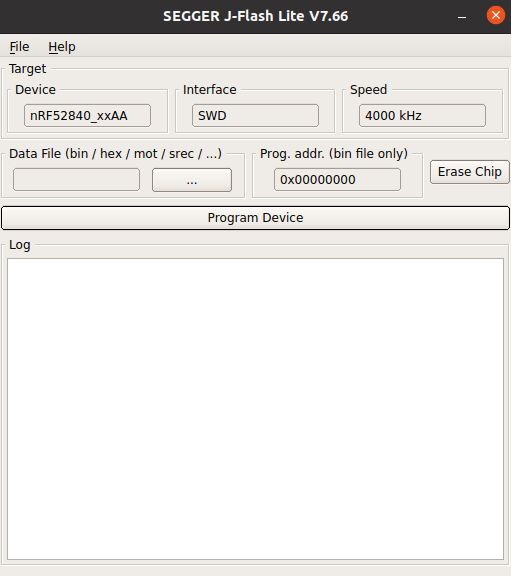
Start J-Flash Lite
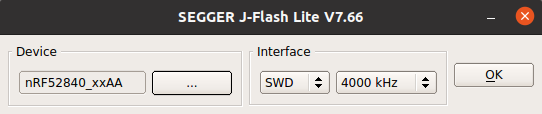
Select device, debug interface and communication speed
Choose a file and click Program Device or click Erase Chip
J-Flash Lite performs the requested operation
Make sure that the latest J-Link software & documentation pack is installed.
Connect J-Link to the PC.
Connect target system to J-Link
Start J-Link Commander.
Type the following commands:
J-Link> device <devicename> // For a list of known devices, please refer to here
J-Link> r
J-Link> h
J-Link> loadbin <PathToBinFile>, <programmingaddress>
J-Link Commander executes the flash download and prints out the time statistics upon success.
Once the update is complete, the board will automatically reset itself as part of the process.
Verify the firmware and confirm success
Open your favorite terminal application,
On GNU/Linux or macOS like Terminal application.
On Windows, like Powershell application.
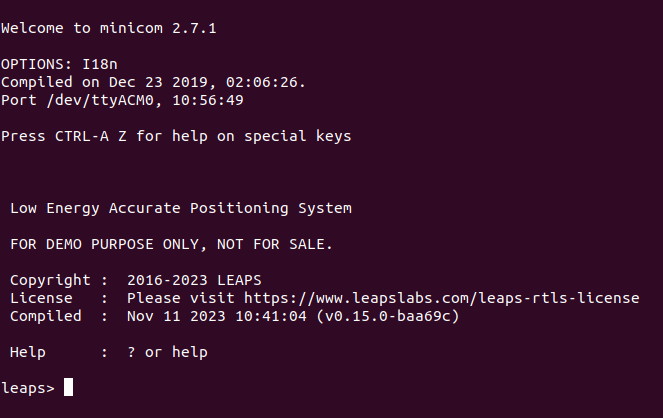
For example, on Ubuntu (Linux), open minicom and press double enter:
minicom -b 115200 -D /dev/ttyACM0