インフラレス近接デモ
セットアップの準備
LEAPS Manager アプリケーションがインストールされました。
少なくとも 2 つの LC14 または LC13 デバイス。
デバイスに電力を供給するためのバッテリーまたは USB-C ケーブル。
オプション: Putty、Teraterm、minicom、またはコンピュータにインストールされているお気に入りのターミナル アプリケーション。
For users, the recommended starting point is either the latest release.
セットアップ時間: 2 分未満
概要
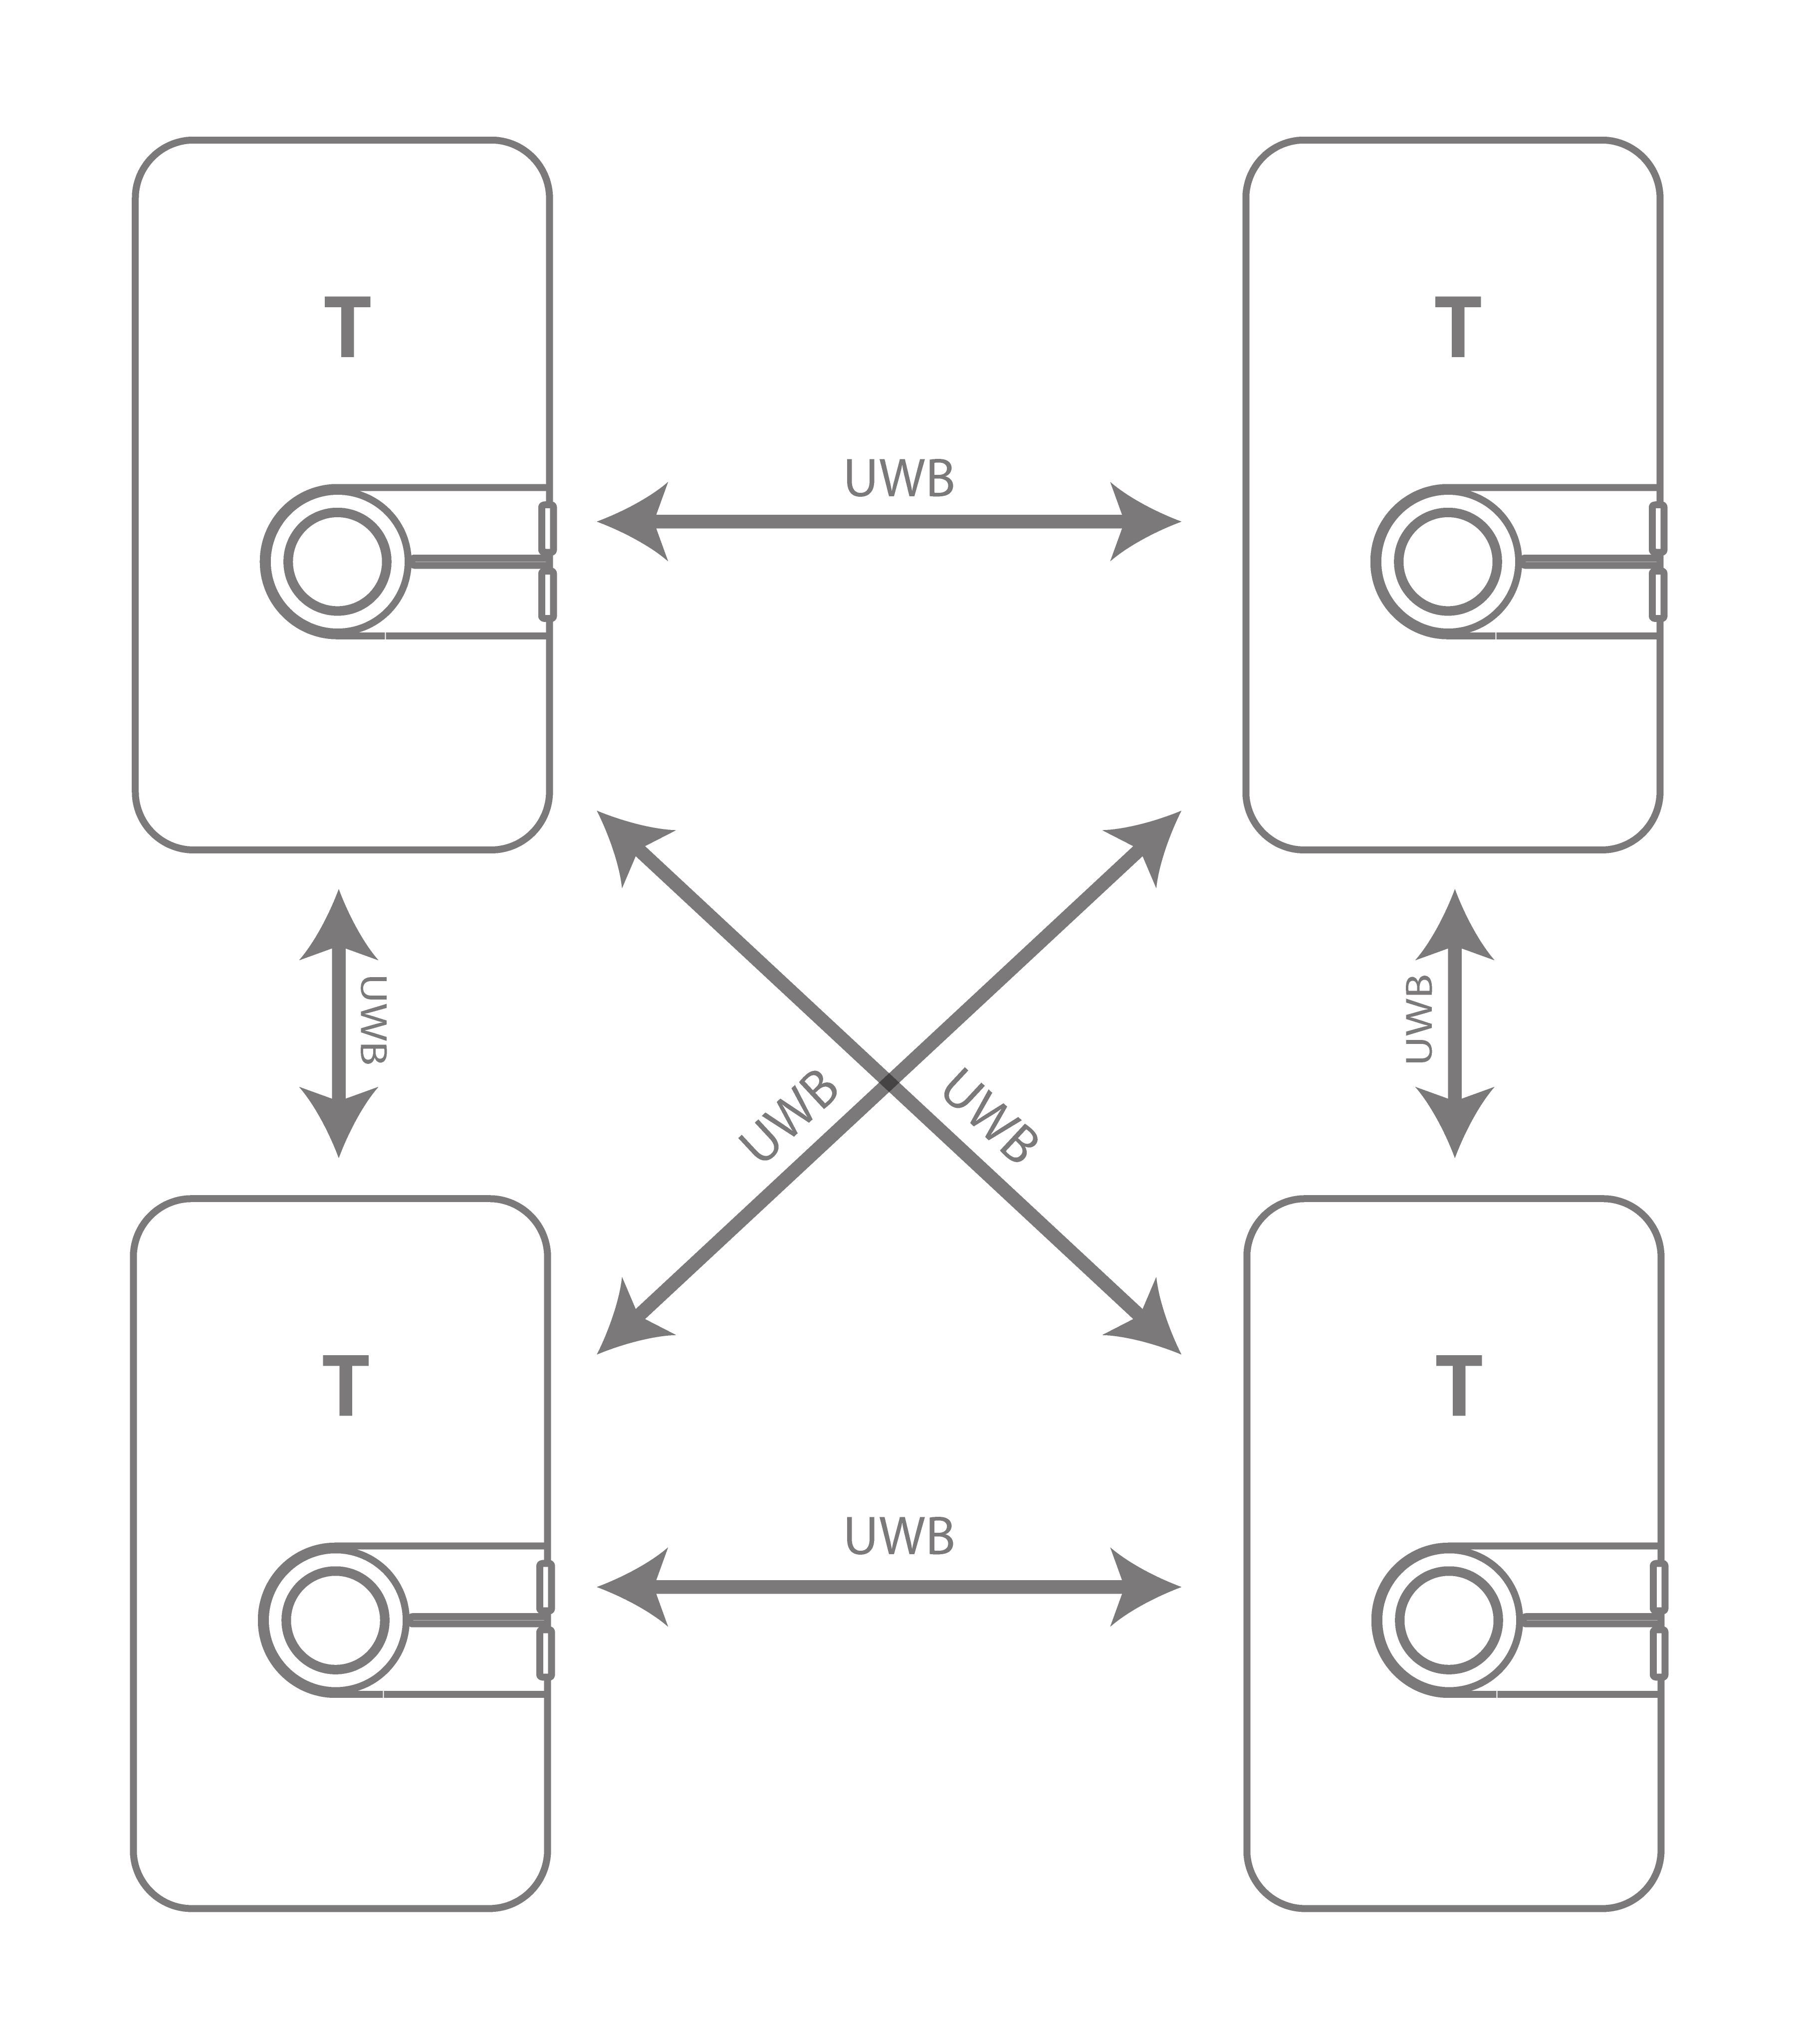
このデモは、Two Way Ranging (TWR) 測定技術に基づいた、インフラストラクチャを使用しないノード間の近接検出を示します。ノードが近接している場合、すべてのノードによってアラームがトリガーされます。アラームは LED、ハプティック モーター、またはブザーを使用し、しきい値は設定可能です。
典型的なアプリケーション: 衝突回避、社会的距離、群の調整。
セットアップ手順
デバイスの電源を ON にします。
デバイスは、Bluetooth を使用して周囲のデバイスを検出し、UWB を使用して検出されたデバイスまでの距離を測定する独立したタグとして機能します。
LEAPS Manager のデモ セレクターを使用して設定します。
2.1。 LEAPS Manager を開き、メイン ページから Demo Selector を選択します。
2.2。 インフラストラクチャのない近接性 を選択します。
2.3。 Bluetooth 経由で検出されたデバイスのリストがリストに表示されます。必要に応じて、下にスワイプしてリストを更新します。
2.4。デモに使用するデバイスを選択します。上側の``ノード``は、デモに必要なデバイスの数を示します。
2.5。 SAVE を押して、デバイスを LEAPS RTLS モード、タグメッシュ ネットワーク プロファイルに設定します。
2.6。デバイスが起動すると、赤い LED が点滅することを目視で確認してください。
デバイスは インフラレス近接デモ 用に構成されています。
By default, when the devices come within
2.5 metersof each other, an alarm will activate (indicated by a RED LED and buzzer). The intensity of the alarm will increase as the devices get closer.最初に、デバイスは低強度のビープ音を発し、赤色 LED が点滅します。上(ボタン B)下(ボタン A)ボタンでビープ音の音量を調整でき、バイブレーションも有効になります。
In the demonstration outlined below, the device has two proximity thresholds: the first threshold is set at
0.2 meters, and the second at0.5 meters.
アプリケーションを使用してノードとネットワークを構成および視覚化する方法の詳細については、LEAPS Manager を参照してください。
高度なセットアップ
高度なセットアップの準備をしてください。ターミナルの能力を活用して、プロのようにデバイスを設定できるようにお手伝いします。以下の手順に従うだけで準備は完了です。
USB-C データ ケーブルを使用して、デバイスの USB-C データ ポート 1 または USB-C データ ポート 2 を PC に接続します。
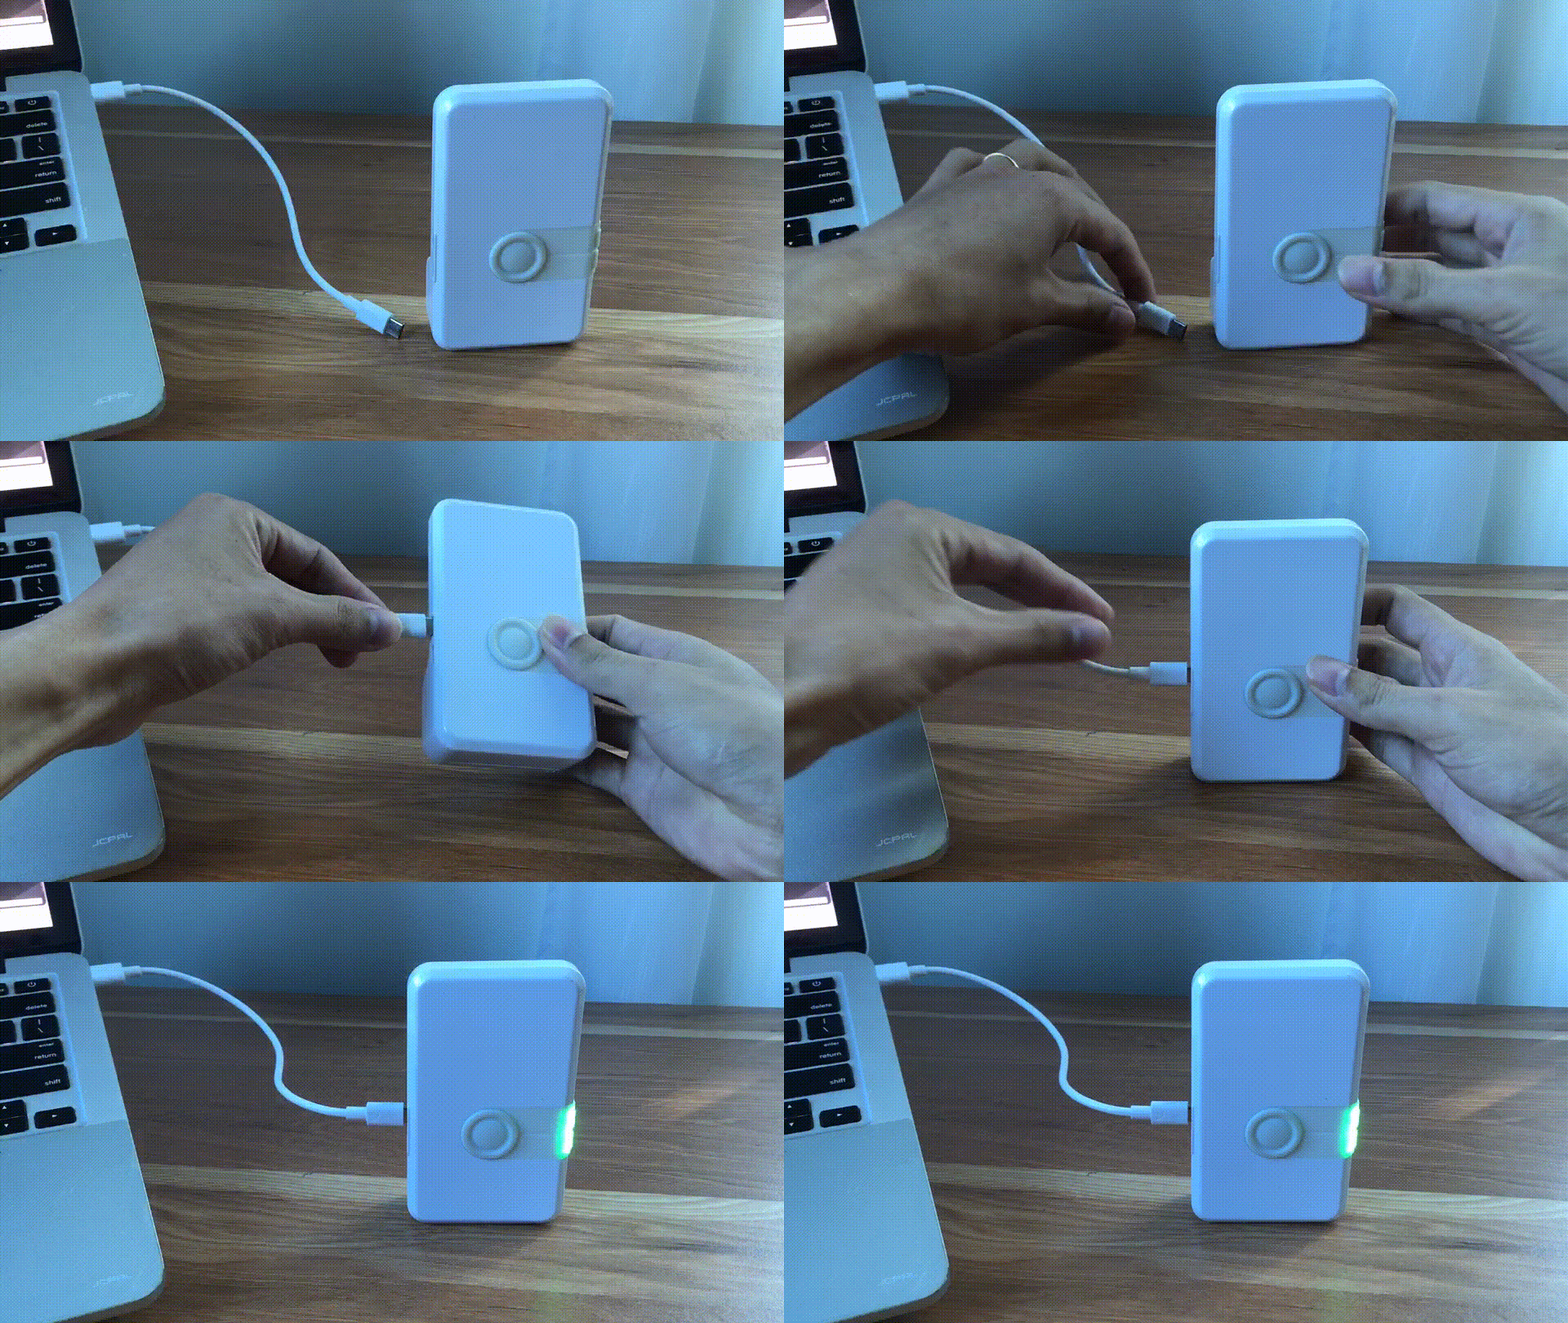
Putty、Teraterm、Minicom などの任意のターミナル アプリケーション、またはお気に入りのターミナル アプリケーションを使用してシリアル ポートに接続します。ボーレートを 115200 に設定する必要があります。
たとえば、Ubuntu (Linux) で Minicom を使用します。
minicom -b 115200 -D /dev/ttyACM0
シェル コンソールで ダブル Enter を押して、コマンド ライン制御システムにアクセスします。
たとえば、Ubuntu (Linux) では、/dev/ttyACM0 を開き、double Enter を押します。
leaps@leaps:~$ minicom -b 115200 -D /dev/ttyACM0

  Low Energy Accurate Positioning System

  Copyright :  2016-2025 LEAPS
  License   :  Please visit https://www.leapslabs.com/leaps-rtls-license
  Compiled  :  Oct 15 2026 09:42:20 (v1.2.1-4f9295)

  Help      :  ? or help

  FOR DEMO PURPOSE ONLY, NOT FOR SALE.
  DEVICE RUNTIME IS LIMITED TO 48 HOURS. RESET THE DEVICE TO RECOVER IT.

  leaps>
次の手順に従って各デバイスを構成します。
Optional: Reset devices to default, run the
frstcommand.$ leaps> frst frst okMonitor and wait for the device to reset successfully. Then press double enter to access the command line control system.
Use the
niscommand to configure all devices in a network.$ leaps> nis 0x1234 nis: ok
Use the
nps 4command to configure profile 4 (support Tag Mesh Proximity) for each device.$ leaps> nps 4 nps: ok
Use the
nmtcommand to update tag mode.$ leaps> nmtThen monitor and wait for the device to configure successfully. Then press double enter to access the command line control system.
Use the
si(System Information) command to verify configurations such as mode, profile and network.leaps> si [000007.700 INF] release: LEAPS RTLS v1.2.1-4f9295 (fira) [000007.701 INF] sys: main main_ver=x02070101 cfg_ver=x01040000 batt=full:4005mV:NoCharger board=LC14_B prod=LC14_B pwr_cnt=0 rst_cnt=2 [000007.701 INF] uwb: ch9 prf64 plen128 pac8 txcode11 rxcode11 baud6800 phrmodeext phrratestd sfdtypeieee4a sfdto129 stsmodeoff stslen64 pdoamodem0 [000007.701 INF] uwb: tx_pwr=x34/xC6C6C6C6 sts:shr:phr:data=22.6:22.6:22.6:22.6[dB] cpl=FCC/ETSI pgcnt=232 temp=25 [000007.702 INF] uwb: lna=1 pa=0 rf1=1 rf2=0 xtaltrim=32 tx_delay=16425 rx_delay=16425 [000007.706 INF] uwb: panid=x1234 panid_mask=xFFFF zone=255 addr=xDECA2DA03CD01219 [000007.715 INF] mode: tn (act,twr,np,le) [000007.749 INF] uwbmac: connected prof=4 (manual) [000007.749 INF] uwbmac: bh disconnected [000007.749 INF] cfg: sync=0 fwup=1 ble=1 leds=1 le=1 lp=0 uab=1 stat_det=1 (sens=2) mode=0 upd_rate_norm=1 upd_rate_stat=50 label=ID1219 [000007.749 INF] enc: off [000007.750 INF] ble: addr=CF:8F:04:42:CF:84 leaps>
mode: tn
panid=x1234
prof=4
デバイスの起動時に 赤い LED が点滅することを目視で確認してください。
デバイスを構成した後、BLE 経由ですべてのデバイスをスキャンします。デバイスが許容距離内にある場合、自動的に UWB が再アクティブ化され、互いの距離が測定されます。
Use the
lncommand to show all devices. This can be used with all UDK devices.
注釈
この例では、2 つのタグ を構成します。
$ leaps> ln
[000087.176 INF] TN: cnt=2 size=100
[000087.176 INF]   0) id=1424 dist=2.64,x5F
[000087.177 INF]   1) id=1219 dist=0.00,x18
[000087.177 INF
$ leaps> ln
[000229.981 INF] TN: cnt=2 size=100
[000229.981 INF]   0) id=1424 dist=0.00,x00
[000229.982 INF]   1) id=1219 dist=2.67,x9D
[000229.982 INF]
インフラレス近接デモ 内。
By default, when the devices come within
2.5 metersof each other, an alarm will activate (indicated by a RED LED and buzzer). The intensity of the alarm will increase as the devices get closer.最初に、デバイスは低強度のビープ音を発し、赤色 LED が点滅します。上(ボタン B)下(ボタン A)ボタンでビープ音の音量を調整でき、バイブレーションも有効になります。
Users can view and configure this distance through 2 commands:
dacgcommand and,dacscommand.For example, to view and configure 2 thresholds
0.2 metersand,0.5 meters.Run the following command:
表示するには:
$ leaps> dacg
dacg: thold_1=200 thold_2=500 mincon=2 minnocon=2 opt=7
設定するには:
$ leaps> dacs 200 500 2 2 7
dacs: ok
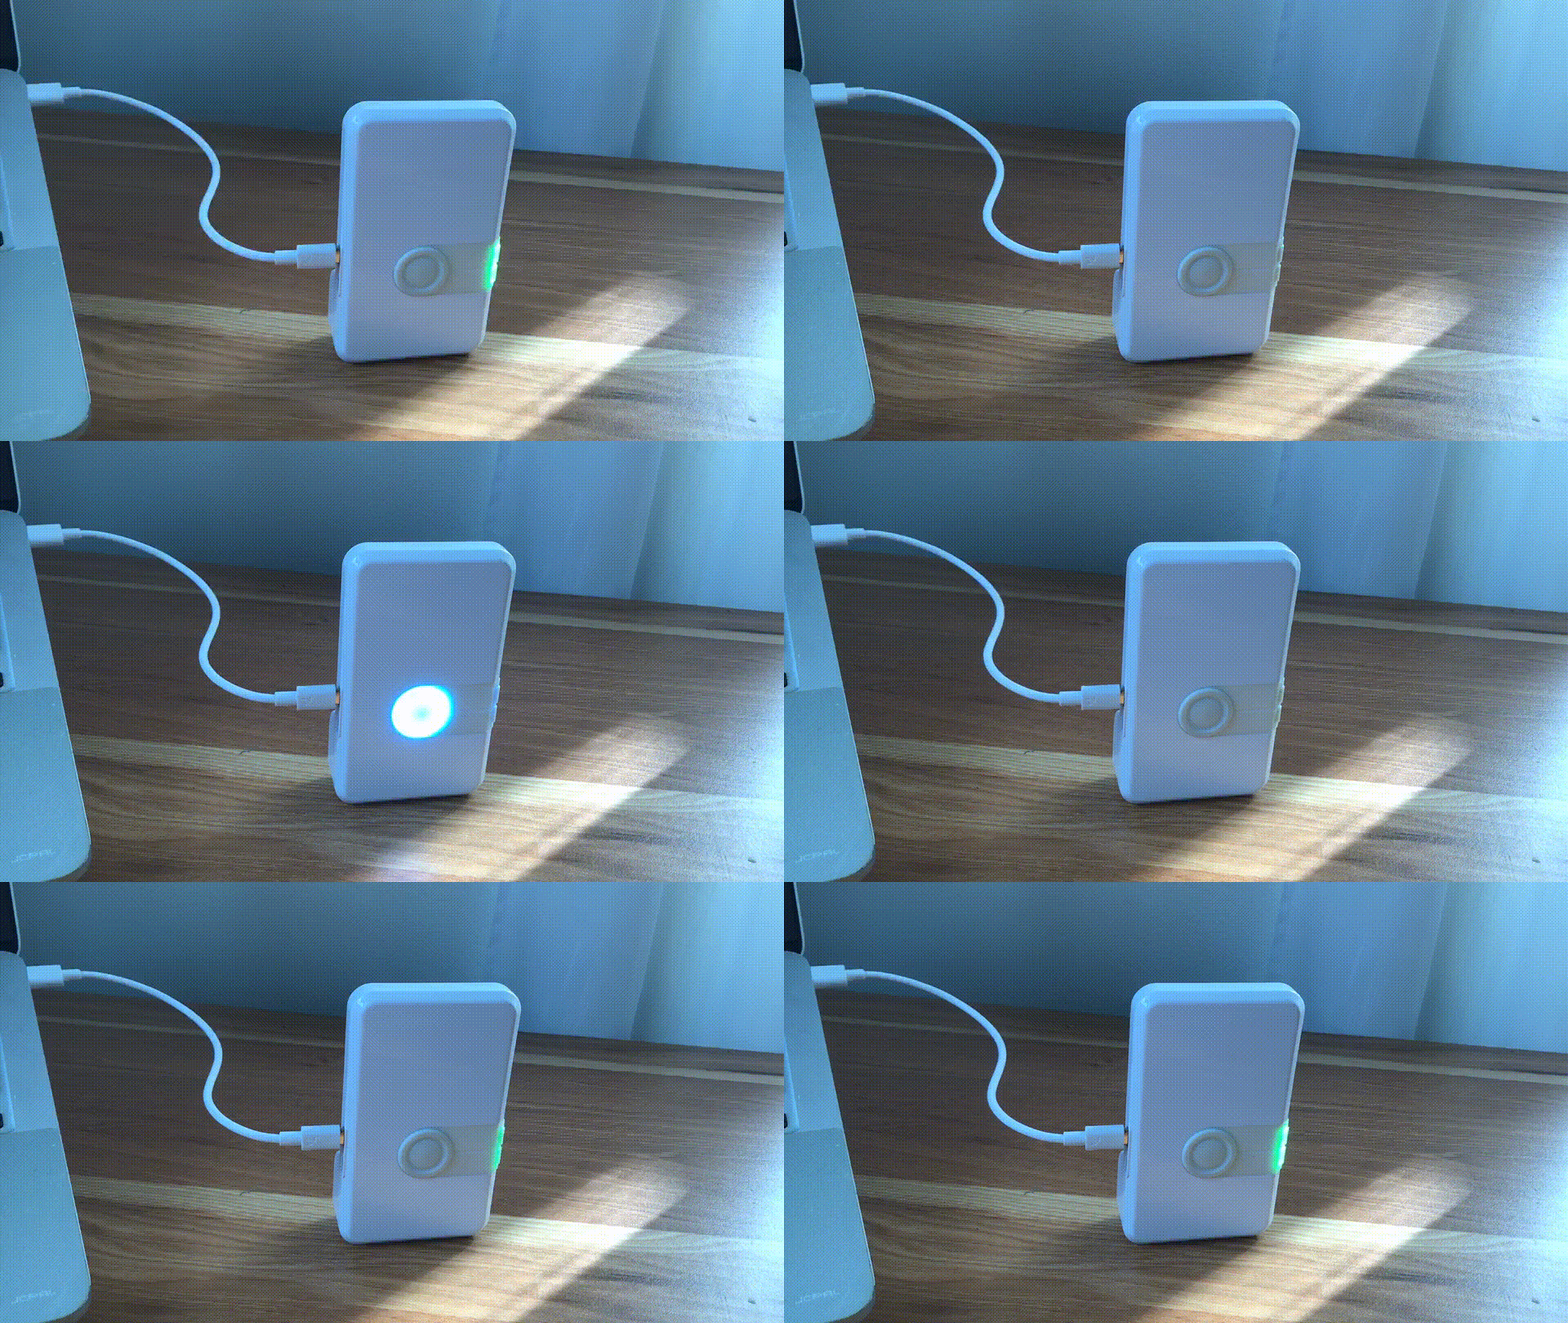
In the GIF Image below, the device is configured with thresholds 1 is 0.2 meters and, thresholds 2 is 0.5 meters.
After the configuration, you can open the shell console for the Tag and view the Tag position using the
lescommand.
For example:
$ leaps> les
  leaps>
  POS[NaN,NaN,Nan,0] 1219[0.00,0.00,0.00,100]=0.54
  POS[NaN,NaN,Nan,0] 1219[0.00,0.00,0.00,100]=0.57
  POS[NaN,NaN,Nan,0] 1219[0.00,0.00,0.00,100]=0.58
  POS[NaN,NaN,Nan,0] 1219[0.00,0.00,0.00,100]=0.59
  POS[NaN,NaN,Nan,0] 1219[0.00,0.00,0.00,100]=0.51
  POS[NaN,NaN,Nan,0] 1219[0.00,0.00,0.00,100]=0.47
  POS[NaN,NaN,Nan,0] 1219[0.00,0.00,0.00,100]=0.43
  POS[NaN,NaN,Nan,0] 1219[0.00,0.00,0.00,100]=0.40
  POS[NaN,NaN,Nan,0] 1219[0.00,0.00,0.00,100]=0.35
  POS[NaN,NaN,Nan,0] 1219[0.00,0.00,0.00,100]=0.32
  POS[NaN,NaN,Nan,0] 1219[0.00,0.00,0.00,100]=0.31
  POS[NaN,NaN,Nan,0] 1219[0.00,0.00,0.00,100]=0.29
  POS[NaN,NaN,Nan,0] 1219[0.00,0.00,0.00,100]=0.27
  POS[NaN,NaN,Nan,0] 1219[0.00,0.00,0.00,100]=0.22
  POS[NaN,NaN,Nan,0] 1219[0.00,0.00,0.00,100]=0.19
  POS[NaN,NaN,Nan,0] 1219[0.00,0.00,0.00,100]=0.16
  POS[NaN,NaN,Nan,0] 1219[0.00,0.00,0.00,100]=0.14
  POS[NaN,NaN,Nan,0] 1219[0.00,0.00,0.00,100]=0.12
  POS[NaN,NaN,Nan,0] 1219[0.00,0.00,0.00,100]=0.09
  POS[NaN,NaN,Nan,0] 1219[0.00,0.00,0.00,100]=0.08
  POS[NaN,NaN,Nan,0] 1219[0.00,0.00,0.00,100]=0.05
  POS[NaN,NaN,Nan,0] 1219[0.00,0.00,0.00,100]=0.09
  POS[NaN,NaN,Nan,0] 1219[0.00,0.00,0.00,100]=0.11
  POS[NaN,NaN,Nan,0] 1219[0.00,0.00,0.00,100]=0.13
  POS[NaN,NaN,Nan,0] 1219[0.00,0.00,0.00,100]=0.15
  POS[NaN,NaN,Nan,0] 1219[0.00,0.00,0.00,100]=0.17
  POS[NaN,NaN,Nan,0] 1219[0.00,0.00,0.00,100]=0.19
  POS[NaN,NaN,Nan,0] 1219[0.00,0.00,0.00,100]=0.21
  POS[NaN,NaN,Nan,0] 1219[0.00,0.00,0.00,100]=0.23
  POS[NaN,NaN,Nan,0] 1219[0.00,0.00,0.00,100]=0.42
  POS[NaN,NaN,Nan,0] 1219[0.00,0.00,0.00,100]=0.51
  POS[NaN,NaN,Nan,0] 1219[0.00,0.00,0.00,100]=0.56
  POS[NaN,NaN,Nan,0] 1219[0.00,0.00,0.00,100]=0.60
  POS[NaN,NaN,Nan,0] 1219[0.00,0.00,0.00,100]=0.62
  POS[NaN,NaN,Nan,0] 1219[0.00,0.00,0.00,100]=0.64
  POS[NaN,NaN,Nan,0] 1219[0.00,0.00,0.00,100]=0.67
  POS[NaN,NaN,Nan,0] 1219[0.00,0.00,0.00,100]=0.69
  POS[NaN,NaN,Nan,0] 1219[0.00,0.00,0.00,100]=0.71
  POS[NaN,NaN,Nan,0] 1219[0.00,0.00,0.00,100]=0.73
これで、システムは正常にセットアップされ、構成されました。楽しく使ってください!
Here are some tips for fixing some issues related to the installation process:
Please check the version. We recommend using the latest official version found under リリース.
When Bluetooth and the LEDs are both disabled, users may erroneously perceive the board as non-functional. In this scenario, the quickest solution is to perform a factory reset (frst) command via the shell.
デバイスの現在の状態がわからない場合は、LEAPS Manager のデモ セレクターの デバイスをデフォルトにリセット 機能を使用します。次のGIF画像を参照してください。
注意
Related to Profile 4 (support Tag Mesh Proximity)
When a device is in anchor mode, or when a node acts as an initiator, users cannot switch to profile 4 (support Tag Mesh Proximity).
The configurable Update Rate is limited to a range of 0.1 seconds (10 Hz) to 1.0 second (1 Hz).
注釈
距離のしきい値は API 経由で構成できます。
弊社製品に関するご意見やご質問については、LEAPS フォーラム にアクセスすることをお勧めします。
既知の制限と問題リストの詳細については、セクション リリース を参照してください。